
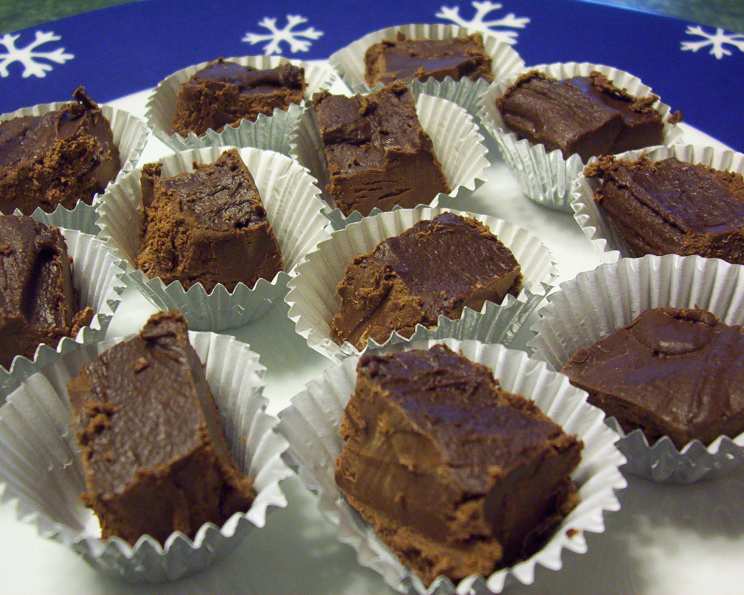
Too-Easy Two-Ingredient Fudge: A Decadent Delight in Minutes
The memory is as vivid as the fudge itself: a flurry of last-minute holiday baking, the scent of chocolate thick in the air, and my aunt bustling about, a mischievous glint in her eye. “This is my secret weapon,” she whispered, gesturing towards a mixing bowl, “foolproof fudge.” I was skeptical, a budding young chef convinced that all good things required hours of labor. But one bite of that impossibly smooth, rich fudge, and I was a convert. This is that recipe, or at least, my take on it – a testament to the fact that sometimes, the simplest things are truly the best.
Recipe Overview
- Prep Time: 5 minutes
- Cook Time: 1 minute
- Cool Time: 30-60 minutes
- Total Time: 35-65 minutes
- Yields: Approximately 90 small pieces
- Dietary Type: Vegetarian (depending on chocolate chips used, may be gluten-free)
Ingredients
- 1 (450 g) container prepared creamy chocolate frosting
- 1 (300 g) package pure milk chocolate chips
Equipment Needed
- Glass measuring cup
- Microwave oven
- 8×8 inch square pan
- Parchment paper (optional, for lining the pan)
- Icing bag with a large star tip (optional, for piping)
Instructions
-
Combine the entire container of creamy chocolate frosting and the entire package of milk chocolate chips in a large glass measuring cup. Using a glass container is preferable, as it distributes heat more evenly than plastic.
-
Microwave on HIGH for 40-60 seconds, stopping to stir at 20-second intervals. The chocolate chips may not appear to be completely melted at first, and that’s perfectly fine. The residual heat will continue to melt them.
-
Continue stirring until the chips are completely melted and the mixture is perfectly smooth and glossy. Be patient! It’s important to stir thoroughly to avoid any grainy texture in the final fudge.
-
Method 1: (Traditional Fudge) Line an 8×8 inch square pan with parchment paper. This makes removing the fudge a breeze! Pour the chocolate mixture into the prepared pan, spreading it evenly with a spatula.
-
(Optional) While the fudge is still wet, sprinkle the top with your favorite toppings, such as chopped nuts, mini marshmallows, or extra chocolate chips. Gently press the toppings into the fudge so they adhere well.
-
Cool in the refrigerator for 30-60 minutes, or until the fudge is firm. The chilling time can vary depending on your refrigerator. Check for firmness by gently pressing the surface of the fudge.
-
Once firm, lift the parchment paper out of the pan and place the fudge on a cutting board. Cut into small squares using a sharp knife. Wipe the knife clean between cuts for neat, even pieces.
-
Method 2: (Piped Rosettes) Allow the melted chocolate mixture to cool slightly, until it reaches approximately 80 degrees Fahrenheit (27 degrees Celsius). This will thicken the mixture enough for piping, but keep it pliable.
-
Transfer the cooled chocolate mixture to an icing bag fitted with a large star tip.
-
Pipe small rosettes onto a cooled surface, such as a cutting board or a baking sheet lined with parchment paper. Aim for a consistent size and shape for a professional look.
-
Cool the piped rosettes for 5-10 minutes to allow them to set slightly before continuing with the remaining batter. This will prevent them from losing their shape.
-
Continue piping the remaining chocolate mixture into rosettes. Serve immediately or chill for a firmer texture.
Expert Tips & Tricks
- Quality Counts: Use high-quality chocolate chips for the best flavor. Dark chocolate chips will create a richer, less sweet fudge, while semi-sweet chips offer a good balance.
- Microwave Mastery: Keep a close eye on the chocolate in the microwave. Overheating can cause the chocolate to seize and become grainy. Stop and stir frequently.
- Smooth Operator: If your mixture seems a little thick, add a teaspoon of milk or cream at a time until you reach the desired consistency.
- Flavor Boost: For a hint of warmth, add a pinch of cinnamon or a dash of vanilla extract to the mixture before microwaving.
- Nutty Delight: Toast your nuts before adding them to the fudge for a deeper, richer flavor.
- Salt Bae: A sprinkle of sea salt on top of the finished fudge enhances the sweetness and adds a sophisticated touch.
- Double Batch? If you need a larger quantity, simply double the ingredients and use a larger pan.
Serving & Storage Suggestions
This decadent fudge is best served chilled or at room temperature. Arrange the squares artfully on a platter for a festive presentation. The piped rosettes are perfect for individual servings.
Storage: Store the fudge in an airtight container in the refrigerator for up to 2 weeks. For longer storage, freeze the fudge for up to 2 months. Thaw in the refrigerator before serving. At room temperature, the fudge will soften and become slightly sticky.
Nutritional Information
(Estimated values based on standard ingredients and approximately 90 servings)
| Nutrient | Amount per Serving | % Daily Value |
|---|---|---|
| Calories | 50 kcal | 3% |
| Total Fat | 2.5 g | 4% |
| Saturated Fat | 1.5 g | 8% |
| Cholesterol | 1 mg | 0% |
| Sodium | 15 mg | 1% |
| Total Carbohydrate | 7 g | 2% |
| Dietary Fiber | 0 g | 0% |
| Sugars | 6 g | – |
| Protein | 0 g | 0% |
Note: Nutritional information is an estimate and may vary based on specific ingredients used.
Variations & Substitutions
- Peanut Butter Bliss: Use peanut butter chips instead of milk chocolate chips for a creamy, nutty twist. Swirl a spoonful of peanut butter into the melted fudge before pouring it into the pan.
- Mint Chocolate Magic: Add a few drops of peppermint extract to the mixture and use dark chocolate chips for a refreshing mint chocolate fudge.
- White Chocolate Wonder: Use vanilla frosting and white chocolate chips for a sweet and elegant fudge. Add sprinkles for a festive touch.
- Espresso Explosion: Stir a teaspoon of instant espresso powder into the mixture for a coffee-flavored fudge that’s perfect for coffee lovers.
- Spiced Delight: Add a pinch of ground cinnamon, nutmeg, and cloves for a warm and comforting spiced fudge.
- Vegan Fudge: While traditional frosting isn’t vegan, some brands offer vegan alternatives. Pair with dairy-free chocolate chips for a plant-based treat!
FAQs (Frequently Asked Questions)
Q: Can I use a different size pan?
A: Yes, but the thickness of the fudge will vary. A smaller pan will result in thicker fudge, while a larger pan will create thinner fudge.
Q: My fudge is too soft. What did I do wrong?
A: It may not have chilled long enough. Place it back in the refrigerator for another 30 minutes. Also ensure your freezer temperature is adequately low.
Q: Can I use a different type of frosting?
A: Yes, you can experiment with different frosting flavors, but be aware that the flavor and texture of the fudge will be affected.
Q: Can I freeze this fudge?
A: Yes, it freezes well. Wrap it tightly in plastic wrap and then place it in an airtight container. Thaw in the refrigerator before serving.
Q: What if my chocolate seizes in the microwave?
A: Unfortunately, seized chocolate is difficult to recover. Start with a fresh batch and be sure to stir the mixture frequently and microwave in short intervals to prevent overheating.
Final Thoughts
This ridiculously easy two-ingredient fudge is a testament to the idea that delicious doesn’t have to be difficult. It’s the perfect treat to whip up when you’re short on time but craving something sweet and satisfying. Don’t be afraid to experiment with different flavors and toppings to create your own signature fudge. Share your creations with friends and family, and watch their faces light up with delight. After all, the best things in life are often the simplest. I encourage you to try this recipe, share your modifications, and maybe even create a new family tradition!