
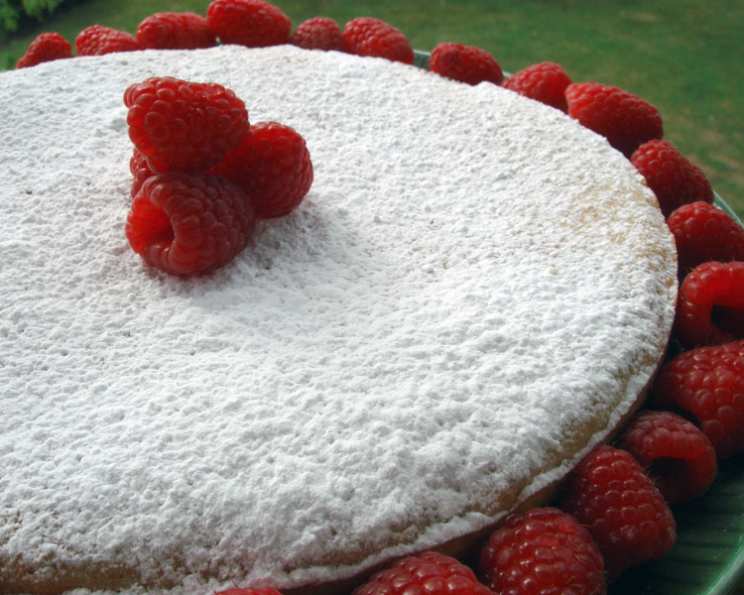
Toronto Pie: A Culinary Rediscovery
The aroma of raspberry jam always transports me back to my grandmother’s kitchen. She wasn’t much of a baker, but her raspberry jam was legendary – tart, sweet, and intensely fruity. We’d spread it on everything, from toast to scones, and sometimes, when no one was looking, straight from the jar with a spoon. Finding this recipe for Toronto Pie, a cake featuring that very same jam, felt like a culinary time warp, connecting me to a forgotten piece of baking history and rekindling those cherished memories.
Recipe Overview
- Prep Time: 20 minutes
- Cook Time: 35 minutes
- Total Time: 55 minutes
- Servings: 6-8
- Yield: 1 cake
- Dietary Type: Vegetarian
Ingredients
- 1/2 cup milk, scalded (heated until bubbles appear around the edges)
- 2 tablespoons butter
- 1 cup cake flour or 1 cup pastry flour
- 1 1/4 teaspoons baking powder
- 1/4 teaspoon salt
- 2 eggs
- 2/3 cup granulated sugar
- 1/4 teaspoon vanilla
- Raspberry jam
- Icing sugar for dusting
Equipment Needed
- 9-inch round layer cake pan
- Wax paper
- Mixing bowls
- Electric mixer
- Sifter or whisk
- Rubber spatula
- Cooling rack
Instructions
- Begin by preheating your oven to 350 degrees Fahrenheit (175 degrees Celsius).
- Thoroughly grease a 9-inch round layer cake pan. Then, line the bottom with a circle of wax paper. This ensures easy removal of the cake after baking.
- In a small saucepan or microwave-safe bowl, scald the milk. Scalding means heating the milk until small bubbles begin to form around the edges, but not boiling it.
- Add the butter to the hot milk and stir until the butter is completely melted. Set this mixture aside to cool slightly.
- In a medium bowl, sift together the cake flour (or pastry flour), baking powder, and salt. Sifting ensures that these dry ingredients are evenly distributed and that there are no lumps. If you don’t have a sifter, you can whisk the ingredients together vigorously.
- In a large mixing bowl, beat the eggs until they are very light and fluffy. This will incorporate air into the batter, resulting in a lighter cake.
- Gradually beat in the granulated sugar and vanilla extract into the eggs.
- With the mixer at high speed, beat the eggs and sugar mixture for a full minute. This step is crucial for creating a light and airy sponge cake.
- Fold in the dry ingredients into the egg mixture. Be careful not to overmix; fold gently until just combined. Overmixing can develop the gluten in the flour, resulting in a tough cake.
- Stir in the hot milk mixture into the batter. The batter will be quite liquid.
- Pour the batter into the prepared cake pan.
- Bake in the preheated 350 degree Fahrenheit oven for 30 to 35 minutes, or until the cake springs back when lightly touched. A toothpick inserted into the center should come out clean, or with just a few moist crumbs clinging to it.
- Cool the cake in the pan for about 10 minutes.
- When almost cool, loosen the edges of the cake from the pan using a thin knife or spatula.
- Invert the cake onto a cooling rack, remove the wax paper, and allow it to cool completely.
- Once the cake is completely cool, carefully split it into two layers using a long serrated knife.
- Spread a generous layer of raspberry jam on top of one layer.
- Sandwich the two layers together, jam-side up.
- Sprinkle the top of the cake generously with icing sugar before serving.
Expert Tips & Tricks
- For an extra moist cake, try brushing the cut sides of the layers with a simple syrup before adding the jam. You can flavor the simple syrup with a little lemon zest or a splash of raspberry liqueur.
- To prevent the cake from sticking, ensure your cake pan is very well greased and floured, even with the wax paper lining.
- If you don’t have cake flour or pastry flour, you can make a substitute by measuring out 1 cup of all-purpose flour, removing 2 tablespoons, and replacing them with 2 tablespoons of cornstarch. This will lower the protein content of the flour, resulting in a more tender cake.
- Don’t overbake the cake! A slightly underbaked cake is better than a dry, overbaked one.
- For a richer flavor, use browned butter in the cake batter. Simply melt the butter in a saucepan over medium heat, continuing to cook until the milk solids turn golden brown and the butter smells nutty. Let it cool slightly before adding it to the milk.
Serving & Storage Suggestions
Serve Toronto Pie slightly warm or at room temperature. It’s delicious on its own, but also pairs well with a scoop of vanilla ice cream or a dollop of whipped cream.
To store, keep the cake in an airtight container at room temperature for up to 2 days, or in the refrigerator for up to 4 days. The cake may become slightly drier in the refrigerator. You can also freeze the cake for up to 2 months. Thaw it overnight in the refrigerator before serving.
Nutritional Information
| Nutrient | Amount per Serving | % Daily Value |
|---|---|---|
| Calories | 241 kcal | – |
| Fat | 6.4 g | 9% |
| Saturated Fat | 3.4 g | 17% |
| Cholesterol | 83.5 mg | 27% |
| Sodium | 233.6 mg | 9% |
| Carbohydrate | 41.4 g | 13% |
| Fiber | 0.4 g | 1% |
| Sugars | 22.4 g | – |
| Protein | 4.7 g | 9% |
Variations & Substitutions
- Gluten-Free: Substitute the cake flour with a gluten-free all-purpose flour blend. You may need to add a binding agent like xanthan gum to help hold the cake together.
- Dairy-Free: Replace the butter with a dairy-free butter substitute and the milk with almond milk, soy milk, or oat milk.
- Jam Variations: Feel free to experiment with different flavors of jam. Strawberry, blackberry, or even apricot jam would be delicious in this cake.
- Lemon Zest: Add a teaspoon of lemon zest to the batter for a bright, citrusy flavor.
- Almond Extract: Substitute the vanilla extract with almond extract for a nutty twist.
FAQs (Frequently Asked Questions)
Q: Can I use all-purpose flour instead of cake flour?
A: While cake flour is preferred for its lower protein content, which results in a more tender cake, you can substitute it with all-purpose flour. However, the cake might be slightly denser. See the “Expert Tips & Tricks” section for how to make a substitute using cornstarch.
Q: How do I prevent the cake from sinking in the middle?
A: Make sure your oven temperature is accurate and avoid opening the oven door too frequently during baking. Also, ensure that you don’t overmix the batter.
Q: Can I make this cake ahead of time?
A: Yes, you can bake the cake layers a day ahead of time. Wrap them tightly in plastic wrap and store them at room temperature. Assemble the cake with the raspberry jam just before serving.
Q: What if I don’t have raspberry jam?
A: Feel free to use any other type of jam you prefer, such as strawberry, blackberry, or apricot.
Q: How can I tell if the cake is done?
A: The cake is done when it springs back lightly when touched and a toothpick inserted into the center comes out clean or with just a few moist crumbs clinging to it.
Final Thoughts
Toronto Pie is more than just a cake; it’s a slice of history, a taste of tradition, and a delicious way to connect with the past. I encourage you to try this recipe and experience the simple pleasure of a hot-milk sponge cake filled with tangy raspberry jam. Whether you’re a seasoned baker or a novice in the kitchen, this cake is sure to impress. Share your creations with friends and family, and let them experience the magic of Toronto Pie. And if you’re feeling adventurous, pair it with a cup of Earl Grey tea for a truly delightful afternoon treat. Happy baking!