
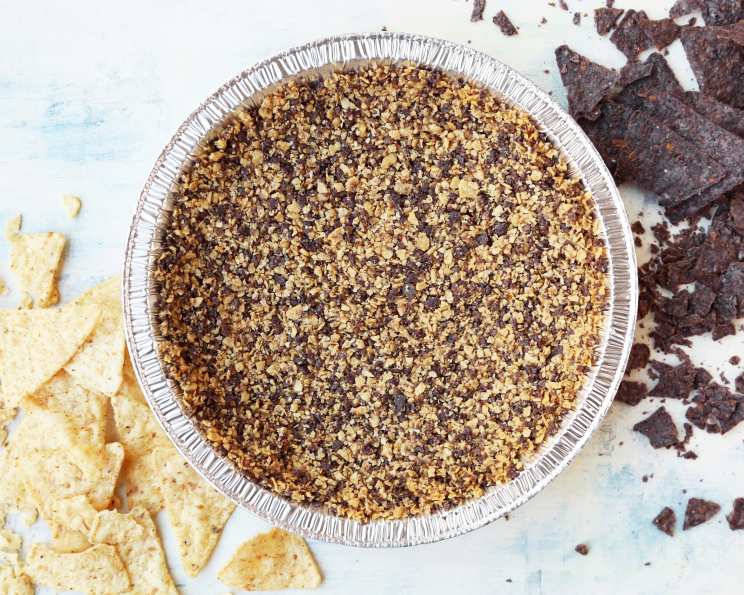
Tortilla Chip Crust for Savory Pie: A Culinary Revelation
I’ll never forget the first time I accidentally discovered the magic of a tortilla chip crust. It was a busy week, and I was prepping for a large catering event. In a moment of pure culinary inspiration (or perhaps desperation!), I used crushed tortilla chips instead of graham crackers for a mini quiche crust. The result was surprisingly delicious – a salty, savory complement to the creamy filling that was a major hit with the guests. Now, I’m excited to share this unconventional yet utterly delightful twist with you!
Recipe Overview
- Prep Time: 10 minutes
- Cook Time: 5 minutes (optional pre-bake)
- Total Time: 15 minutes
- Servings: 6-8
- Yield: 1 crust
- Dietary Type: Gluten-Free (check chip ingredients)
Ingredients
- 1 1⁄2 cups corn tortilla chips, very finely crushed
- 2 tablespoons butter, melted
Equipment Needed
- 9-inch pie plate
- Small bowl
- Blender or food processor (recommended)
- Measuring cups and spoons
Instructions
- Begin by preparing the tortilla chips. The key to a great crust is finely crushed chips. I find that a blender or food processor works best for achieving a texture similar to graham cracker crumbs. If you don’t have either, you can place the chips in a large zip-top bag and crush them with a rolling pin or the bottom of a heavy pan. Ensure there are no large chunks.
- In a small bowl, combine the finely crushed tortilla chips and the melted butter. Mix thoroughly until all the crumbs are evenly moistened. The mixture should resemble wet sand.
- Transfer the mixture to a 9-inch pie plate. Using your fingers or the back of a spoon, press the crumb mixture firmly and evenly onto the bottom and up the sides of the pie plate. Ensure the crust is uniform in thickness to prevent soggy spots or uneven baking.
- At this stage, you have two options depending on the type of filling you intend to use. If you plan to fill the crust with a relatively dry filling, such as a Mexican-style pie with pre-cooked ingredients, you can proceed directly to adding your filling. However, if you intend to use the crust for a quiche or any filling with high moisture content, I highly recommend pre-baking the crust.
- For pre-baking, preheat your oven to 375°F (190°C). Place the pie plate with the prepared crust in the preheated oven and bake for 5 minutes. This brief pre-baking helps to set the crust and prevent it from becoming soggy when filled with a wet mixture.
- Remove the pre-baked crust from the oven and let it cool completely before adding your chosen filling. This cooling period is crucial as it allows the crust to firm up further and prevents the filling from seeping underneath.
- Once the crust has cooled, you can proceed with filling it according to your recipe. Whether it’s a creamy quiche, a spicy Mexican pie, or another savory creation, the tortilla chip crust will provide a delightful, unexpected flavor and texture contrast.
- Bake the filled pie according to your recipe instructions.
Expert Tips & Tricks
- Chip Selection: Experiment with different flavors of tortilla chips. A hint of lime, chili, or even a blend of blue corn and yellow corn chips can add exciting layers of flavor to your crust. Just be mindful of the salt content, adjusting any additional salt in your filling recipe accordingly.
- Even Baking: For a truly uniform crust, use the bottom of a measuring cup to press the crumb mixture firmly and evenly into the pie plate. Pay special attention to the edges, ensuring they are well-formed and not too thin, to prevent burning.
- Blind Baking: If you prefer an extra-crisp crust, you can blind bake it. After pressing the crumb mixture into the pie plate, line the crust with parchment paper and fill it with pie weights or dried beans. Bake at 375°F (190°C) for 8-10 minutes, then remove the weights and parchment paper and bake for another 2-3 minutes, or until golden brown.
- Troubleshooting a Soggy Crust: If your filling is particularly wet and you’re concerned about a soggy crust, brush the pre-baked crust with a thin layer of beaten egg white before adding the filling. The egg white will create a barrier that helps to prevent moisture absorption.
- Salt Control: Remember that tortilla chips already contain salt. Taste your crushed chips before mixing with butter and reduce or eliminate any additional salt called for in your pie filling to avoid an overly salty final product.
- Make Ahead: The unbaked tortilla chip crust can be made a day ahead. Cover it tightly with plastic wrap and store it in the refrigerator. This will save time on the day you plan to bake your pie.
- Spicy Kick: For a spicier crust, add a pinch of chili powder or a dash of cayenne pepper to the crushed tortilla chips before mixing them with the melted butter.
Serving & Storage Suggestions
Serve your savory pie warm or at room temperature, depending on the filling. A quiche is delicious warm, while a Mexican pie may be enjoyed slightly cooler. Leftovers should be stored in the refrigerator, covered tightly, for up to 3 days. To reheat, warm individual slices in the oven or microwave until heated through. Note that the crust might lose some of its original crispness upon refrigeration. While freezing is possible, it’s generally not recommended as the crust’s texture can suffer.
Nutritional Information
Note: Nutritional information is an estimate and may vary based on specific ingredients and serving size.
| Nutrient | Amount per Serving | % Daily Value |
|---|---|---|
| Calories | 150 kcal | 8% |
| Total Fat | 10g | 15% |
| Saturated Fat | 6g | 30% |
| Cholesterol | 25mg | 8% |
| Sodium | 150mg | 7% |
| Total Carbohydrate | 12g | 4% |
| Dietary Fiber | 1g | 4% |
| Sugars | 0g | 0% |
| Protein | 2g | 4% |
Variations & Substitutions
- Spicy Crust: Add a pinch of chili powder or cayenne pepper to the crushed chips for a subtle kick.
- Cheese Infusion: Mix in 1/4 cup of grated cheddar or Monterey Jack cheese with the crushed chips before adding the melted butter for a cheesy twist.
- Herbaceous Crust: Incorporate 1 tablespoon of finely chopped fresh herbs, such as cilantro, parsley, or oregano, for a fresh, aromatic crust.
- Vegan Option: Use a vegan butter substitute to keep the crust dairy-free. Ensure your tortilla chips are also vegan-friendly.
- Different Chip Flavors: Experiment with different flavors of tortilla chips like lime, jalapeño, or even sweet potato chips for unique flavor combinations.
FAQs (Frequently Asked Questions)
Q: Can I use stale tortilla chips for this recipe?
A: Absolutely! This is a fantastic way to use up slightly stale tortilla chips. Just make sure they’re not rancid or moldy.
Q: Do I have to pre-bake the crust?
A: Pre-baking is highly recommended if you’re using a wet filling like quiche. It helps prevent the crust from becoming soggy. If your filling is drier, you can skip this step.
Q: Can I make this crust ahead of time?
A: Yes, you can make the crust and keep it covered in the refrigerator for up to 24 hours before filling.
Q: What if my crust is too crumbly and doesn’t hold together?
A: You may need to add a little more melted butter, a teaspoon at a time, until the mixture holds together when pressed.
Q: Can I use a different type of oil instead of butter?
A: Yes, you can substitute melted coconut oil or olive oil for the butter. Keep in mind that the flavor will be slightly different.
Final Thoughts
I hope this recipe inspires you to get creative in the kitchen and try something new! The tortilla chip crust is a game-changer for savory pies, offering a unique flavor and texture that’s sure to impress. Don’t be afraid to experiment with different chip flavors and fillings to create your own signature dish. I can’t wait to hear about your culinary adventures with this versatile crust. Share your experiences and variations – happy baking!