
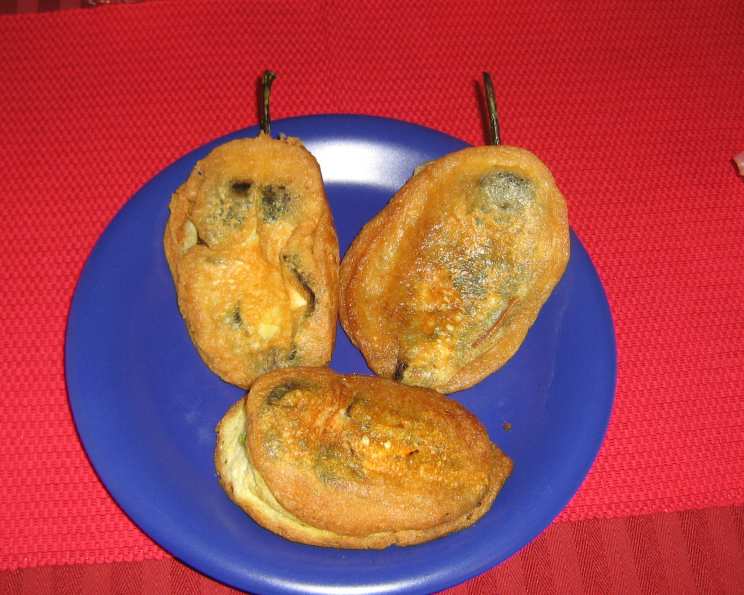
Traditional Chiles Rellenos: A Taste of Abuela’s Kitchen
The scent of roasting chiles always transports me back to my grandmother’s tiny kitchen in Santa Fe. Abuela’s hands, weathered but nimble, moved with practiced grace as she coaxed the smoky sweetness from the poblano peppers. The air, thick with the aroma of simmering salsa and the anticipation of the first bite, was pure culinary magic. These weren’t just stuffed peppers; they were edible love letters, each bite a reminder of family, tradition, and the comforting embrace of home.
Recipe Overview
- Prep Time: 30 minutes
- Cook Time: 25 minutes
- Total Time: 55 minutes
- Servings: 6
- Yield: 6 stuffed chiles
- Dietary Type: Vegetarian
Ingredients
- 6 whole poblano peppers
- 1/2 lb cheese, thinly sliced (Oaxaca, queso fresco, or Chihuahua are recommended)
- 1/4 cup flour
- 6 whole raw eggs, separated
- 1/2 cup flour
- 2 cups salsa verde (canned)
- 2 cups home-style Mexican salsa (canned)
- 1 cup corn oil
Equipment Needed
- 9 x 14 baking dish (or cookie sheet)
- Potholders
- Plastic bag or damp paper towels
- Teaspoon
- Electric mixer
- Skillet
- Medium saucepan
- Paper towels
Instructions
-
Begin by rinsing the poblano peppers thoroughly under cool water to remove any dirt or residue.
-
Preheat your oven to broil. Position the oven rack close to the broiler element.
-
Place the chiles in a 9 x 14 inch baking dish (or on a cookie sheet). Set the dish on the top shelf of your oven, as close to the broiler as safely possible.
-
Watch and listen closely as the chiles begin to roast. You’ll hear popping sounds, and the skins will start to char and turn black in places. This process typically takes a few minutes per side, but stay vigilant as broilers can vary in intensity.
-
When one side of the chiles is fairly evenly charred, carefully remove the baking dish from the oven, using potholders to protect your hands. Flip the chiles over to roast the other side.
-
Continue to broil the chiles until both sides are fairly evenly charred. It’s important not to overcook them to the point of being entirely black, as this can make them mushy.
-
Once the chiles are properly charred, immediately wrap each chile in a moist paper towel or place them in a sealed plastic bag. This steaming process will help loosen the skins, making them easier to peel.
-
After a few minutes of steaming, check the chiles. The skins should now slip off easily. Peel each chile carefully, trying not to tear the flesh.
-
Using a sharp knife, cut a slit almost the full length of each chile. At the top of the slit, near the stem, make a small “T” shape. This allows you to open the chile and remove the seeds and inner membranes (which contain most of the heat).
-
Gently scrape out the fibers and seeds with a teaspoon. If you miss a few, don’t worry.
-
Replace the removed seeds with a slice of cheese. Fold the cheese to fit snugly inside the chile.
-
You can set the stuffed chiles aside at this point, for a few minutes or a few hours, if you store them in the refrigerator.
-
In a large bowl, whip the egg whites at high speed with an electric mixer until stiff peaks form. This is crucial for creating a light and airy batter.
-
Heat the corn oil in a skillet over medium-high heat. The oil is ready when a drop of water sizzles when dropped into the pan.
-
In a separate bowl, beat the egg yolks with one tablespoon of flour and a pinch of salt.
-
Gently fold the egg yolks into the whipped egg whites, stirring until you have a thick paste-like batter. Be careful not to overmix, as this will deflate the egg whites.
-
Place 1/4 cup of flour on a plate. Roll each chile in the flour, coating it lightly on all sides. This helps the egg batter adhere better.
-
Dip each floured chile into the egg batter, coating it evenly. Try not to coat the chiles too thickly, as this can result in a heavy and greasy final product.
-
Fry the battered chiles in the hot oil, seam-side down, until golden brown on both sides. This typically takes a few minutes per side.
-
Place the fried chiles rellenos on paper towels to drain excess oil.
-
Meanwhile, heat the salsa in a medium saucepan. You can use either the salsa verde, the home-style Mexican salsa, or a combination of both.
-
To serve, place one or two rellenos on each plate and pour salsa over them. Serve immediately with rice, beans, and warm tortillas. Sour cream is also a delicious addition.
Expert Tips & Tricks
-
Cheese Selection: The type of cheese you use can greatly impact the flavor and texture. Oaxaca cheese melts beautifully and has a mild, stringy texture. Queso fresco offers a slightly salty and crumbly contrast. Chihuahua cheese is another good melting option with a slightly sharper flavor.
-
Roasting Perfection: Keep a close watch on the chiles while broiling to prevent burning. The goal is to char the skin so it peels easily, but the flesh should remain tender.
-
Batter Consistency: Achieving the perfect batter consistency is key. The egg whites should be whipped to stiff peaks for a light and airy texture. Gently fold in the yolks to avoid deflating the whites.
-
Toothpick Trick: For extra security, use toothpicks to hold the chiles closed after stuffing them. Remember to remove the toothpicks before serving.
-
Spoon Basting: To ensure even coating with the egg batter, set the pepper in the batter and spoon the batter over the top, handling the pepper as carefully as possible to avoid tearing.
Serving & Storage Suggestions
Serve the chiles rellenos immediately after frying for the best taste and texture. They are traditionally served with rice, refried beans, and warm tortillas. A dollop of sour cream or a sprinkle of crumbled queso fresco adds a cool and creamy contrast to the rich flavors.
Leftover chiles rellenos can be stored in an airtight container in the refrigerator for up to 3 days. To reheat, bake them in a preheated oven at 350°F (175°C) until warmed through. Microwaving is also an option, but the batter may become slightly soggy. They are best enjoyed fresh, but can be stored.
Nutritional Information
| Nutrient | Amount per Serving | % Daily Value |
|---|---|---|
| Calories | 458 kcal | 23% |
| Total Fat | 35g | 54% |
| Saturated Fat | 12g | 60% |
| Cholesterol | 140mg | 47% |
| Sodium | 525mg | 22% |
| Total Carbohydrate | 18g | 6% |
| Dietary Fiber | 3g | 12% |
| Sugars | 5g | N/A |
| Protein | 15g | 30% |
Note: Nutritional information is an estimate and may vary based on specific ingredients and portion sizes.
Variations & Substitutions
- Vegan Chiles Rellenos: Substitute the cheese with a vegan cheese alternative and use an egg replacer for the batter.
- Spicy Kick: Add a pinch of cayenne pepper or a finely chopped serrano pepper to the cheese filling for extra heat.
- Different Cheeses: Experiment with different types of cheese, such as Monterey Jack or asadero.
- Meat Filling: Add cooked ground beef or shredded chicken to the cheese filling for a heartier meal.
- Salsa Options: Try different types of salsa, such as salsa roja or a roasted tomato salsa.
FAQs (Frequently Asked Questions)
Q: Can I prepare the chiles rellenos ahead of time?
A: Yes, you can roast, peel, and stuff the chiles ahead of time. Store them in the refrigerator until you’re ready to batter and fry them.
Q: How do I prevent the batter from falling off during frying?
A: Make sure the chiles are thoroughly dried after peeling and lightly coat them in flour before dipping them in the batter. This will help the batter adhere better.
Q: What’s the best way to reheat chiles rellenos?
A: The best way to reheat chiles rellenos is in a preheated oven at 350°F (175°C) until warmed through. This will help maintain their crispy texture.
Q: Can I freeze chiles rellenos?
A: While you can freeze them, the texture may change upon thawing. If freezing, wrap them individually and freeze for up to 2 months. Reheat in the oven.
Q: My chiles are too spicy. What can I do?
A: Be thorough when removing the seeds and membranes from the inside of the chiles, as this is where most of the heat is concentrated. You can also soak the peeled chiles in milk for a few minutes to help reduce the spiciness.
Final Thoughts
Chiles rellenos are more than just a recipe; they’re a celebration of flavor and tradition. I encourage you to embrace the process, experiment with different fillings and salsas, and make this dish your own. Don’t be afraid to get your hands dirty, and most importantly, share the love with family and friends. And if you try this recipe, please let me know how it turns out! I’d love to hear your feedback and see your culinary creations. ¡Buen provecho!