
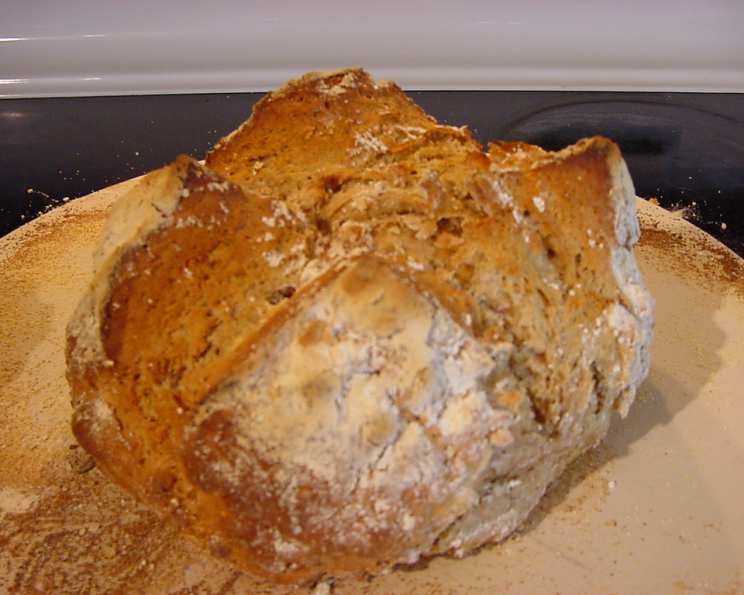
The Soul of Ireland: Baking Traditional Irish Brown Bread
The scent of warm bread has always been synonymous with home for me. But there’s one bread, in particular, that evokes a visceral sense of nostalgia – Irish Brown Bread. I remember visiting my grandmother in County Clare as a child, the rugged coastline a constant backdrop to our adventures. Each morning, the aroma of freshly baked brown bread would waft from her kitchen, a hearty, earthy fragrance that mingled with the salty sea air. Slathered with creamy Irish butter and a dollop of homemade jam, it was more than just food; it was a taste of Ireland itself.
Recipe Overview:
- Prep Time: 10 minutes
- Cook Time: 40 minutes
- Total Time: 50 minutes
- Servings: 16
- Yield: 1 loaf
- Dietary Type: Vegetarian
Ingredients:
- 4 cups coarse ground whole wheat flour
- 4 cups white flour
- 3 teaspoons salt
- 1 tablespoon baking soda
- 3-4 cups low-fat cultured buttermilk
Equipment Needed:
- Large mixing bowl
- Measuring cups and spoons
- Baking sheet
- Floured surface
Instructions:
-
Begin by preheating your oven to 475°F (246°C). This initial high heat is crucial for creating a good rise and a lovely crust.
-
In a large mixing bowl, thoroughly combine all the dry ingredients: 4 cups of coarse ground whole wheat flour, 4 cups of white flour, 3 teaspoons of salt, and 1 tablespoon of baking soda. Whisking the dry ingredients ensures even distribution and helps the bread to rise properly.
-
Create a well in the center of the dry ingredients. This allows you to gradually incorporate the buttermilk without overmixing the flour.
-
Pour in some of the buttermilk. Using your hand, gently work the mixture together. Continue adding buttermilk gradually until the dough is soft and just slightly sticky. The amount of buttermilk required can vary depending on the humidity and the type of flour used, so add it slowly and assess as you go. You’re aiming for a dough that holds its shape but isn’t dry or tough.
-
Lightly flour a clean work surface. Turn the dough out onto the floured surface and gently knead it into a circular shape, approximately three inches thick. Avoid over-kneading, as this will develop the gluten too much and result in a tough loaf. A light touch is key here.
-
Carefully transfer the circular loaf to a baking sheet. With a sharp knife, cut a deep cross into the top of the loaf, almost reaching the bottom. This helps the bread to bake evenly and allows it to expand properly.
-
Bake the bread in the preheated oven for 20 minutes at 475°F (246°C). Then, reduce the oven temperature to 400°F (204°C) and bake for another 20 minutes. This two-stage baking process ensures a perfectly cooked interior and a beautifully golden-brown crust.
-
To check for doneness, tap the bottom of the loaf. If it sounds hollow, the bread is fully cooked. If it sounds dense or heavy, return it to the oven for a few more minutes.
-
Once baked, transfer the bread to a wire rack to cool completely before slicing and serving. Cooling on a rack prevents the bottom from becoming soggy.
Expert Tips & Tricks:
- Use Fresh Baking Soda: Baking soda loses its potency over time, so ensure yours is fresh for optimal rising power.
- Don’t Overmix: Overmixing develops the gluten in the flour, resulting in a tough bread. Mix just until the ingredients are combined.
- Buttermilk Substitute: If you don’t have buttermilk, you can make a quick substitute by adding 1 tablespoon of lemon juice or white vinegar to a liquid measuring cup and then filling it with milk to equal 1 cup. Let it sit for 5 minutes to curdle before using.
- Experiment with Flours: While the recipe calls for a combination of whole wheat and white flour, you can experiment with other types of flour, such as spelt or rye, for different flavor profiles.
- Add-Ins: Consider adding ingredients like rolled oats, seeds (sunflower, pumpkin, flax), or chopped nuts for added texture and flavor. Just be sure not to add too much, or it will affect the bread’s structure.
- Room Temperature Buttermilk: Allow your buttermilk to come to room temperature before mixing. This will help the dough rise better.
Serving & Storage Suggestions:
Irish Brown Bread is best served warm, ideally within a few hours of baking. It’s delicious with butter, jam, cheese, or served alongside a hearty soup or stew.
To store, wrap the cooled loaf tightly in plastic wrap or place it in an airtight container. It will stay fresh at room temperature for 2-3 days. For longer storage, you can freeze the bread for up to 2 months. Thaw completely before slicing and serving. To refresh day-old bread, lightly toast or warm it in the oven.
Nutritional Information:
| Nutrient | Amount per Serving | % Daily Value |
|---|---|---|
| Calories | 215.4 kcal | N/A |
| Calories from Fat | 7 g | 4% |
| Total Fat | 0.9 g | 1% |
| Saturated Fat | 0.1 g | 0% |
| Cholesterol | 0 mg | 0% |
| Sodium | 673 mg | 28% |
| Total Carbohydrate | 45.6 g | 15% |
| Dietary Fiber | 4.5 g | 18% |
| Sugars | 0.2 g | 0% |
| Protein | 7.3 g | 14% |
Nutritional information is an estimate and may vary based on specific ingredients and preparation methods.
Variations & Substitutions:
- Seeded Brown Bread: Add a mix of sunflower, pumpkin, and flax seeds to the dough for a nutty and nutritious twist.
- Oatmeal Brown Bread: Incorporate rolled oats into the dough for a heartier texture and added fiber.
- Sweet Brown Bread: Add a touch of honey or molasses to the dough for a subtle sweetness. You can also include dried fruits like raisins or cranberries.
- Gluten-Free Brown Bread: Substitute the wheat flours with a gluten-free flour blend. You may need to adjust the amount of buttermilk to achieve the right consistency. Ensure your baking soda is also gluten-free.
- Spiced Brown Bread: Add a teaspoon of mixed spice (cinnamon, nutmeg, cloves) to the dry ingredients for a warm and aromatic bread, perfect for the autumn months.
FAQs (Frequently Asked Questions):
Q: Why is my brown bread dense and heavy?
A: This could be due to overmixing the dough, using old baking soda, or not using enough buttermilk. Ensure your baking soda is fresh and avoid overworking the dough. Add buttermilk gradually until the dough is soft and slightly sticky.
Q: Can I use regular milk instead of buttermilk?
A: While buttermilk provides a characteristic tang and helps with the bread’s texture, you can use regular milk with a tablespoon of lemon juice or vinegar added to it as a substitute. Let it sit for 5 minutes before using.
Q: How do I prevent the crust from getting too dark?
A: If the crust is browning too quickly, you can tent the loaf with aluminum foil during the last 10-15 minutes of baking.
Q: Can I make this bread in a bread machine?
A: Yes, you can adapt this recipe for a bread machine. Follow your bread machine’s instructions for setting the program and adding ingredients.
Q: How long will this bread last?
A: Properly stored, Irish Brown Bread will last for 2-3 days at room temperature or up to 2 months in the freezer.
Final Thoughts:
Making Irish Brown Bread is more than just following a recipe; it’s about connecting with a rich culinary tradition and bringing a piece of Ireland into your home. The simple ingredients and straightforward method yield a loaf that’s both comforting and satisfying. So, gather your ingredients, preheat your oven, and let the aroma of freshly baked brown bread fill your kitchen. Share it with loved ones, and savor the taste of home. I encourage you to experiment with different variations and find your own perfect loaf. And if you do, please share your experiences – I’d love to hear about your baking adventures!