
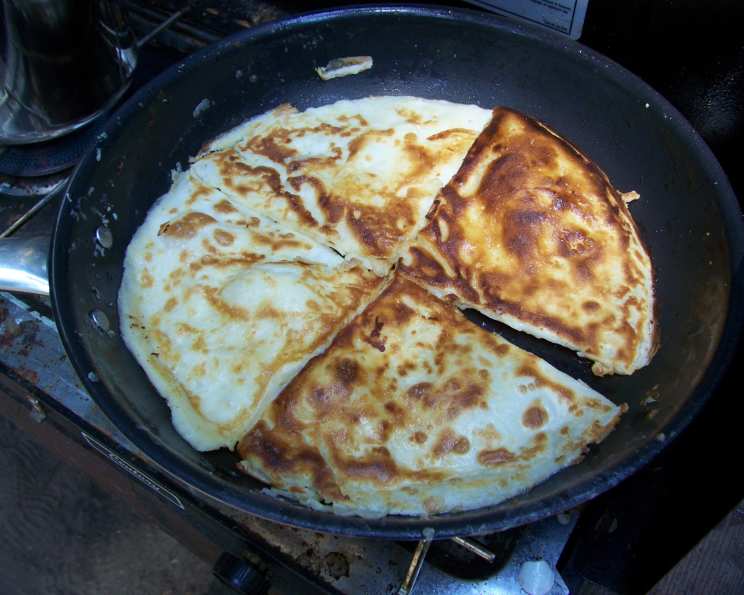
Traditional Norwegian Pancakes
The scent of cardamom and melted butter, that specific sweet-savory aroma, instantly transports me back to my grandmother’s kitchen in Oslo. Her pannekaker, paper-thin and golden brown, were legendary. Each one was a delicate canvas for lingonberry jam or a simple sprinkle of sugar, a taste of pure comfort and warmth that defined my childhood. I remember standing on a stool, mesmerized as she expertly swirled the batter in the hot pan, a magician conjuring up edible delights.
Recipe Overview
- Prep Time: 10 minutes
- Cook Time: 20 minutes
- Total Time: 30 minutes
- Servings: 4-6
- Yield: About 12 pancakes
- Dietary Type: Varies (See Variations)
Ingredients
- 2/3 cup flour
- 1/4 teaspoon salt
- 3 large eggs
- 1 1/2 cups milk
- 1 tablespoon sugar or 1 tablespoon honey, plus more for serving
- 3 tablespoons butter, melted, plus butter for cooking
Equipment Needed
- Medium bowl
- Whisk
- Cast-iron skillet or heavy skillet
- Spatula
- Plate
Instructions
- In a medium bowl, combine the flour and salt. This ensures the salt is evenly distributed throughout the batter, preventing pockets of saltiness.
- Add the eggs, milk, and sugar (or honey) to the flour mixture.
- Whisk until you have a light batter. It’s crucial to ensure there are no lumps. Over-whisking can develop the gluten in the flour, leading to tougher pancakes, so whisk just until the batter is smooth.
- Stir in the melted butter. The melted butter adds richness and flavor to the pancakes.
- Let the batter rest for 30 minutes. This resting period allows the gluten to relax, resulting in more tender pancakes. It also allows the flour to fully absorb the liquid, creating a smoother batter.
- Heat 2 teaspoons of butter over medium heat in a cast-iron or other heavy skillet. The cast iron provides even heat distribution, ensuring the pancakes cook evenly and develop a beautiful golden-brown color.
- Add 1/3 cup of the batter to the hot skillet.
- Immediately tilt the skillet so that the batter spreads out evenly, forming a thin pancake. This is key to achieving the signature thinness of traditional Norwegian pancakes.
- Cook for approximately 3 minutes, or until the batter has set on top and the edges begin to lightly brown. Watch carefully to prevent burning. The timing may vary depending on the heat of your stove.
- Flip the pancake using a spatula.
- Cook for 2 minutes on the other side, until golden brown.
- Transfer the cooked pancake to a plate.
- Repeat steps 6-12, stacking the cooked pancakes, until you have used all the batter, adding more butter to the pan as needed to prevent sticking. Make sure to stir the batter occasionally as it rests, as the flour can settle at the bottom.
- Serve the pancakes warm with berries and sugar, or cheese and ham.
Expert Tips & Tricks
- Batter Consistency: If your batter seems too thick after resting, add a tablespoon or two of milk to thin it out. The ideal consistency should be similar to heavy cream.
- Preventing Sticking: Make sure your skillet is properly heated before adding the batter. The butter should be melted and shimmering, but not smoking. If the pancakes are still sticking, try using a non-stick skillet.
- Keeping Pancakes Warm: As you cook the pancakes, keep them warm in a preheated oven (200°F or 95°C) or under a warming lamp. This will prevent them from getting cold and soggy before serving.
- Flavor Infusion: Experiment with adding a pinch of cardamom or vanilla extract to the batter for a warm, aromatic twist.
- Lacy Edges: For extra-crispy, lacy edges, use clarified butter or ghee for cooking.
Serving & Storage Suggestions
Serve these traditional Norwegian pancakes warm, straight from the skillet. They are incredibly versatile and can be enjoyed with both sweet and savory toppings. For a classic Norwegian experience, serve with fresh berries (such as strawberries, raspberries, or blueberries) and a sprinkle of sugar. Alternatively, try lingonberry jam, whipped cream, or a dollop of sour cream. For a savory option, fill the pancakes with cheese and ham, smoked salmon, or sautéed mushrooms.
Leftover pancakes can be stored in the refrigerator for up to 3 days. To reheat, simply warm them in a skillet over medium heat, in the microwave, or in the oven. They can also be frozen for longer storage. To freeze, layer the pancakes between sheets of parchment paper to prevent sticking and store in an airtight container for up to 2 months. Reheat from frozen in a skillet or oven.
Nutritional Information
Note: Nutritional information is an estimate and can vary based on specific ingredients and serving sizes.
| Nutrient | Amount per Serving | % Daily Value |
|---|---|---|
| Calories | 250 kcal | 13% |
| Total Fat | 12g | 18% |
| Saturated Fat | 7g | 35% |
| Cholesterol | 100mg | 33% |
| Sodium | 200mg | 9% |
| Total Carbohydrate | 25g | 8% |
| Dietary Fiber | 1g | 4% |
| Sugars | 8g | – |
| Protein | 8g | 16% |
Variations & Substitutions
- Gluten-Free: Substitute the all-purpose flour with a gluten-free flour blend. A 1:1 gluten-free baking flour works well.
- Dairy-Free: Replace the milk with almond milk, soy milk, or oat milk. Use a dairy-free butter substitute for cooking.
- Vegan: In addition to the dairy-free substitutions, use a flax egg (1 tablespoon ground flaxseed mixed with 3 tablespoons water, let sit for 5 minutes) to replace each egg.
- Sweetness Level: Adjust the amount of sugar or honey to your preference. For a less sweet pancake, reduce the sugar to half a tablespoon.
- Spices: Experiment with adding other spices, such as cinnamon, nutmeg, or cardamom, to the batter.
- Savory Pancakes: Omit the sugar and add herbs such as dill or chives to the batter for a savory pancake.
FAQs (Frequently Asked Questions)
Q: Why is it important to let the batter rest?
A: Resting the batter allows the gluten in the flour to relax, resulting in more tender pancakes. It also gives the flour time to fully absorb the liquid, creating a smoother batter.
Q: Can I use a regular skillet instead of a cast-iron skillet?
A: Yes, you can use a regular skillet, but a cast-iron skillet is recommended because it provides even heat distribution, ensuring the pancakes cook evenly and develop a beautiful golden-brown color.
Q: How do I prevent the pancakes from sticking to the skillet?
A: Make sure your skillet is properly heated before adding the batter and use enough butter to grease the pan. If the pancakes are still sticking, try using a non-stick skillet.
Q: Can I make the batter ahead of time?
A: Yes, you can make the batter ahead of time and store it in the refrigerator for up to 24 hours. Just be sure to whisk it well before using.
Q: What are some traditional Norwegian toppings for these pancakes?
A: Traditional Norwegian toppings include fresh berries, lingonberry jam, whipped cream, sour cream, cheese, and ham.
Final Thoughts
Now, it’s your turn to create your own memories with these delightful Norwegian pancakes. Don’t be afraid to experiment with different toppings and variations to find your perfect combination. Whether you serve them with sweet berries or savory fillings, these pancakes are sure to bring a touch of Scandinavian comfort to your table. And please, share your creations and feedback – I’d love to hear about your culinary adventures! Pair these pancakes with a cup of strong Norwegian coffee for the full experience.