
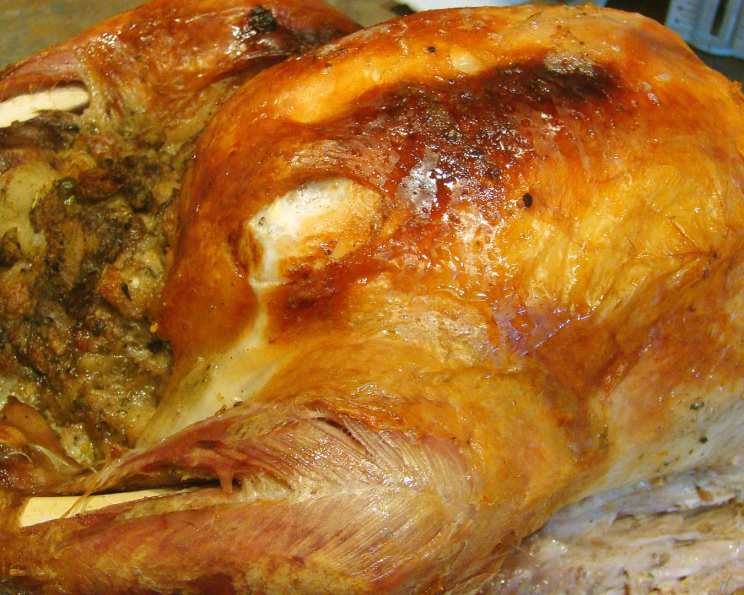
Grandma’s Traditional Roast Stuffed Turkey: A Thanksgiving Classic
The aroma of roasting turkey always takes me back to my grandmother’s kitchen. I can almost feel the warmth of the oven radiating through the room, hear the gentle clatter of pans, and see her bustling around with a determined gleam in her eye. This wasn’t just a meal; it was a ritual, a labor of love that filled our home with comfort and joy every Thanksgiving. She never used fancy herbs or brines, just simple ingredients and a slow, steady roast to golden-brown perfection. It’s a recipe I’ve cherished and perfected over the years, and now I’m delighted to share it with you.
Recipe Overview
- Prep Time: 2 hours
- Cook Time: 4 hours
- Total Time: 6 hours
- Servings: 12
- Yield: 1 whole stuffed turkey
- Dietary Type: Not Gluten-Free
Ingredients
- 12 lbs whole turkey
- 2 loaves white bread
- 1 loaf brown bread
- 1/2 cup margarine
- 1 medium onion
- 4 tablespoons sage
- 1 cup chicken broth
Equipment Needed
- Large mixing bowl
- Large roasting pan
- Foil
- Crock pot (optional, for extra stuffing)
- Meat thermometer
Instructions
- Prepare the Bread: Tear the white bread and brown bread into pieces and place them back into their respective bags. Leave these bags out overnight; the slightly stale bread soaks up the flavors beautifully.
- Dice the Onion: Dice the onion into small pieces. Cover and leave on the counter overnight as well. This allows the flavor to mellow slightly, preventing it from overpowering the stuffing.
- Sauté the Aromatics: The next day, melt the margarine in a large skillet. Sauté the diced onion in the melted margarine until translucent and softened. Stir in the sage and chicken broth. Cook for a few minutes until the sage is fragrant and the broth is heated through.
- Combine the Stuffing: Place the bread pieces in a large mixing bowl. Pour most of the onion mixture onto the bread and stir gently to combine. Reserve a little of the onion mixture in case you need it for moisture later.
- Check the Moisture: This is a crucial step! The stuffing has enough moisture when you can squeeze a handful and it stays in a loose ball when you open your hand. If it falls apart, add a little more of the reserved onion mixture, a tablespoon at a time, until it holds its shape. If it is soggy and squeezes together tightly, add a little more bread pieces to absorb the excess moisture. The goal is a moist, but not mushy, stuffing.
- Prepare the Turkey: If the turkey has skin binding its legs together, cut it to release them. Rinse the turkey thoroughly under cold running water, both inside and out. Remove and discard the giblets (heart, neck, etc.). Pat the inside of the turkey dry with paper towels to remove excess moisture.
- Stuff the Turkey: Now for the fun part! Push the stuffing into the main cavity of the turkey until you can’t fit any more in – overstuffing is key for a moist stuffing. The tighter you pack it, the moister the stuffing will be as it absorbs the turkey’s juices during roasting.
- Stuff the Neck Cavity: Don’t forget the neck cavity! Stuff it with the same care and attention as the main cavity.
- Cook Extra Stuffing (Optional): If you have any leftover stuffing, that’s a good thing! Place it in a sprayed crock pot and cook on low for 4-5 hours, or until heated through. This ensures you have plenty of stuffing for everyone to enjoy.
- Protect the Extremities: Wrap the legs and wings of the turkey with foil. These parts tend to cook more quickly than the rest of the bird, and the foil will prevent them from drying out.
- Initial Roasting: Put a piece of loose foil over the entire bird to trap moisture and prevent excessive browning early on. Roast at 325°F (160°C) for about 3 hours.
- Browning the Bird: Remove all of the foil, setting it aside to reuse later. Roast for another hour, uncovered. This is when the turkey will develop that beautiful golden-brown color.
- Check for Doneness: If the turkey doesn’t have a pop-up timer, use a meat thermometer. Insert it into the thickest part of the thigh, being careful not to touch the bone. The turkey is done when the internal temperature reaches 165°F (74°C).
- Rest the Turkey: This is a critical step for a moist bird! When done, set the turkey out on the counter and cover it loosely with the foil you reserved earlier. Let it stand for 20 minutes before carving. This allows the juices to redistribute throughout the meat, resulting in a more tender and flavorful turkey.
- Combine the Stuffings: Remove the stuffing from the bird and mix it in with the crock pot stuffing (if you made extra). This ensures all the stuffing is evenly moist and flavorful.
- Carve and Serve: Carve the turkey and arrange the slices artfully on a platter, surrounded by the delicious stuffing.
- Enjoy: Share this time-honored tradition with your loved ones! Remember, you may use more or less sage according to your taste preferences.
Expert Tips & Tricks
- Brining: While this recipe is designed to be simple, a 24-hour brine can add extra moisture and flavor. Use a basic salt and sugar brine with your favorite herbs.
- Dry the Skin: For extra crispy skin, pat the turkey skin very dry before roasting. You can even leave it uncovered in the refrigerator overnight to dry out the skin further.
- Basting: Basting with pan juices every 30 minutes during the last hour of roasting can help create a beautiful, even color.
- Don’t Overcook: Overcooked turkey is dry turkey. Use a meat thermometer and pull it out of the oven as soon as it reaches 165°F (74°C). The temperature will continue to rise slightly as it rests.
- Gravy from Pan Drippings: Don’t throw away the pan drippings! They’re the key to a delicious homemade gravy.
Serving & Storage Suggestions
Serve the roast turkey immediately after carving, accompanied by the stuffing, gravy, cranberry sauce, and your favorite side dishes.
Leftover turkey and stuffing should be stored in airtight containers in the refrigerator within two hours of cooking. They will last for 3-4 days. You can also freeze leftovers for up to 2-3 months. Reheat in the oven or microwave until heated through. Add a little broth or water to prevent drying out.
Nutritional Information
| Nutrient | Amount per Serving | % Daily Value |
|---|---|---|
| Calories | 829.6 kcal | N/A |
| Calories from Fat | 334 g | 40% |
| Total Fat | 37.1 g | 57% |
| Saturated Fat | 9.5 g | 47% |
| Cholesterol | 225.8 mg | 75% |
| Sodium | 935.9 mg | 38% |
| Total Carbohydrate | 43.7 g | 14% |
| Dietary Fiber | 2.4 g | 9% |
| Sugars | 4 g | 16% |
| Protein | 74.8 g | 149% |
Nutritional information is an estimate and may vary based on specific ingredients and preparation methods.
Variations & Substitutions
- Gluten-Free Stuffing: Substitute gluten-free bread for the white and brown bread to make a gluten-free version.
- Herb Variations: Experiment with different herbs in the stuffing. Thyme, rosemary, or marjoram are all excellent choices.
- Add Vegetables to Stuffing: Sautéed celery, carrots, or mushrooms can add extra flavor and texture to the stuffing.
- Different Fats: You can substitute butter or olive oil for the margarine.
- Spice it Up: Add a pinch of red pepper flakes to the stuffing for a little heat.
FAQs (Frequently Asked Questions)
Q: Can I make the stuffing ahead of time?
A: Yes, you can prepare the stuffing a day in advance. Store it in an airtight container in the refrigerator and add a little extra broth before stuffing the turkey to ensure it’s moist.
Q: How do I prevent the turkey from drying out?
A: Overstuffing the bird with the stuffing, wrapping the legs and wings in foil, and resting the turkey after roasting are all crucial for a moist bird.
Q: Can I use a different type of bread for the stuffing?
A: Yes, you can experiment with different types of bread, such as sourdough or French bread. Just be sure to adjust the amount of liquid as needed.
Q: How long can I store leftover turkey and stuffing?
A: Leftover turkey and stuffing can be stored in the refrigerator for 3-4 days or frozen for up to 2-3 months.
Q: What if my turkey is browning too quickly?
A: If your turkey is browning too quickly, you can cover it loosely with foil to prevent it from burning.
Final Thoughts
This traditional roast stuffed turkey recipe is more than just a set of instructions; it’s a connection to family, tradition, and the simple pleasures of home cooking. Don’t be intimidated by the length of the recipe – each step is straightforward and designed to help you create a truly memorable Thanksgiving feast. I encourage you to try it, put your own spin on it, and share it with the people you love. And if you do, please let me know how it turns out. Happy cooking!