
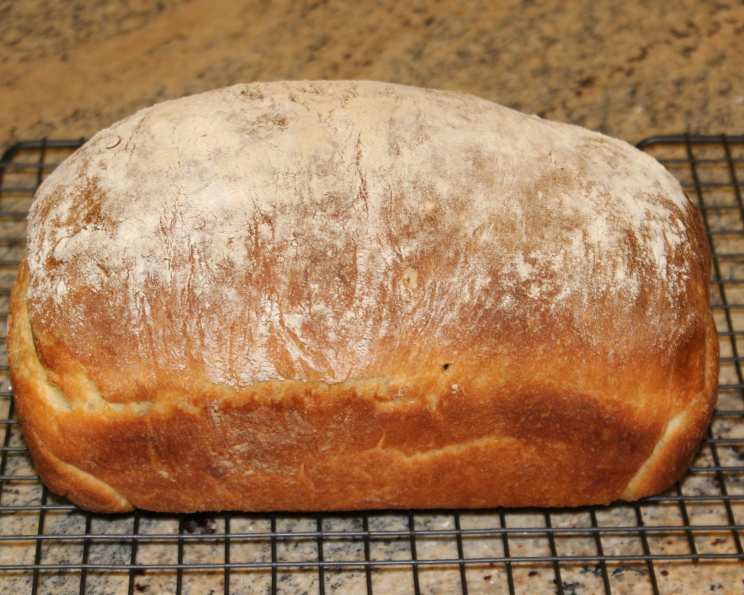
Tricia’s Vanilla Bread: A Slice of Simple Joy
I can still picture the kitchen, bathed in the warm afternoon light, my sister Tricia humming softly as she pulled a golden-brown loaf from the oven. The air, thick with the aroma of freshly baked bread and a delicate whisper of vanilla, was utterly intoxicating. It was more than just bread; it was a comforting ritual, a symbol of home, and a reminder of the simple joys in life that we often overlook. This recipe isn’t just about making bread; it’s about recreating that feeling of warmth and simple delight.
Recipe Overview
- Prep Time: 20 minutes
- Cook Time: 30 minutes
- Total Time: 1 hour 30 minutes
- Servings: 7
- Yield: 1 medium loaf
- Dietary Type: Vegetarian
Ingredients
- 240 g water (1 cup, 1 tablespoon lukewarm water)
- 400 g flour (3 cups, 2 tablespoons)
- 2 tablespoons sugar
- 8 g table salt (rounded teaspoon)
- 6 g yeast (instant or bread machine yeast)
- 1 teaspoon vanilla extract
Equipment Needed
- Large mixing bowl
- Measuring cups and spoons
- Floured counter
- Oiled container (straight-sided or graduated)
- Oiled counter
- Medium bread loaf pan
- Oiled plastic wrap
- Oven
- Cooling rack
Instructions
-
In a large bowl, combine all of the ingredients: water, flour, sugar, salt, yeast, and vanilla extract. Use a spoon that has been frequently wetted to mix the ingredients.
-
Mix the ingredients well until all of the flour is wetted. The dough will be shaggy at this stage.
-
Tip the dough out onto a lightly floured counter and knead until uniformly mixed, approximately 3 to 4 minutes. The dough should become smoother and more elastic.
-
Place the kneaded dough in an oiled container that is straight-sided or graduated, similar to a measuring container. This will allow you to easily monitor its rise.
-
After 10 minutes, remove the dough to an oiled counter. Stretch and fold the dough envelope-style: pull one side up and over the center, then repeat with the opposite side, and then the top and bottom. This technique helps develop gluten and creates a stronger, more flavorful bread.
-
Return the stretched and folded dough to the container.
-
After 10 more minutes, repeat the stretching and folding process on the oiled counter and return the dough to the container. Note the volume of the dough at this point.
-
Cover the container and allow the dough to double in volume, which should take approximately 20 to 30 minutes. The exact time will depend on the temperature of your kitchen.
-
Tip the doubled dough out onto the counter and gently spread the dough into a rectangle. The rectangle should be no wider than your medium bread loaf pan.
-
Roll the dough into a cylinder, making it as long as the loaf pan. Seal the seams tightly to prevent the bread from splitting during baking.
-
Oil the bread pan thoroughly to prevent sticking. Place the rolled dough into the pan, seam down.
-
Cover the pan with oiled plastic wrap to prevent the dough from drying out. Let the dough proof until it is nearly doubled in volume, usually about 1 inch above the lid of the pan. This may take another 20-30 minutes, depending on the room temperature.
-
Preheat the oven to 400 degrees F (200 degrees C).
-
Bake the loaf in the center of the preheated oven for approximately 30 minutes, turning the pan halfway through the baking time to ensure even browning.
-
The bread is fully baked when the internal temperature reaches 190 to 210 degrees F (88 to 99 degrees C), and the top crust is nicely browned. You can use a food thermometer to check the internal temperature.
-
Remove the loaf from the oven and carefully remove it from the loaf pan. Place the loaf on a cooling rack and allow it to cool for at least 30 minutes before slicing. This prevents the bread from becoming gummy.
Expert Tips & Tricks
-
Wetting your spoon: Using a wetted spoon while mixing prevents the dough from sticking excessively, making it easier to incorporate all the flour.
-
Flour Quality: The type of flour you use can significantly impact the texture of the bread. Bread flour, with its higher gluten content, will produce a chewier loaf, while all-purpose flour will result in a slightly softer texture.
-
Temperature Matters: The temperature of your ingredients, particularly the water, can affect the yeast’s activity. Lukewarm water (around 105-115°F or 40-46°C) is ideal for activating the yeast.
-
Oven Calibration: Oven temperatures can vary. If your bread consistently browns too quickly or slowly, consider using an oven thermometer to ensure your oven is accurately calibrated.
-
Even Baking: Turning the loaf halfway through baking is crucial for achieving even browning on all sides.
-
Steam: For a crispier crust, you can introduce steam into the oven during the first 10 minutes of baking. Place a pan of hot water on the bottom rack of the oven.
Serving & Storage Suggestions
Tricia’s Vanilla Bread is incredibly versatile. Serve it warm with a pat of butter for a simple yet satisfying breakfast. It’s also fantastic for making toast, sandwiches, or grilled cheese. This bread truly shines when used in bread puddings, French toast, or cinnamon toast, as the subtle vanilla flavor complements the other ingredients beautifully.
Store leftover bread at room temperature in a breadbox or airtight container for up to 3 days. For longer storage, wrap the bread tightly in plastic wrap and freeze for up to 2 months. To thaw, simply leave the bread at room temperature for a few hours. You can also refresh day-old bread by lightly toasting it or warming it in the oven.
Nutritional Information
| Nutrient | Amount per Serving | % Daily Value |
|---|---|---|
| Calories | 226.4 kcal | N/A |
| Calories from Fat | 5 g | 3% |
| Total Fat | 0.6 g | 0% |
| Saturated Fat | 0.1 g | 0% |
| Cholesterol | 0 mg | 0% |
| Sodium | 445.6 mg | 18% |
| Total Carbohydrate | 47.6 g | 15% |
| Dietary Fiber | 1.8 g | 7% |
| Sugars | 3.8 g | N/A |
| Protein | 6.2 g | 12% |
Note: Nutritional information is an estimate and may vary based on specific ingredients and preparation methods.
Variations & Substitutions
-
Whole Wheat Vanilla Bread: Substitute up to half of the all-purpose flour with whole wheat flour for a nuttier flavor and added fiber.
-
Vanilla Bean Bread: For a more intense vanilla flavor, use vanilla bean paste or scrape the seeds from a vanilla bean into the dough.
-
Sweet Vanilla Bread: Increase the amount of sugar to 1/4 cup for a sweeter loaf, perfect for desserts.
-
Gluten-Free Vanilla Bread: Use a gluten-free all-purpose flour blend in place of the regular flour. You may need to adjust the amount of water to achieve the desired dough consistency. Be aware that the texture and flavor will differ from the original recipe.
-
Dairy-Free Vanilla Bread: This recipe is already virtually dairy-free, assuming your vanilla extract is not made with dairy.
FAQs (Frequently Asked Questions)
Q: Can I use active dry yeast instead of instant yeast?
A: Yes, you can. Use the same amount (6g), but activate it in the lukewarm water for 5-10 minutes before adding the other ingredients. Look for a foamy layer on top to indicate the yeast is active.
Q: My dough isn’t rising. What could be the problem?
A: Several factors can affect the dough’s rise: the yeast might be old or inactive, the water might be too hot or too cold, or the room temperature might be too low. Make sure your yeast is fresh, your water is lukewarm, and the room is warm.
Q: Can I make this bread in a bread machine?
A: Yes, you can! Simply add all the ingredients to your bread machine according to the manufacturer’s instructions, and select the basic bread cycle.
Q: How do I know when the bread is done baking?
A: The bread is done when the top is golden brown, and the internal temperature reaches 190-210°F (88-99°C). You can also tap the bottom of the loaf; it should sound hollow.
Q: The crust of my bread is getting too dark. What can I do?
A: If the crust is browning too quickly, tent the loaf with aluminum foil during the last 10-15 minutes of baking.
Final Thoughts
I hope this recipe brings you as much joy as it has brought me and my family over the years. Tricia’s Vanilla Bread is more than just a recipe; it’s a reminder to appreciate the simple pleasures in life, like the comforting aroma of freshly baked bread and the warmth of a shared meal. So, preheat your oven, gather your ingredients, and let the magic of baking fill your home. And please, don’t hesitate to share your feedback – I’d love to hear about your vanilla bread adventures! Maybe pair it with some homemade strawberry jam for the full experience.