
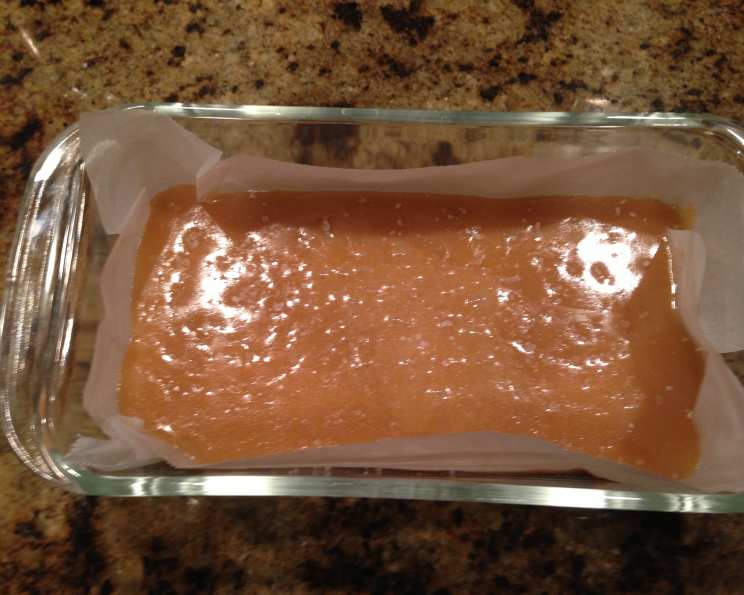
Tried and True Caramel Candy
The scent of caramel simmering on the stovetop always transports me back to my childhood Christmases. I can almost feel the warmth of my grandmother’s kitchen, the joyful chaos of family gatherings, and the anticipation of unwrapping those little squares of golden goodness. She always made a huge batch, wrapping each piece individually in waxed paper, a true labor of love. These caramels weren’t just candy; they were edible memories, and this recipe is my attempt to recreate that magic.
Recipe Overview
- Prep Time: 5 minutes
- Cook Time: 15 minutes
- Total Time: 20 minutes
- Yields: 50 pieces
- Serves: 15
- Dietary Type: Vegetarian
Ingredients
- 1 cup sugar
- ¾ cup corn syrup
- ½ cup (1 stick) butter
- 1 cup heavy cream
- ½ teaspoon vanilla extract
Equipment Needed
- Heavy-bottomed saucepan
- Wooden spoon or heat-resistant spatula
- Small bowl
- Ice water
- Greased counter or parchment paper
- Pizza cutter
- Wax paper or parchment paper squares
Instructions
-
Combine the sugar, corn syrup, butter, and heavy cream in a heavy-bottomed saucepan. Using a heavy-bottomed pan is crucial; it will distribute the heat evenly and prevent scorching.
-
Place the saucepan over medium-high heat. Stir constantly with a wooden spoon or heat-resistant spatula as the ingredients melt and combine. Consistent stirring is key to preventing the sugar from burning and ensuring a smooth, even caramel.
-
Once the mixture begins to boil, continue stirring constantly. The mixture will bubble vigorously and gradually thicken. Be patient and keep stirring!
-
As the mixture cooks, it will begin to thicken considerably. Remember that the caramel will firm up significantly as it cools, so don’t overcook it at this stage. You’re aiming for the medium-ball stage, but since we are bypassing the candy thermometer, we’re relying on the drop test.
-
Prepare your drop test station: Fill a small bowl with ice water and set it next to the stove. This allows for quick and easy testing without interrupting the cooking process too much.
-
Begin testing for doneness using the drop test. When you suspect the caramel is nearing the desired firmness, take a spoonful of the hot mixture and carefully drop it into the ice water.
-
Wait about 30 seconds to allow the caramel to cool completely in the ice water. This cooling time is important for accurate assessment.
-
Remove the caramel from the ice water and squish it between your fingers. Assess the consistency. If it is not as firm as you would like, continue cooking the caramel for a bit longer and repeat the drop test.
-
Continue testing every minute or two until the caramel reaches your desired firmness. Remember, it will continue to firm up as it cools. The longer you cook it, the firmer the final caramel will be. For soft, chewy caramels, aim for a consistency that is slightly softer than you ultimately want. For firmer, more toffee-like caramels, cook it a bit longer.
-
Once the caramel has reached the desired consistency, remove it from the heat and stir in the vanilla extract. Stir until well combined. This ensures that the vanilla flavor is evenly distributed throughout the caramel.
-
Allow the caramel to cool slightly in the pan for a few minutes. This will help prevent it from splattering when you pour it out.
-
Pour the slightly cooled caramel onto a greased counter or a sheet of parchment paper. Make sure the surface is well-greased or lined to prevent sticking.
-
Let the caramel cool completely to room temperature. This will take several hours, so be patient. Don’t try to rush the cooling process, or the caramel will be difficult to cut.
-
Once the caramel is firm, use a pizza cutter to cut it into strips. Then, cut the strips into small, bite-sized pieces. A pizza cutter makes quick work of this task and ensures clean, even cuts.
-
Wrap each piece of caramel individually in squares of wax paper or parchment paper. Parchment paper is a better choice for softer caramels, as they are more likely to stick to wax paper.
Expert Tips & Tricks
- Invest in a good quality heavy-bottomed saucepan. This will ensure even heat distribution and prevent scorching.
- Don’t stop stirring! Constant stirring is essential for preventing the sugar from burning and ensuring a smooth, even caramel.
- Adjust the cooking time to achieve your desired caramel consistency. The longer you cook it, the firmer it will be.
- If your caramel becomes grainy, it means the sugar has crystallized. You can try adding a tablespoon or two of water and stirring vigorously to dissolve the crystals.
- For a richer flavor, use salted butter instead of unsalted. The salt will enhance the sweetness of the caramel.
- Add a pinch of sea salt to the finished caramel for a salted caramel variation.
Serving & Storage Suggestions
Serve the caramel candies at room temperature. They are perfect as a sweet treat after a meal or as a homemade gift.
Store the individually wrapped caramels in an airtight container at room temperature for up to two weeks. For longer storage, you can freeze them for up to two months. Thaw them at room temperature before serving. If you live in a warm climate, consider storing them in the refrigerator to prevent them from becoming too soft.
Nutritional Information
| Nutrient | Amount per Serving | % Daily Value |
|---|---|---|
| Calories | 205 kcal | 10% |
| Total Fat | 12 g | 18% |
| Saturated Fat | 8 g | 37% |
| Cholesterol | 38 mg | 12% |
| Sodium | 61 mg | 2% |
| Total Carbohydrate | 26 g | 8% |
| Dietary Fiber | 0 g | 0% |
| Sugars | 17 g | 69% |
| Protein | 0 g | 0% |
Variations & Substitutions
- Salted Caramel: Add a pinch of sea salt to the finished caramel or use salted butter.
- Vanilla Bean Caramel: Scrape the seeds from one vanilla bean into the saucepan along with the other ingredients.
- Chocolate Caramel: Add 2 ounces of chopped bittersweet chocolate to the caramel after removing it from the heat. Stir until melted and smooth.
- Nutty Caramel: Stir in ½ cup of chopped nuts (such as pecans, walnuts, or almonds) after removing the caramel from the heat.
- Spiced Caramel: Add ½ teaspoon of ground cinnamon or nutmeg to the saucepan along with the other ingredients.
FAQs (Frequently Asked Questions)
Q: What if my caramel is too soft?
A: If your caramel is too soft, you can re-melt it in the saucepan and cook it for a longer period, testing frequently with the drop test until it reaches your desired firmness.
Q: What if my caramel is too hard?
A: Unfortunately, there’s not much you can do to soften caramel that has become too hard. It’s best to carefully monitor the cooking process to prevent overcooking.
Q: Can I use a candy thermometer instead of the drop test?
A: Yes, you can use a candy thermometer. Cook the caramel to 245-250°F (118-121°C) for firm caramels, or 235-240°F (113-116°C) for softer caramels. Remember that altitude can affect these temperatures, so the drop test might be more reliable.
Q: Why is my caramel grainy?
A: Grainy caramel is usually caused by sugar crystals forming. Make sure to stir the mixture constantly as it cooks to prevent crystallization. If graininess does occur, try adding a tablespoon or two of water and stirring vigorously to dissolve the crystals.
Q: How long does this caramel last?
A: Stored properly in an airtight container, these caramels will last for about two weeks at room temperature or up to two months in the freezer.
Final Thoughts
I hope this recipe brings you as much joy as it has brought me over the years. Don’t be intimidated by the process; with a little patience and attention to detail, you’ll be rewarded with delicious, homemade caramel candies that are perfect for sharing with friends and family. So go ahead, tie on your apron, and give it a try. I’m sure you’ll find that this recipe is a keeper! Pair these with a hot cup of coffee or a glass of cold milk for the perfect treat.