
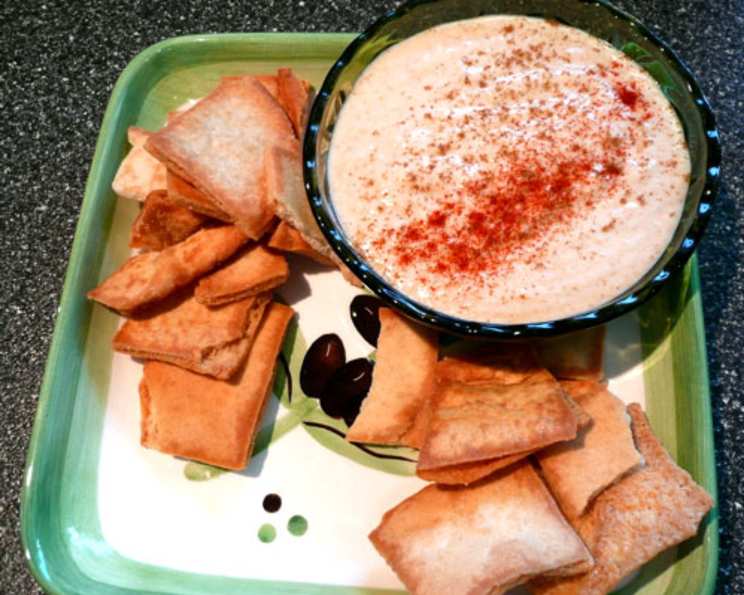
Tried and True Hummus
The aroma of warm pita, the swirl of olive oil, the creamy, comforting dip… Hummus has always been a part of my story. I remember summer evenings spent in my grandmother’s kitchen, the whir of her ancient food processor filling the air as she transformed humble chickpeas into a magical spread. She always had a crowd around her table, eager to dunk, scoop, and savor the taste of home. To this day, the simple act of making hummus transports me back to those cherished moments, reminding me of family, tradition, and the joy of sharing good food.
Recipe Overview
- Prep Time: 10 minutes
- Cook Time: 5 minutes
- Total Time: 15 minutes
- Servings: 4
- Yield: About 2 cups
- Dietary Type: Vegan, Gluten-Free, Dairy-Free
Ingredients
- 1 (15 ounce) can chickpeas
- 2 teaspoons lemon juice
- 2 tablespoons tahini (sesame paste)
- 2 large garlic cloves
- ¼ teaspoon salt
- 1 teaspoon olive oil, plus extra for garnish
- 1 teaspoon ground cumin, plus extra for garnish
- Paprika (for garnish, optional)
Equipment Needed
- Saucepan
- Food processor
- Serving dish
Instructions
- Begin by heating the chickpeas in a saucepan. Bring them to a boil over medium heat.
- Once boiling, reduce the heat and let them simmer for about 5 minutes. This step helps to soften the chickpeas, resulting in a smoother hummus.
- Reserve ½ cup of the cooking liquid. This liquid is crucial for achieving the perfect consistency.
- In a food processor, combine the heated chickpeas, reserved chickpea juice, lemon juice, tahini, garlic cloves, salt, and olive oil.
- Blend the ingredients until smooth. Stop the food processor halfway through to scrape down the sides of the bowl, ensuring that everything is evenly incorporated. Continue blending until you reach a creamy, consistent texture.
- Pour the hummus into a serving dish.
- Drizzle generously with olive oil and sprinkle with ground cumin and paprika (if using).
- For an optional touch of freshness, garnish with sliced tomatoes and kalamata olives.
- Serve immediately with toasted pita bread, fresh vegetables, or crackers. The hummus will taste even better the next day as the flavors meld together!
Expert Tips & Tricks
- Tahini Quality Matters: Opt for a high-quality tahini that is smooth and creamy, with a slightly nutty flavor. Avoid tahini that is bitter or overly thick.
- Garlic Taming: If you prefer a milder garlic flavor, try roasting the garlic cloves before adding them to the food processor. Roasting mellows out the garlic and adds a subtle sweetness.
- Ice Water Secret: For an extra creamy texture, add a tablespoon or two of ice water while blending. The cold water helps to emulsify the ingredients and create a lighter, airier hummus.
- Lemon Juice Adjustment: Taste the hummus after blending and adjust the amount of lemon juice to your liking. Some prefer a tangier hummus, while others prefer a more subtle flavor.
- Chickpea Skin Removal: For the absolute smoothest hummus, you can remove the skins from the chickpeas before blending. This is a bit time-consuming, but the results are worth it for a truly luxurious texture.
- Warming the Chickpeas: Heating the chickpeas before blending helps them break down more easily, resulting in a smoother hummus.
- Tahini Separation: Tahini tends to separate in the jar. Make sure to stir it very well before measuring it out for the recipe.
Serving & Storage Suggestions
Serve your homemade hummus with warm pita bread, cut vegetables like carrots, cucumbers, and bell peppers, or spread it on sandwiches and wraps. It also makes a delicious dip for falafel or grilled meats.
- Room Temperature: Hummus can be left at room temperature for up to 2 hours.
- Refrigerator: Store leftover hummus in an airtight container in the refrigerator for up to 5 days. The flavors will actually develop and deepen over time.
- Freezer: Hummus can also be frozen for up to 3 months. Thaw it in the refrigerator overnight before serving. Note that the texture may change slightly after freezing, but the flavor will still be delicious.
- Reheating: If refrigerated, let the hummus sit at room temperature for about 15-20 minutes before serving to soften slightly. You can also add a drizzle of olive oil and a sprinkle of cumin to freshen it up.
Nutritional Information
| Nutrient | Amount per Serving | % Daily Value |
|---|---|---|
| Calories | 184.4 kcal | N/A |
| Calories from Fat | 54 g | 30% |
| Total Fat | 6.1 g | 9% |
| Saturated Fat | 0.8 g | 4% |
| Cholesterol | 0 mg | 0% |
| Sodium | 470 mg | 19% |
| Total Carbohydrate | 27 g | 9% |
| Dietary Fiber | 5.5 g | 21% |
| Sugars | 0.1 g | 0% |
| Protein | 6.8 g | 13% |
Note: Nutritional information is an estimate and may vary based on specific ingredients and preparation methods.
Variations & Substitutions
- Spicy Hummus: Add a pinch of cayenne pepper or a dash of hot sauce to the food processor for a spicy kick. You can also blend in a roasted jalapeño pepper.
- Roasted Red Pepper Hummus: Roast a red bell pepper until the skin is blackened, then peel, seed, and add it to the food processor along with the other ingredients.
- Sun-Dried Tomato Hummus: Add a handful of oil-packed sun-dried tomatoes to the food processor for a tangy and flavorful twist.
- Herb Hummus: Blend in a handful of fresh herbs like parsley, cilantro, or dill for a vibrant green hummus.
- Beet Hummus: Roast a beet until tender, then peel and add it to the food processor for a beautiful pink hummus with a slightly sweet flavor.
- Different Beans: While chickpeas are traditional, you can experiment with other beans like white beans or black beans for a different flavor profile.
- Nut-Free Option: If you have a sesame allergy, you can try substituting the tahini with another nut butter, such as almond butter or cashew butter. The flavor will be different, but still delicious.
FAQs (Frequently Asked Questions)
Q: Why is my hummus grainy?
A: Grainy hummus is often caused by using low-quality tahini or not blending the ingredients long enough. Make sure to use smooth, high-quality tahini and blend the hummus for several minutes until it reaches a creamy consistency.
Q: Can I make hummus without a food processor?
A: While a food processor is ideal, you can also use a high-powered blender. You may need to add a bit more liquid to help the ingredients blend smoothly.
Q: How can I make my hummus lighter and fluffier?
A: Adding ice water while blending helps to create a lighter, airier texture. You can also whip the hummus for a few minutes after blending to incorporate more air.
Q: What’s the best way to toast pita bread for serving with hummus?
A: You can toast pita bread in the oven, on the stovetop, or in a toaster. For oven-toasted pita, brush the bread with olive oil and bake at 350°F (175°C) for 5-7 minutes, or until golden brown.
Q: Can I add other spices to the hummus?
A: Absolutely! Feel free to experiment with different spices like smoked paprika, garlic powder, onion powder, or even a pinch of chili flakes. Adjust the amount to your liking.
Final Thoughts
Now it’s your turn to create your own batch of this tried and true hummus! Don’t be afraid to experiment with different flavors and variations to find your perfect blend. This recipe is a wonderful base to build upon. Share your creations with friends and family, and let the simple act of dipping, scooping, and savoring bring you closer together. Whether you enjoy it as a snack, appetizer, or part of a larger meal, this hummus is sure to become a staple in your kitchen. Consider pairing it with a crisp, dry white wine or a refreshing iced tea for the ultimate culinary experience. Bon appétit!