
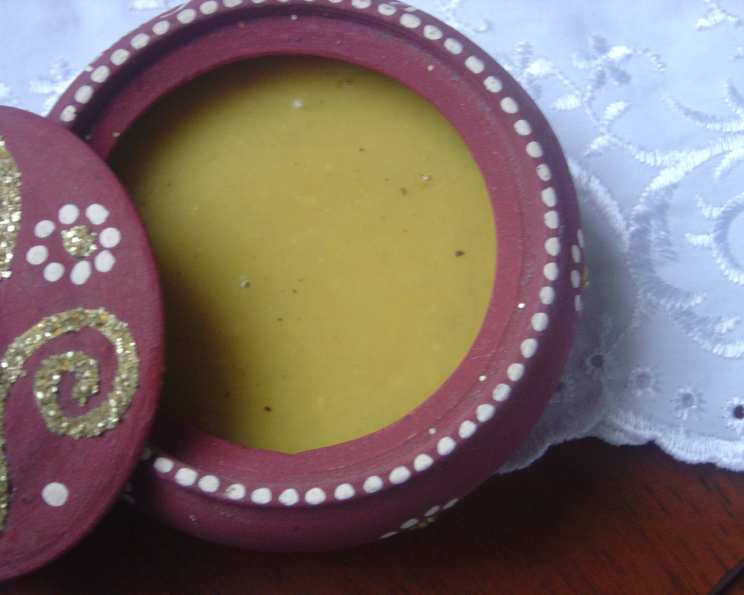
Trinidadian Dhal: A Taste of Home
The aroma of simmering split peas, infused with turmeric and garlic, instantly transports me back to my grandmother’s kitchen in Trinidad. I remember the comforting yellow hue of the dhal, its creamy texture, and the way it would cling perfectly to a bed of fluffy rice. For me, it wasn’t just a meal; it was a warm embrace, a taste of love and family tradition that nourished both body and soul. Each spoonful held stories of generations past, whispered secrets, and the simple joys of sharing a meal together.
Recipe Overview
- Prep Time: 10 minutes
- Cook Time: 30 minutes
- Total Time: 40 minutes
- Servings: 4
- Yield: About 4 cups
- Dietary Type: Vegan
Ingredients
- 1 cup split peas
- 2 cups water
- 1 teaspoon turmeric powder
- 2 garlic cloves
- ¼ cup onion, finely chopped (optional)
- 1 teaspoon salt, or to taste
- 2 teaspoons oil or 2 teaspoons ghee (for tempering)
- ½ teaspoon cumin seed (geera)
- Caribbean pepper sauce (optional, to taste)
Equipment Needed
- Medium-sized pot
- Small pot (for tempering)
- Blender, immersion blender, or dhal gutnee (swizzle stick)
Instructions
- Begin by rinsing the split peas thoroughly under cold running water until the water runs clear. This helps to remove any excess starch and ensures a smoother final texture.
- In a medium-sized pot, combine the rinsed split peas with 2 cups of water. Bring the mixture to a boil over medium-high heat.
- Once boiling, add the turmeric powder, 1 minced garlic clove, hot pepper (if using), and onion (if using).
- Reduce the heat to low, cover the pot, and simmer gently until the split peas are tender and easily mashed. This usually takes about 20-30 minutes. Stir occasionally to prevent sticking and add more water if the mixture becomes too dry. The peas should be soft and easily broken down.
- Add the salt to taste.
- Now it’s time to purée the mixture. You can use a traditional dhal gutnee (swizzle stick) for a rustic texture, an immersion blender directly in the pot for convenience, or carefully transfer the mixture to a regular blender (in batches if necessary) for a super smooth consistency. Blend until the dhal reaches your desired thickness and smoothness.
- In a small pot, heat the oil or ghee over medium heat. Add the cumin seeds (geera) and the remaining minced garlic clove.
- Fry until the cumin seeds start to sizzle and become fragrant, and the garlic turns golden brown. Be careful not to burn the garlic, as it will become bitter. This process is called tempering, or “chongkay-ing” the dhal.
- Pour the hot oil and cumin/garlic mixture (the tempering) into the split peas mixture.
- Add pepper sauce to taste. Stir well to combine all the flavors. The tempering adds a nutty, aromatic depth to the dhal.
- Simmer gently for another 5 minutes to allow the flavors to meld together.
- Serve hot.
Expert Tips & Tricks
- For an even smoother dhal, soak the split peas in water for at least 30 minutes before cooking. This helps them to break down more easily.
- If you don’t have a dhal gutnee or immersion blender, you can use a potato masher to break down the split peas, although the texture will be slightly chunkier.
- Adjust the amount of water as needed during cooking to achieve your desired consistency. Some prefer a thicker dhal, while others like it more soupy.
- Don’t skip the tempering step! It’s crucial for adding that signature Trinidadian flavor to the dhal.
- If you’re sensitive to spice, start with a small amount of pepper sauce and add more to taste. Remember, a little goes a long way! You can also use a milder pepper or omit it entirely.
Serving & Storage Suggestions
Serve the dhal hot with steamed rice, roti, or as a hearty soup on its own. It’s also delicious with fried fish or alongside other curries.
Leftover dhal can be stored in an airtight container in the refrigerator for up to 3 days. To reheat, simply warm it gently on the stovetop over low heat, adding a splash of water if needed to loosen it up. You can also reheat it in the microwave.
For longer storage, the dhal can be frozen for up to 2 months. Thaw it overnight in the refrigerator before reheating.
Nutritional Information
| Nutrient | Amount per Serving | % Daily Value |
|---|---|---|
| Calories | 220 kcal | 11% |
| Total Fat | 5g | 6% |
| Saturated Fat | 1g | 5% |
| Cholesterol | 0mg | 0% |
| Sodium | 600mg | 26% |
| Total Carbohydrate | 35g | 13% |
| Dietary Fiber | 15g | 54% |
| Sugars | 5g | N/A |
| Protein | 15g | 30% |
Note: Nutritional information is an estimate and may vary based on specific ingredients and preparation methods.
Variations & Substitutions
- For a richer flavor, use coconut milk instead of water when cooking the split peas.
- Add other vegetables to the dhal, such as spinach, pumpkin, or sweet potatoes.
- Use different types of lentils or peas, such as yellow split peas or red lentils, for a slightly different flavor and texture.
- Experiment with different spices, such as garam masala, coriander, or ginger, to customize the flavor to your liking.
FAQs (Frequently Asked Questions)
Q: What are split peas?
A: Split peas are dried peas that have been peeled and split in half. They cook more quickly than whole peas and have a mild, slightly sweet flavor.
Q: Can I make this in a pressure cooker or Instant Pot?
A: Yes, you can! Reduce the cooking time significantly. Cook on high pressure for about 10-12 minutes, followed by a natural pressure release.
Q: Is dhal supposed to be thick or thin?
A: The consistency is a matter of personal preference. Adjust the amount of water to achieve your desired thickness.
Q: Can I make this without onion and garlic?
A: Yes, you can omit the onion and garlic if you prefer. However, they do add a lot of flavor to the dish.
Q: What if I don’t have Caribbean pepper sauce?
A: You can use any hot sauce you like, or a chopped chili pepper. Start with a small amount and add more to taste. Alternatively, you can omit the pepper altogether.
Final Thoughts
I hope this recipe inspires you to try making Trinidadian dhal at home. It’s a simple, wholesome dish that’s packed with flavor and tradition. Don’t be afraid to experiment with different variations and substitutions to make it your own. And, if you’re feeling adventurous, serve it alongside some homemade roti for the full Trinidadian experience! Enjoy, and feel free to share your creations and feedback with me.