
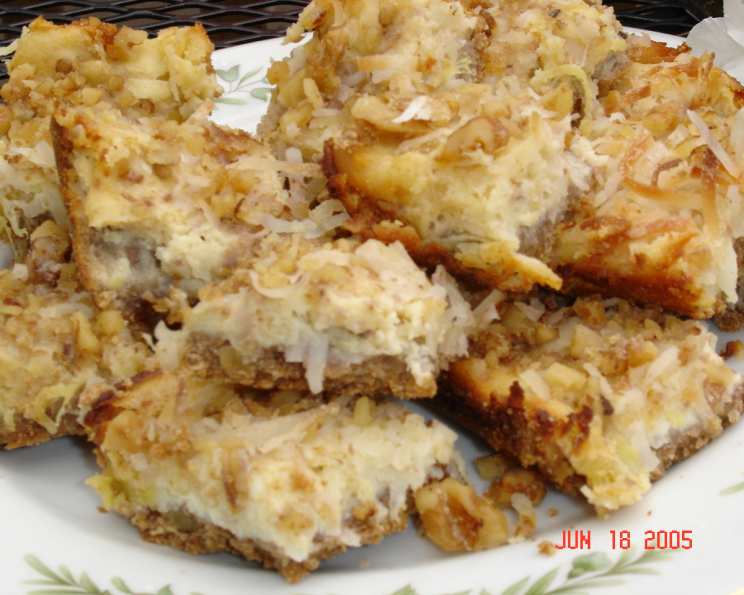
Tropical Paradise Bars: A Taste of Sunshine
My grandmother, Nana Elsie, wasn’t known for her adventurous palate. Roast beef with Yorkshire pudding was her culinary comfort zone. However, once a year, when the summer heat was at its peak, she’d pull out a recipe card splattered with pineapple juice and handwritten notes. This card held the secret to her “Tropical Paradise Bars,” a little square of sunshine that transported us, at least in our imaginations, to a far-off island. The sweet-tart pineapple, the creamy filling, and that buttery, nutty crust—it was a burst of unexpected flavor that always made me smile, and now, it brings me right back to her kitchen.
Recipe Overview
- Prep Time: 20 minutes
- Cook Time: 47 minutes
- Total Time: 67 minutes
- Yields: 1 pan (approximately 9 bars)
- Dietary Type: Not specified (can be modified for dairy-free)
Ingredients
For the Crust:
- ½ cup chopped walnuts
- 1 cup whole wheat flour
- ⅓ cup margarine
- ¼ cup lightly packed brown sugar
For the Filling:
- 1 (19 ounce) can crushed pineapple
- 1 (8 ounce) package cream cheese
- 1 large egg
- ¼ cup granulated sugar
- 1 teaspoon vanilla extract
- ⅓ cup sweetened flaked coconut
Equipment Needed
- 9-inch square baking pan
- Mixing bowls
- Electric mixer (optional)
- Measuring cups and spoons
- Wire rack
Instructions
-
Prepare the Crust: Begin by preheating your oven to 350°F (180°C). Chop ¼ cup (50 mL) of the walnuts. Reserve the remaining ¼ cup for topping.
-
Combine Crust Ingredients: In a mixing bowl, combine the chopped walnuts, whole wheat flour, margarine, and brown sugar.
-
Press into Pan: Press the mixture firmly and evenly into the bottom of a 9-inch square baking pan. It should form a compact crust.
-
Bake the Crust: Bake the crust in the preheated oven for 12 minutes. This par-baking ensures a firm base for the filling.
-
Prepare the Pineapple: While the crust is baking, drain the can of crushed pineapple very well. Use a fine-mesh sieve and press down with a spoon to remove as much liquid as possible. Excess moisture can make the filling soggy.
-
Make the Filling: In a separate mixing bowl, beat the cream cheese until smooth and creamy. An electric mixer makes this easier, but you can also use a sturdy whisk.
-
Add Filling Ingredients: Add the egg, granulated sugar, and vanilla extract to the cream cheese. Beat until well combined and smooth.
-
Incorporate Pineapple: Gently fold in the well-drained crushed pineapple into the cream cheese mixture. Make sure it’s evenly distributed.
-
Pour Filling over Crust: Once the crust is partially baked, remove it from the oven. Pour the pineapple filling evenly over the warm crust.
-
Add Toppings: Sprinkle the remaining chopped walnuts and the sweetened flaked coconut evenly over the filling.
-
Bake the Bars: Return the pan to the oven and bake for approximately 35 minutes, or until the filling is golden brown and set. The edges should be slightly puffed up, and the center should no longer jiggle.
-
Cool Completely: Remove the bars from the oven and place them on a wire rack to cool completely. Allow them to cool to room temperature before cutting into squares. The cooling process allows the filling to firm up fully.
Expert Tips & Tricks
- Draining the Pineapple: Seriously, don’t skimp on draining the pineapple! This is crucial to preventing a soggy bottom. Place the drained pineapple on a few layers of paper towels and gently press to extract any extra moisture.
- Cream Cheese Temperature: Softened cream cheese is your friend. Take it out of the refrigerator about 30 minutes before you plan to use it. This will make it much easier to beat and incorporate smoothly into the filling.
- Nut Variations: Feel free to experiment with different nuts in the crust. Macadamia nuts or pecans would also be delicious. Just be sure to chop them finely.
- Baking Time: Oven temperatures can vary. Start checking the bars around 30 minutes, and if the topping is browning too quickly, loosely tent the pan with foil to prevent burning.
- Make Ahead: These bars are perfect for making ahead. Bake them a day in advance and store them in the refrigerator. The flavors meld together beautifully overnight.
Serving & Storage Suggestions
These Tropical Paradise Bars are best served chilled or at room temperature. Cut them into squares or rectangles and arrange them on a platter for an appealing presentation. A dollop of whipped cream or a scoop of vanilla ice cream would be a delightful addition.
To store leftovers, keep them in an airtight container in the refrigerator. They will stay fresh for up to 3-4 days. You can also freeze the bars for longer storage. Wrap them individually in plastic wrap and then place them in a freezer-safe bag or container. Frozen bars will keep for up to 2 months. Thaw them in the refrigerator before serving.
Nutritional Information
(Note: This is an estimated nutrition table. Actual values may vary based on specific ingredients and portion sizes.)
| Nutrient | Amount per Serving | % Daily Value |
|---|---|---|
| Calories | 280 kcal | 14% |
| Total Fat | 16g | 25% |
| Saturated Fat | 8g | 40% |
| Cholesterol | 45mg | 15% |
| Sodium | 120mg | 5% |
| Total Carbohydrate | 30g | 10% |
| Dietary Fiber | 2g | 8% |
| Sugars | 20g | – |
| Protein | 4g | 8% |
Variations & Substitutions
- Dairy-Free: Substitute the cream cheese with a plant-based cream cheese alternative. Be sure to choose one that is firm and designed for baking. You can also use a flax egg (1 tablespoon ground flaxseed mixed with 3 tablespoons water, let sit for 5 minutes) in place of the egg. Ensure your margarine is also dairy-free.
- Gluten-Free: Replace the whole wheat flour with a gluten-free all-purpose blend. You may need to add a little extra moisture (1-2 tablespoons of water) to the crust if it seems too dry.
- Nut-Free: Substitute the walnuts in the crust with toasted sunflower seeds or pumpkin seeds.
- Citrus Zest: Add a teaspoon of lime or orange zest to the filling for an extra burst of tropical flavor.
- Other Fruits: Consider adding a layer of sliced bananas or mangoes between the crust and the pineapple filling.
FAQs (Frequently Asked Questions)
Q: Can I use fresh pineapple instead of canned?
A: While you can use fresh pineapple, canned crushed pineapple is recommended because it’s already broken down and the canning process softens it. If using fresh, be sure to chop it very finely and cook it slightly to release some of the juices before draining it well.
Q: Why is it important to bake the crust before adding the filling?
A: Par-baking the crust prevents it from becoming soggy when the moist filling is added. It creates a sturdier base that can support the filling and maintain its texture.
Q: Can I use a different type of sugar in the crust?
A: Yes, you can substitute the brown sugar with granulated sugar or coconut sugar if you prefer. However, the brown sugar adds a slight molasses flavor that complements the other ingredients.
Q: How do I know when the bars are done baking?
A: The filling should be set and golden brown around the edges. The center may still have a slight jiggle, but it should not be liquid. A toothpick inserted into the center should come out clean or with a few moist crumbs.
Q: Can I freeze the entire pan of bars before cutting them?
A: Yes, you can freeze the entire pan of bars before cutting them. Allow them to cool completely, then wrap the entire pan tightly with plastic wrap and foil before freezing. Thaw in the refrigerator before cutting and serving.
Final Thoughts
These Tropical Paradise Bars are more than just a dessert; they’re a little slice of happiness. Whether you’re seeking a taste of the tropics or simply want a comforting and flavorful treat, this recipe is sure to please. Gather your ingredients, preheat your oven, and let the aroma of pineapple and coconut transport you to a sun-drenched beach. Don’t hesitate to experiment with variations and substitutions to make it your own. And if you make these bars, I’d love to hear your thoughts and see your creations! So go on, bake a batch and share the sunshine!