
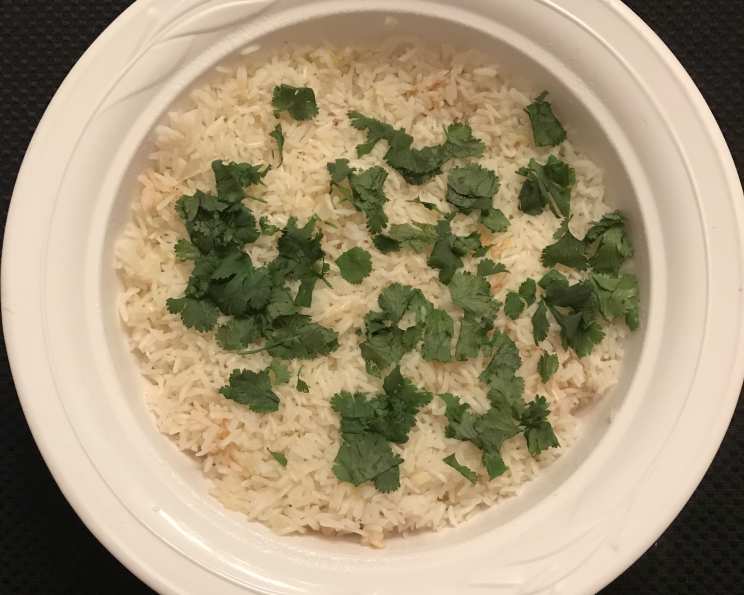
True Brazilian Rice: A Culinary Staple
The first time I tasted real Brazilian rice, it wasn’t in a fancy restaurant, but in the bustling kitchen of a small, family-run “boteco” in Rio de Janeiro. Dona Maria, the matriarch, presided over the steaming pots, her hands moving with the practiced grace of decades. The aroma alone was intoxicating – a delicate dance of garlic, onion, and perfectly cooked rice. She ladled a generous portion onto my plate, beside a vibrant feijoada, and urged me to try it. That first bite – fluffy, subtly flavorful, and utterly comforting – transported me. It was more than just rice; it was a taste of Brazilian soul. And it’s a taste I’ve been chasing ever since.
Recipe Overview
- Prep Time: 5 minutes
- Cook Time: 20 minutes
- Total Time: 25 minutes
- Servings: 4
- Dietary Type: Gluten-Free
Ingredients
- 1 cup basmati rice or jasmine rice
- 1 ½ tablespoons olive oil
- 1 small onion, finely chopped
- 2 garlic cloves, finely chopped
- 1 teaspoon salt
- 2 cups boiling water
Equipment Needed
- Medium saucepan with a lid
Instructions
-
Begin by thoroughly washing the rice under cold running water. This crucial step removes excess starch, resulting in a fluffier, less sticky final product. Continue washing until the water runs clear. Once washed, set the rice aside to dry slightly.
-
While the rice is drying, prepare your aromatics. Finely chop the onion and garlic cloves. The finer the chop, the more evenly their flavors will infuse the rice.
-
Place a medium saucepan over medium heat. Add the olive oil and allow it to heat up for a moment. You want the oil to shimmer slightly before adding the aromatics.
-
Add the chopped onion and garlic to the heated oil. Sauté them until they become fragrant and translucent, approximately 3 minutes. Be careful not to brown or burn the garlic, as this can impart a bitter flavor.
-
Add the dry rice to the pan with the sautéed onions and garlic. Stir constantly for an additional 3-4 minutes, ensuring that the rice does not stick to the bottom of the pan. This step toasts the rice grains, enhancing their nutty flavor and helping to prevent clumping during cooking.
-
Carefully pour in the two cups of boiling water, followed by the salt. The boiling water helps to maintain the temperature and ensures even cooking.
-
Give the rice a gentle stir to combine all the ingredients. Then, immediately place a lid on the pan.
-
Cook on medium heat for 8 minutes. During this time, resist the temptation to lift the lid, as this will release steam and affect the cooking process.
-
After 8 minutes, decrease the heat to low and continue cooking for another 10-15 minutes, or until all the water has evaporated. Again, keep the lid on. The exact cooking time may vary depending on your stove and the type of rice you use.
-
Once the cooking time has elapsed, check to see if the rice is cooked through and if all the water has been absorbed. If the rice is still not cooked to your liking, or if there is still water remaining in the pan, add a little bit more boiling water (about ¼ cup at a time) and continue cooking on low heat until the rice is tender and the water is gone. You can also check the rice by tilting the pot slightly; if no water pools at the bottom, it’s likely done.
-
Once the rice is cooked, remove the pan from the heat and let it rest, covered, for 5-10 minutes. This allows the steam to redistribute throughout the rice, resulting in an even more fluffy texture.
-
Finally, gently fluff the rice with a fork before serving. This separates the grains and prevents them from sticking together.
Expert Tips & Tricks
- Rice Quality Matters: While this recipe works well with both basmati and jasmine rice, the quality of the rice will significantly impact the final result. Opt for high-quality brands for the best flavor and texture.
- Don’t Skip the Washing: Washing the rice is non-negotiable. It removes excess starch, preventing a gummy consistency.
- Toast it Right: Toasting the rice with the aromatics adds a subtle nutty flavor that elevates the dish. Watch carefully to prevent burning.
- Perfect Water Ratio: The 2:1 water-to-rice ratio is a good starting point, but you might need to adjust it slightly depending on your rice and stove. Keep an eye on the rice and add more water as needed.
- Patience is Key: Avoid the urge to stir or lift the lid too often. Let the rice steam undisturbed for the best results.
Serving & Storage Suggestions
Serve this classic Brazilian rice as a side dish to complement a variety of meals. It pairs perfectly with feijoada, grilled meats, stews, and even vegetarian dishes. To elevate the presentation, garnish with fresh parsley or cilantro.
Leftover rice can be stored in an airtight container in the refrigerator for up to 3-4 days. To reheat, add a splash of water to the rice before microwaving or steaming. This will help to rehydrate the grains and prevent them from drying out.
While freezing cooked rice is possible, the texture may change slightly upon thawing. To freeze, spread the cooked rice in a single layer on a baking sheet and freeze until solid. Then, transfer the frozen rice to an airtight freezer bag or container. It can be stored in the freezer for up to 2 months. Thaw completely before reheating.
Nutritional Information
| Nutrient | Amount per Serving | % Daily Value |
|---|---|---|
| Calories | 225 kcal | 11% |
| Total Fat | 6.4 g | 9% |
| Saturated Fat | 1 g | 4% |
| Cholesterol | 0 mg | 0% |
| Sodium | 589 mg | 24% |
| Total Carbohydrate | 37.9 g | 12% |
| Dietary Fiber | 1.9 g | 7% |
| Sugars | 1.1 g | 4% |
| Protein | 4 g | 7% |
Variations & Substitutions
- Coconut Rice: Substitute half of the water with coconut milk for a richer, more fragrant rice.
- Herbaceous Rice: Add fresh herbs like thyme, rosemary, or bay leaf during cooking for an aromatic twist.
- Turmeric Rice: Add ½ teaspoon of turmeric powder to the rice while sautéing with the onions and garlic for a vibrant color and subtle flavor.
- Brown Rice Version: While this recipe is optimized for white rice, you can adapt it for brown rice. Use brown rice instead of white rice and increase the cooking time and water quantity as needed. Brown rice typically requires a longer cooking time and more water than white rice.
FAQs (Frequently Asked Questions)
Q: Why is it important to wash the rice before cooking?
A: Washing the rice removes excess starch, which can cause the rice to become sticky and clump together during cooking.
Q: Can I use chicken broth instead of water?
A: Yes, using chicken broth will add more flavor to the rice. Be sure to reduce the amount of salt you add accordingly.
Q: How do I know when the rice is done cooking?
A: The rice is done when all the water has been absorbed and the grains are tender. You can also check by tilting the pot; if no water pools at the bottom, it’s likely done.
Q: What if my rice is still hard after the cooking time?
A: If your rice is still hard, add a little bit more boiling water (about ¼ cup) and continue cooking on low heat until the rice is tender.
Q: Can I make this recipe in a rice cooker?
A: Yes, you can adapt this recipe for a rice cooker. Follow the manufacturer’s instructions for cooking rice, using the same ingredients and ratios as in the recipe.
Final Thoughts
This recipe is more than just a way to cook rice; it’s a connection to the heart of Brazilian cuisine. The simple yet profound flavors, the careful techniques, and the comforting aroma all contribute to an experience that transcends the ordinary. I encourage you to try this recipe, experiment with variations, and share your own culinary journey with others. Serve it alongside a flavorful moqueca or a hearty churrasco and transport yourself to the sun-kissed shores of Brazil, one delicious grain at a time. Bom apetite!