
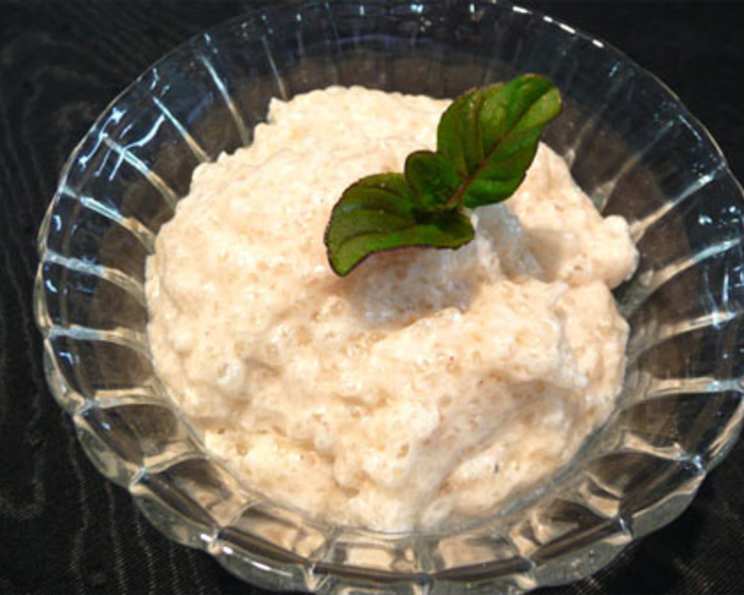
Truvia Coconut Tapioca Pudding: A Guilt-Free Indulgence
The clatter of spoons against ceramic bowls, the soft glow of the kitchen light, the hushed anticipation as we waited for our grandmother’s tapioca pudding to cool—these are the moments etched into my memory. As a child, that creamy, comforting sweetness was pure magic. Now, with a few health tweaks and a lot of love, I’ve recreated that classic comfort food using Truvia and coconut milk. It may not be exactly the same as Grandma’s, but it’s close enough to transport me back to those happy, carefree days, and that’s all that matters.
Recipe Overview
- Prep Time: 5 minutes
- Cook Time: 6 minutes
- Total Time: 11 minutes
- Servings: 4-6
- Dietary Type: Dairy-Free, Gluten-Free, Sugar-Free (with modifications)
Ingredients
- ¼ cup quick-cooking tapioca (I recommend Let’s Do…Organic’s Tapioca granules)
- 4 packets Truvia artificial sweetener
- 1 egg, lightly beaten
- ⅛ teaspoon nutmeg
- 1 (14 ounce) can unsweetened coconut milk
- 1 cup water (or 1 cup milk, if not dairy-free)
- 1 teaspoon vanilla
- ¼ cup shredded coconut (optional)
Equipment Needed
- Saucepan
- Whisk
Instructions
- In a saucepan, vigorously whisk together the tapioca, Truvia, egg, nutmeg, coconut milk, and water. The goal here is to ensure the tapioca is evenly dispersed and no clumps remain. A good whisking now will prevent lumps later.
- Allow the mixture to sit for 5 minutes. This resting period allows the tapioca granules to begin absorbing the liquid, which will contribute to the pudding’s creamy texture. Don’t skip this step!
- Place the saucepan over medium heat and bring the mixture to a boil, stirring often. Constant stirring is key to preventing the tapioca from sticking to the bottom of the pan and burning.
- Once boiling, reduce the heat slightly to maintain a gentle boil and continue stirring for 3 minutes, or until the tapioca granules are clear and soft. The tapioca should transition from opaque white to nearly translucent. A few granules might still have a tiny white dot at the center, but the majority should be clear. If the mixture becomes too thick too quickly, reduce the heat further and add a tablespoon or two of water.
- Remove the saucepan from the heat.
- Stir in the vanilla and shredded coconut (if using). The vanilla adds a warm, comforting flavor, while the coconut provides a pleasant textural contrast.
- Transfer the pudding to individual serving dishes or a larger bowl. The mixture will thicken further as it cools.
- Enjoy warm or chilled.
Expert Tips & Tricks
- Tapioca Choice: Using quick-cooking tapioca is essential for this recipe’s short cooking time. Pearl tapioca will require a much longer soaking and cooking time.
- Sweetness Level: The amount of Truvia can be adjusted to your personal preference. Start with 4 packets and add more if needed, tasting as you go. Remember that the sweetness will mellow slightly as the pudding cools.
- Texture Perfection: For an ultra-smooth pudding, use an immersion blender to blend the mixture after cooking. Be careful not to over-blend, as this can make the pudding gummy.
- Preventing Skin Formation: To prevent a skin from forming on the surface of the pudding as it cools, press a piece of plastic wrap directly onto the surface.
- Coconut Milk Considerations: Full-fat coconut milk will yield a richer, creamier pudding. If you prefer a lighter pudding, use light coconut milk, but be aware that the texture may be slightly thinner.
- Egg Alternatives: The egg helps with the pudding’s structure and texture, but if you’re looking for an egg-free version, you can try substituting it with a tablespoon of cornstarch mixed with two tablespoons of water. Add this slurry to the pudding during the last minute of cooking.
- Nutmeg Enhancement: Don’t underestimate the power of nutmeg! It complements the coconut and Truvia beautifully, masking any potential aftertaste from the sweetener. If you don’t have nutmeg, a pinch of cinnamon or cardamom would also work well.
Serving & Storage Suggestions
Serve the Truvia Coconut Tapioca Pudding warm or chilled, depending on your preference. For a more elegant presentation, garnish with a sprinkle of shredded coconut, a dusting of nutmeg, or a few fresh berries.
Leftover pudding can be stored in an airtight container in the refrigerator for up to 3 days. The pudding may thicken further upon refrigeration, so you might need to add a splash of milk or water to loosen it up before serving. Reheat gently in the microwave or on the stovetop over low heat, stirring frequently. I don’t recommend freezing tapioca pudding as it can affect the texture, causing it to become grainy.
Nutritional Information
Please note that the following is an estimate, as nutritional values can vary based on specific ingredients and brands.
| Nutrient | Amount per Serving | % Daily Value |
|---|---|---|
| Calories | 150 kcal | 8% |
| Total Fat | 10g | 15% |
| Saturated Fat | 8g | 40% |
| Cholesterol | 20mg | 7% |
| Sodium | 50mg | 2% |
| Total Carbohydrate | 10g | 4% |
| Dietary Fiber | 1g | 4% |
| Sugars | 2g | N/A |
| Protein | 2g | 4% |
Variations & Substitutions
- Tropical Twist: Add a tablespoon of shredded mango or pineapple during the last minute of cooking for a tropical flavor boost.
- Chocolate Coconut: Stir in a tablespoon of unsweetened cocoa powder along with the vanilla for a decadent chocolate coconut pudding. You might need to adjust the Truvia to taste.
- Spice It Up: Add a pinch of ground ginger or cardamom for a warm, aromatic twist.
- Nutty Delight: Incorporate a handful of chopped almonds, walnuts, or pecans for added texture and flavor.
- Vegan Variation: Replace the egg with 1 tablespoon of cornstarch mixed with 2 tablespoons of water, as suggested earlier. This will provide the necessary thickening power without using eggs.
FAQs (Frequently Asked Questions)
Q: Can I use regular sugar instead of Truvia?
A: Yes, you can substitute the Truvia with 1/3 cup of regular sugar or 1/4 cup of agave nectar. Keep in mind this will change the nutritional content and it will no longer be a sugar-free recipe.
Q: My pudding is too thin. What did I do wrong?
A: There are a few possible reasons. You may not have cooked it long enough, or your heat was too low. Be sure to maintain a gentle boil for the full 3 minutes, stirring constantly. Also, ensure you are using quick-cooking tapioca.
Q: Can I use a different type of milk?
A: Absolutely! If you’re not dairy-free, whole milk or 2% milk will work well. Almond milk or oat milk are also good alternatives for a dairy-free option. Just be mindful of their sweetness levels, as some brands can be quite sweet.
Q: My pudding has lumps. How can I fix it?
A: If your pudding has lumps, you can try using an immersion blender to smooth it out. Alternatively, you can strain the pudding through a fine-mesh sieve to remove the lumps.
Q: How long does this pudding last in the fridge?
A: This pudding will keep well in an airtight container in the refrigerator for up to 3 days.
Final Thoughts
So there you have it – my take on a classic tapioca pudding, lightened up and made suitable for those of us navigating dietary restrictions. I truly hope you enjoy this recipe as much as I do. Don’t be afraid to experiment with the variations and substitutions to create your own unique version. And please, share your feedback and any tips or tricks you discover along the way! I’d love to hear how it turns out for you. Perhaps you could serve it with a sprinkle of cinnamon and a cup of chamomile tea for a cozy evening treat. Happy cooking!