
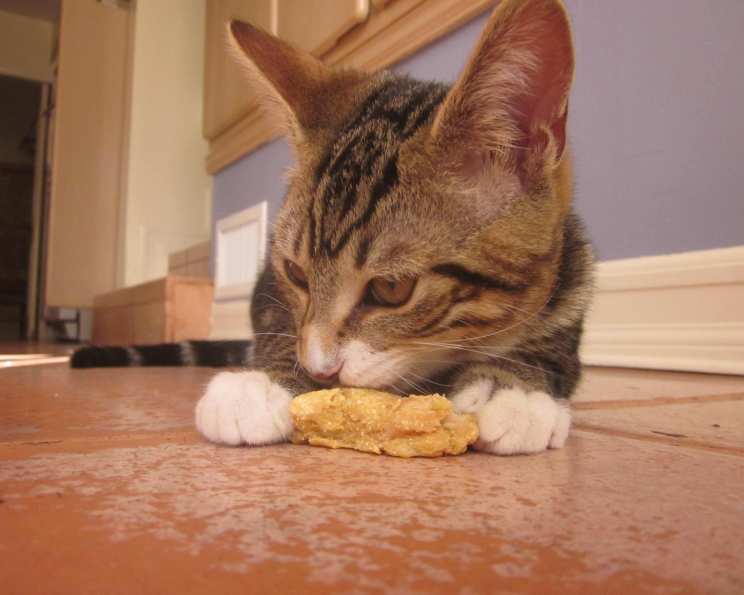
Tuna Treats for Cats: A Purrfectly Delicious Snack
I’ll never forget the first time I tried making homemade treats for my ginger tabby, Marmalade. He was usually a picky eater, turning his nose up at even the most expensive gourmet wet food. But one afternoon, while experimenting with some leftover tuna, I whipped up a batch of these simple treats. The moment he caught a whiff, he was practically climbing the counter, his purrs vibrating like a tiny motor. The joy in his eyes as he crunched down on those little tuna bites was all the reward I needed. From that day on, these tuna treats became a staple in our household, a symbol of our shared love and a way to show him just how special he is.
Recipe Overview
- Prep Time: 10 minutes
- Cook Time: 20 minutes
- Total Time: 30 minutes
- Servings: Varies
- Yield: Approximately 20-30 small treats
- Dietary Type: High Protein
Ingredients
- 3 tablespoons egg whites, scrambled
- 6 ounces canned tuna in water, undrained
- 1/4 cup cornmeal
- 1/2 cup whole wheat flour
Equipment Needed
- Cookie sheet
- Mixing bowl
- Fork or spoon
- Measuring cups and spoons
- Greased cookie sheet
Instructions
-
Preheat your oven to 350 degrees Fahrenheit (175 degrees Celsius). Make sure your oven rack is positioned in the center for even baking.
-
Prepare the egg whites by scrambling them lightly. You don’t need to cook them fully; just break up the yolks and whites until they are somewhat combined. Chop the scrambled egg whites into smaller pieces. This will help them mix more evenly into the treat dough.
-
In a mixing bowl, combine the chopped egg whites, canned tuna in water (including the water!), cornmeal, and whole wheat flour. The tuna water adds extra flavor and moisture to the treats.
-
Using a fork or spoon, thoroughly mix all the ingredients until they form a cohesive dough. Don’t overmix; just ensure everything is well combined. The mixture will be fairly wet and sticky, which is normal.
-
Press the dough into a ball. This makes it easier to manage and flatten.
-
Lightly grease a cookie sheet to prevent the treats from sticking. You can use cooking spray or a bit of oil spread with a paper towel.
-
Flatten the dough onto the greased cookie sheet. Aim for a thickness of about 1/4 inch (0.6 cm). You can use your fingers or a rolling pin (lightly floured) to achieve an even thickness.
-
Using a knife or pizza cutter, cut the flattened dough into bite-sized pieces suitable for cats. Small squares or rectangles work well. Remember, these are treats, so keep them small.
-
Bake in the preheated oven for 20 minutes. The treats should be lightly golden brown around the edges and firm to the touch. Check for doneness by pressing gently on one of the treats; it should feel solid, not squishy.
-
Remove the cookie sheet from the oven and allow the treats to cool slightly on the cookie sheet before transferring them to a cooling rack. They will firm up further as they cool.
-
Serve the treats to your cat while they are still slightly warm. Most cats find them more appealing when they are not ice-cold.
Expert Tips & Tricks
-
Adjust Flour as Needed: The amount of flour required may vary depending on the moisture content of the tuna and the size of the egg whites. If the dough is too wet and sticky to handle, add a tablespoon of flour at a time until it reaches a manageable consistency.
-
Don’t Overbake: Overbaking can result in hard, dry treats that your cat may not enjoy. Watch the treats closely during the last few minutes of baking and remove them from the oven as soon as they are golden brown.
-
Vary the Size and Shape: Experiment with different sizes and shapes to see what your cat prefers. Some cats prefer smaller, crunchy treats, while others like larger, softer ones.
-
Add a Pinch of Catnip: If your cat enjoys catnip, you can add a small pinch to the dough for an extra enticing treat.
Serving & Storage Suggestions
Serve these tuna treats as a special snack for your cat, not as a replacement for their regular meals. Offer a few treats at a time and observe your cat’s reaction to gauge their preference.
Store leftover treats in an airtight container in the refrigerator for up to 5 days. You can also freeze them for longer storage, up to 2 months. Thaw frozen treats in the refrigerator before serving. Serve the treats slightly warm for optimal taste and aroma. Reheat by wrapping in a paper towel and microwaving for 5-10 seconds.
Nutritional Information
| Nutrient | Amount per Serving (Estimated) |
|---|---|
| Calories | 15-20 kcal |
| Protein | 1-2 g |
| Fat | Less than 1 g |
| Carbohydrates | 2-3 g |
| Fiber | Less than 1 g |
Note: These values are estimates and may vary depending on the exact ingredients used.
Variations & Substitutions
-
Gluten-Free Option: Substitute the whole wheat flour with a gluten-free all-purpose flour blend.
-
Fishy Fun: Try using salmon or mackerel instead of tuna for a different flavor profile. Just ensure the fish is canned in water, not oil.
-
Add Some Herbs: Mix in a teaspoon of finely chopped parsley or cilantro for added nutrients and flavor.
-
Egg-Free Version: While the egg whites help bind the ingredients, you could experiment with a small amount of unsweetened applesauce or plain yogurt as a binder instead. Be sure to monitor the consistency and adjust the flour accordingly.
FAQs (Frequently Asked Questions)
Q: Can I use tuna packed in oil instead of water?
A: While you can, it’s generally not recommended. Tuna packed in oil is much higher in fat, which isn’t ideal for cats. Tuna in water is a healthier option.
Q: How often can I give my cat these treats?
A: Treats should only make up a small portion of your cat’s daily diet. Limit these tuna treats to a few per day.
Q: My cat doesn’t like the texture of these treats. What can I do?
A: Try baking them for a shorter time to make them softer, or add a bit more tuna water to the dough for a moister treat.
Q: Can kittens eat these treats?
A: Yes, but in smaller portions. Kittens have more sensitive stomachs, so introduce the treats slowly and monitor for any digestive issues.
Q: How can I tell if the treats have gone bad?
A: If the treats develop a strange odor, change in texture, or show signs of mold, discard them immediately.
Final Thoughts
Making these Tuna Treats for your feline friend is a simple yet rewarding way to show them your love. The process is straightforward, the ingredients are readily available, and the result is a delicious and healthy snack that your cat will adore. So, go ahead, don your apron, and whip up a batch of these delectable treats. I am confident that your cat will thank you with purrs, head-butts, and maybe even a little extra cuddling! And while you’re at it, why not experiment with different flavors and ingredients to discover your cat’s ultimate treat recipe? Happy baking!