
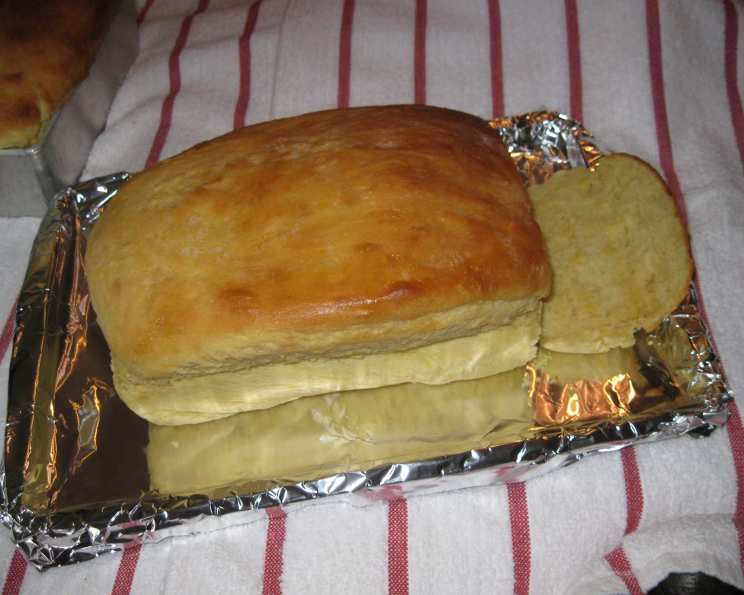
Tupperware Bread: A Blast From the Past
The aroma of freshly baked bread has always been a portal to simpler times for me. As a child, I remember watching my grandmother knead dough on her well-worn countertop, her hands moving with a practiced grace that only years of experience could provide. The warmth emanating from the oven, the yeasty scent permeating the air – those are sensory memories etched in my mind. This Tupperware Bread recipe brings back those comforting feelings; it’s a no-fuss, reliable bread that’s perfect for sharing (or keeping all to yourself!).
Recipe Overview
- Prep Time: 25 minutes
- Cook Time: 50 minutes
- Total Time: 1 hour 15 minutes + Rising Time
- Servings: 4 loaves
- Yield: 4 loaves
- Dietary Type: Vegetarian
Ingredients
- 3 ¾ cups warm water
- 3 (¼ ounce) packages dry yeast
- 6 tablespoons sugar
- 5 teaspoons salt
- 10 cups flour
- 6 tablespoons butter, softened
- 2 eggs
Equipment Needed
- Large Mixing Bowl (Tupperware Fix n’ Mix bowl is ideal, but any large bowl will work)
- Electric Mixer
- 4 Loaf Pans
- Moist Towel
Instructions
- In a large mixing bowl, preferably a Tupperware Fix n’ Mix bowl, combine the warm water and dry yeast. Let stand for 5-10 minutes until the yeast is foamy. This step is crucial to ensure the yeast is active and will properly leaven the bread.
- Add the sugar, softened butter, eggs, and salt to the yeast mixture.
- Add 5 cups of the flour. Using an electric mixer, blend the ingredients until well combined. The dough will be quite wet and sticky at this stage.
- Gradually add the remaining 5 cups of flour, stirring by hand. This is where the dough will start to come together. It’s important to incorporate the flour gradually to avoid over-mixing. At this point, the dough will be very thick and sticky. Some people find it helpful to wear gloves during this stage to prevent the dough from sticking to their hands.
- Place the lid (or a tight-fitting cover) on the bowl. Let the dough rise in a warm place until the seal on the bowl pops off, or until the dough has doubled in size. This rising time can vary depending on the temperature of your kitchen. It can take anywhere from 1 to 2 hours, or even longer.
- Once the dough has risen, gently punch it down to release any excess air.
- Divide the dough into 4 equal portions.
- Grease four loaf pans. Place each portion of dough into a greased pan.
- Cover the loaf pans with a moist towel. Let the dough set for 40 minutes in a warm place. This allows the dough to proof, which is the final rise before baking.
- Preheat your oven to 350°F (175°C).
- Bake the bread for 50 minutes, or until golden brown and the internal temperature reaches 200-210°F (93-99°C). A good way to check for doneness is to insert a wooden skewer into the center of a loaf; if it comes out clean, the bread is done.
- Remove the bread from the oven and let it cool in the pans for a few minutes before transferring it to a wire rack to cool completely.
Expert Tips & Tricks
- Temperature is Key: Ensure the water is warm, but not hot. Too hot, and you’ll kill the yeast. Aim for around 105-115°F (40-46°C).
- Kneading Matters: While this recipe doesn’t require extensive kneading, make sure all the ingredients are well incorporated. Over-kneading can lead to tough bread.
- Rising Environment: A warm, draft-free environment is crucial for proper rising. Try placing the bowl in a slightly warmed oven (turned off!) or on top of the refrigerator.
- Butter Softening: Make sure your butter is softened to room temperature before adding it to the mix. This will help it incorporate more evenly into the dough.
- Egg Wash (Optional): For a shinier crust, brush the tops of the loaves with a beaten egg before baking.
- Doneness Check: If the bread is browning too quickly, tent it with foil during the last 15-20 minutes of baking.
- Salt: Don’t skip the salt. It controls the yeast and enhances the overall flavor of the bread.
Serving & Storage Suggestions
This Tupperware Bread is delicious served warm with butter, jam, or cheese. It’s also fantastic for sandwiches, toast, or French toast.
- Storage: Store cooled bread in an airtight container at room temperature for up to 3 days.
- Refrigeration: For longer storage, wrap the bread tightly in plastic wrap and store it in the refrigerator for up to a week.
- Freezing: To freeze, slice the bread, wrap it tightly in plastic wrap, and then place it in a freezer bag. It can be frozen for up to 3 months. Thaw at room temperature before serving.
- Reheating: To reheat, wrap a slice of bread in a damp paper towel and microwave for 10-15 seconds. Alternatively, you can toast it in a toaster or toaster oven.
Nutritional Information
(Note: These values are approximate and can vary depending on specific ingredients and portion sizes.)
| Nutrient | Amount per Serving | % Daily Value |
|---|---|---|
| Calories | 354 kcal | 18% |
| Total Fat | 8g | 10% |
| Saturated Fat | 4g | 20% |
| Cholesterol | 75mg | 25% |
| Sodium | 769mg | 32% |
| Total Carbohydrate | 52g | 17% |
| Dietary Fiber | 2g | 8% |
| Sugars | 5g | — |
| Protein | 8g | 16% |
Variations & Substitutions
- Whole Wheat Bread: Substitute up to half of the all-purpose flour with whole wheat flour for a nuttier flavor and added fiber.
- Herb Bread: Add 1-2 tablespoons of dried herbs, such as rosemary, thyme, or oregano, to the dough for a savory twist.
- Cheese Bread: Add 1 cup of shredded cheese, such as cheddar or mozzarella, to the dough.
- Sweet Bread: Increase the sugar to 1/2 cup and add 1 teaspoon of cinnamon for a sweet bread perfect for breakfast.
- Gluten-Free: While not tested with this specific recipe, you could try substituting the all-purpose flour with a gluten-free all-purpose blend. Be aware that the texture may be different.
- Dairy-Free: Substitute the butter with a dairy-free butter alternative or vegetable oil.
FAQs (Frequently Asked Questions)
Q: Why is my bread not rising?
A: Several factors can affect rising. Make sure your yeast is fresh and active, the water is the correct temperature, and the dough is in a warm place.
Q: My bread is too dense. What went wrong?
A: This could be due to over-mixing the dough, not using enough yeast, or not allowing the dough to rise for long enough.
Q: Can I use a stand mixer instead of an electric mixer?
A: Yes, you can use a stand mixer. Use the dough hook attachment and mix until the ingredients are well combined.
Q: How can I tell if my bread is done?
A: The bread should be golden brown and sound hollow when tapped on the bottom. An internal temperature of 200-210°F (93-99°C) indicates doneness.
Q: Can I add nuts or seeds to the dough?
A: Absolutely! Add about 1/2 to 1 cup of your favorite nuts or seeds to the dough after the first rise.
Final Thoughts
This Tupperware Bread recipe is more than just a set of instructions; it’s a connection to the past, a reminder of the simple pleasures of homemade goodness. Whether you’re a seasoned baker or just starting out, I encourage you to give this recipe a try. Share it with loved ones, experiment with different variations, and most importantly, enjoy the process of creating something delicious. And if you happen to have a vintage Tupperware Fix n’ Mix bowl, all the better! Let me know in the comments how your bread turns out – happy baking!