
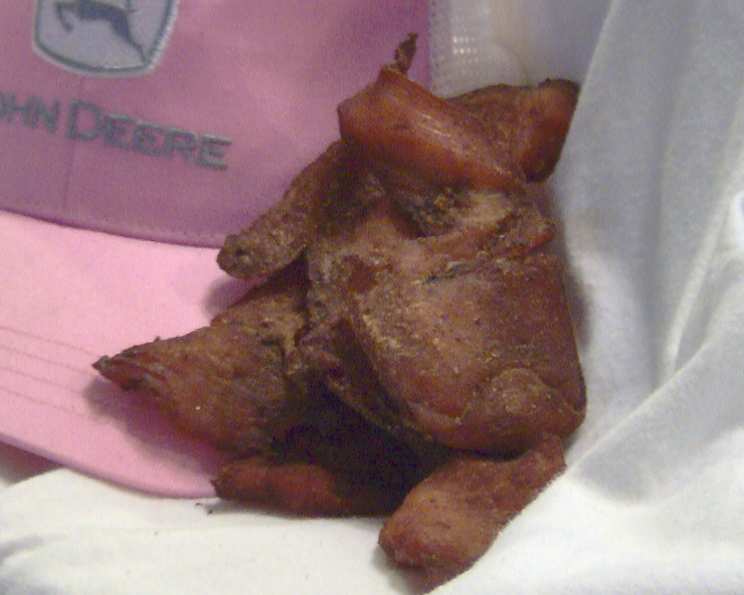
Savory Homemade Turkey Jerky: A Delicious & Healthy Snack
I remember family road trips when I was a kid. The hours seemed endless, but my dad always had a secret weapon – a Ziploc bag filled with his homemade jerky. The smoky, savory flavor kept us all happy, and it felt like a special treat made with love. While his was beef, this turkey jerky recipe evokes that same feeling of home, and it’s a healthier alternative that doesn’t compromise on taste.
Recipe Overview
- Prep Time: 30 minutes
- Cook Time: 3-6 hours
- Total Time: 3 hours 30 minutes to 6 hours 30 minutes (plus marinating time)
- Servings: 12-16
- Yield: Varies depending on thickness of slices
- Dietary Type: High Protein, Gluten-Free (check soy sauce label)
Ingredients
- 1 boneless turkey breast (skinned and trimmed of fat)
- ½ cup water
- ¼ cup soy sauce
- 2 tablespoons brown sugar (firmly packed)
- 2 teaspoons Worcestershire sauce
- 1 teaspoon fresh ground black pepper
- ½ teaspoon garlic powder
- ½ teaspoon onion powder
Equipment Needed
- Freezer
- Sharp knife or electric knife
- Mixing bowl
- Pot
- Meat thermometer
- Oven
- Paper towels
- Oven racks
- Wooden spoon
- Airtight container
Instructions
-
Begin by prepping the turkey breast. Remove the skin and any visible fat. Place the prepared turkey breast in the freezer for approximately 30 minutes. This partial freezing helps make slicing much easier.
-
Once the turkey breast is partially frozen, remove it from the freezer. Using a sharp knife, preferably an electric knife if you have one, carefully slice the turkey thinly against the grain. Consistent, thin slices are key for even drying.
-
In a mixing bowl, combine the water, soy sauce, brown sugar (firmly packed), Worcestershire sauce, fresh ground black pepper, garlic powder, and onion powder. Stir well to ensure the brown sugar is fully dissolved. This mixture is your marinade.
-
Add the sliced turkey to the bowl with the marinade. Stir thoroughly, making sure that all the turkey slices are completely coated in the marinade.
-
Cover the bowl tightly with plastic wrap or transfer the mixture to a resealable container. Refrigerate the turkey and marinade overnight, or for at least 8 hours. This allows the flavors to penetrate the meat, resulting in a more flavorful jerky.
-
The next day, when you are ready to begin the drying process, pour the turkey slices and the marinade into a pot. Place the pot on the stovetop over medium heat. Simmer the mixture until the internal temperature of the turkey reaches 160 degrees Fahrenheit (71 degrees Celsius), as measured with a meat thermometer. This step is crucial to eliminate any potential bacteria.
-
Preheat your oven to a low temperature of 150 degrees Fahrenheit (65 degrees Celsius). This low and slow method is ideal for drying the jerky without cooking it.
-
Drain the turkey slices from the marinade. Discard the marinade after draining; do not reuse it.
-
Pat the turkey slices dry with paper towels to remove excess moisture. This step helps the jerky dry more efficiently in the oven.
-
Lay the slices of turkey directly across your oven racks. Ensure that the slices are not overlapping, as this will prevent even drying.
-
Prop the oven door open slightly using a wooden spoon. This allows moisture to escape from the oven during the drying process.
-
Continue to cook the turkey this way for 3 to 6 hours, or until the jerky reaches the desired texture. The drying time will depend on the thickness of the slices and the humidity in your environment.
-
After 3 hours, begin testing the jerky for doneness. Remove a piece from the oven and allow it to cool to room temperature. Once cooled, bend the piece of jerky. It should be pliable but not brittle, and there should be no visible moisture. If there is any moisture present, continue to dry the jerky, checking every 30 minutes until it reaches the desired texture.
-
Once the jerky is dried to your liking, remove it from the oven and allow it to cool completely.
-
Store the cooled jerky in an airtight container for up to 2 months in the refrigerator, or for up to 6 months in the freezer.
Expert Tips & Tricks
-
Slicing Consistency: Uniformly thin slices are essential for even drying. If you don’t have an electric knife, ask your butcher to slice the turkey breast for you.
-
Marinade Enhancement: For a spicier kick, add a pinch of red pepper flakes or a dash of hot sauce to the marinade.
-
Oven Rack Placement: Experiment with different rack positions in your oven. Placing the racks closer to the heat source may shorten the drying time, but watch carefully to prevent burning.
-
Doneness Test: Properly dried jerky should bend without breaking and have a slightly leathery texture. If it snaps easily, it’s likely over-dried.
-
Preventing Over-Drying: If you notice the jerky is drying too quickly, reduce the oven temperature slightly.
Serving & Storage Suggestions
This homemade turkey jerky is perfect as a high-protein snack on its own. Pack it for hikes, road trips, or simply enjoy it as a healthy alternative to processed snacks. You can also chop it up and add it to salads or trail mixes for an extra boost of flavor and protein.
Proper storage is crucial for maintaining the quality of your jerky. Store it in an airtight container to prevent it from becoming stale or absorbing moisture. When stored in the refrigerator, it will last for up to 2 months. For longer storage, freeze the jerky for up to 6 months. There’s no need to reheat – just grab a piece and enjoy!
Nutritional Information
| Nutrient | Amount per Serving | % Daily Value |
|---|---|---|
| Calories | 162.2 kcal | N/A |
| Calories from Fat | 59 kcal | 37% |
| Total Fat | 6.6 g | 10% |
| Saturated Fat | 1.8 g | 9% |
| Cholesterol | 61.3 mg | 20% |
| Sodium | 401.3 mg | 16% |
| Total Carbohydrate | 3 g | 1% |
| Dietary Fiber | 0.1 g | 0% |
| Sugars | 2.5 g | N/A |
| Protein | 21.3 g | 42% |
Nutritional information is an estimate and may vary based on specific ingredients and portion sizes.
Variations & Substitutions
-
Gluten-Free: Ensure that the soy sauce you use is certified gluten-free. Tamari is a good substitute.
-
Spice Level: Adjust the amount of black pepper, or add red pepper flakes or cayenne pepper, to control the heat level.
-
Smoked Flavor: Add a teaspoon of liquid smoke to the marinade for a smoky flavor profile.
-
Sweet & Spicy: Add a tablespoon of honey or maple syrup to the marinade for a touch of sweetness.
-
Different Herbs and Spices: Experiment with other herbs and spices, such as smoked paprika, chili powder, or Italian seasoning, to create your own unique flavor combinations.
FAQs (Frequently Asked Questions)
Q: Why do I need to partially freeze the turkey breast before slicing?
A: Partially freezing the turkey breast makes it firmer and easier to slice thinly and evenly, which is essential for making jerky.
Q: Can I use a dehydrator instead of an oven?
A: Yes, you can use a dehydrator. Follow the manufacturer’s instructions for dehydrating meat, ensuring the internal temperature reaches 160°F (71°C) initially, and then dehydrate at the appropriate temperature until the jerky is properly dried.
Q: How do I know when the jerky is done?
A: The jerky is done when it is pliable but not brittle. It should bend without breaking and have no visible moisture.
Q: Is it safe to skip the simmering step and just marinate and dry the turkey?
A: No, it is not recommended to skip the simmering step. Simmering the turkey to an internal temperature of 160°F (71°C) is crucial to eliminate any potential bacteria, ensuring the jerky is safe to eat.
Q: Can I use a different type of meat for this recipe?
A: Yes, you can adapt this recipe for other lean meats, such as beef or venison. However, cooking times may vary depending on the thickness and type of meat used.
Final Thoughts
Making your own turkey jerky is a rewarding culinary experience. It allows you to control the ingredients, customize the flavors, and create a healthy and delicious snack that is far superior to store-bought versions. Don’t be afraid to experiment with different spices and seasonings to create your own signature jerky recipe. I encourage you to give this recipe a try and share your creations with friends and family. Pair it with your favorite craft beer for a truly satisfying snack experience!