
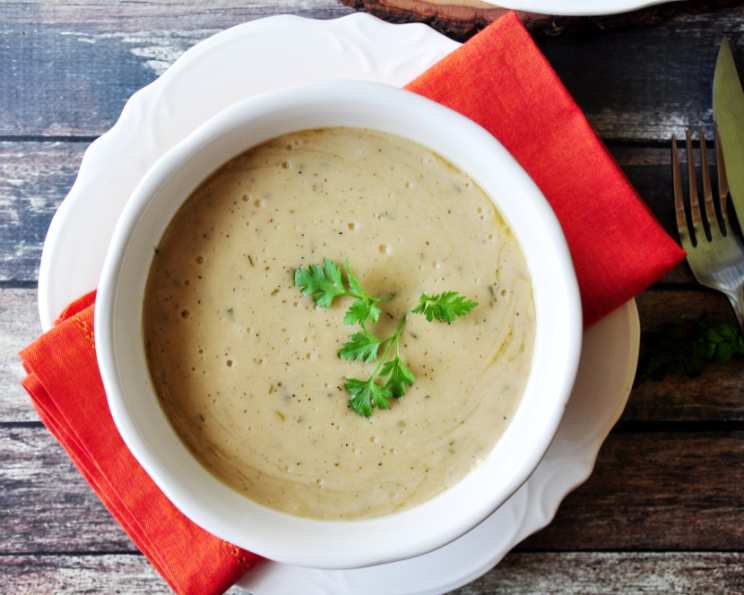
The Heart of Thanksgiving: My Foolproof Turkey Pan Gravy
My grandmother, Nana Elsie, made the best gravy. Not just at Thanksgiving, but always. Even a simple weeknight roast chicken was elevated to something extraordinary with her magical gravy. I remember standing on a stool next to her, watching her work at the stove, the rich aroma filling her tiny kitchen. She’d let me stir the pan, a privilege I took very seriously, and tell me secrets – like the importance of patience and a good whisk. Her gravy was never fancy, but it was always perfect; a comforting, flavorful hug in a bowl, and this recipe is my attempt to capture that magic, and keep her memory alive at every holiday gathering.
Recipe Overview
- Prep Time: 5 minutes
- Cook Time: 5 minutes
- Total Time: 10 minutes
- Servings: 6
- Yield: About 2 cups
- Dietary Type: Varies (can be made gluten-free)
Ingredients
- Turkey pan drippings (amount will vary, enough to coat the bottom of the saucepan)
- ¼ cup white wine
- ⅓ cup flour (can substitute with gluten-free all-purpose flour)
- 1 teaspoon parsley
- ¼ teaspoon garlic powder
- ¼ – ½ teaspoon salt (adjust to taste, depending on the saltiness of the drippings)
- ¼ teaspoon thyme
- ½ teaspoon pepper
- Water or broth (turkey or chicken, if needed to supplement drippings)
Equipment Needed
- Large saucepan
- Whisk (or hand blender)
- Measuring cups and spoons
Instructions
-
Begin by pouring the turkey pan drippings into a large saucepan. The amount you have will depend on your roasting method, but you want enough to generously coat the bottom of the pan. If you don’t have enough drippings, supplement with water or broth. Aim for at least ½ cup of liquid in the pan to start.
-
Place the saucepan over medium heat. Once the drippings are shimmering, carefully add the white wine. The wine will deglaze the pan, lifting any flavorful browned bits from the bottom. Use a spoon to scrape up these bits, incorporating them into the liquid. Allow the wine to simmer for about a minute to reduce slightly and cook off the alcohol.
-
In a separate bowl, whisk together the flour, parsley, garlic powder, salt, thyme, and pepper. This ensures even distribution of the dry ingredients and prevents clumping when added to the liquid. If using gluten-free flour, ensure it is a blend formulated for all-purpose use.
-
Gradually add the flour mixture to the saucepan, whisking constantly to prevent lumps from forming. This is a crucial step, so take your time and be diligent with your whisking. The mixture will thicken quickly, forming a paste.
-
Continue to cook the flour mixture, stirring constantly, for about 1-2 minutes. This step is important to cook out the raw flour taste. The mixture should be smooth and fragrant.
-
Now, gradually add water or broth to the pan, about ½ cup at a time, whisking continuously to incorporate it into the flour mixture. Continue adding liquid until the gravy reaches your desired consistency. Remember that the gravy will thicken slightly as it cools.
-
Bring the gravy to a gentle boil, then reduce the heat to low and simmer for about 3-5 minutes, stirring occasionally. This allows the flavors to meld and the gravy to thicken further. Taste and adjust the seasoning with salt and pepper as needed. If the gravy is too thick, add a little more water or broth to thin it out.
-
For an extra smooth gravy, especially if you encounter any lumps, use a hand blender (immersion blender) directly in the saucepan. Blend until the gravy is silky smooth. Be careful not to splash hot gravy!
-
Remove the gravy from the heat and serve immediately.
Expert Tips & Tricks
- Strain the Drippings: For the smoothest gravy, strain the turkey pan drippings through a fine-mesh sieve before starting the recipe. This will remove any solids or bits of bone that may have accumulated during roasting.
- Make a Roux: For an even richer flavor, you can brown the flour in the drippings before adding any liquid. This creates a roux, which adds depth and complexity to the gravy. Simply cook the flour in the drippings over medium heat, stirring constantly, until it turns a light golden brown color.
- Infuse with Herbs: For a more aromatic gravy, add a sprig of fresh rosemary or sage to the saucepan while it simmers. Remove the herbs before serving.
- Deglaze with Sherry: For a slightly sweeter and more complex flavor, substitute sherry for the white wine.
- Preventing Lumps: Whisk constantly while adding the flour mixture and the liquid. If lumps do form, use a hand blender to smooth them out.
Serving & Storage Suggestions
Serve the turkey pan gravy hot, spooned generously over slices of roasted turkey, mashed potatoes, stuffing, and any other Thanksgiving favorites. Leftover gravy can be stored in an airtight container in the refrigerator for up to 3 days. Reheat gently on the stovetop or in the microwave, adding a little water or broth if needed to thin it out. Gravy can also be frozen for up to 2 months. Thaw in the refrigerator overnight before reheating. Be sure to stir while reheating to ensure that it is smooth and well-combined.
Nutritional Information
| Nutrient | Amount per Serving | % Daily Value |
|---|---|---|
| Calories | 50 kcal | 3% |
| Total Fat | 2g | 3% |
| Saturated Fat | 0.5g | 3% |
| Cholesterol | 0mg | 0% |
| Sodium | 150mg | 7% |
| Total Carbohydrate | 6g | 2% |
| Dietary Fiber | 0.5g | 2% |
| Sugars | 0.5g | 1% |
| Protein | 1g | 2% |
Note: Nutritional information is an estimate and may vary based on specific ingredients and preparation methods.
Variations & Substitutions
- Gluten-Free Gravy: Use a gluten-free all-purpose flour blend instead of regular flour. Ensure the blend contains xanthan gum or another binding agent.
- Vegetarian Gravy: Use vegetable broth instead of turkey drippings and water. You can also add a tablespoon of butter or olive oil for richness. Consider using mushroom broth for a deeper, umami flavor.
- Dairy-Free Gravy: Use olive oil or vegan butter instead of turkey drippings. Use vegetable broth or water instead of milk or cream.
- Spicy Gravy: Add a pinch of cayenne pepper or a dash of hot sauce to the gravy for a little kick.
- Herbaceous Gravy: Add a mixture of fresh herbs, such as rosemary, thyme, and sage, to the gravy while it simmers. Remove the herbs before serving.
FAQs (Frequently Asked Questions)
Q: How do I prevent lumps in my gravy?
A: The key is to whisk constantly while adding the flour mixture to the pan. Make sure the flour is evenly distributed and doesn’t clump together.
Q: Can I make this gravy ahead of time?
A: Yes, you can make the gravy a day or two in advance and store it in the refrigerator. Reheat gently on the stovetop or in the microwave before serving.
Q: What if my gravy is too thick?
A: Simply add a little more water or broth to thin it out. Stir until the gravy reaches your desired consistency.
Q: What if my gravy is too thin?
A: Simmer the gravy over low heat for a few minutes, stirring occasionally, until it thickens. You can also whisk in a teaspoon of cornstarch mixed with a tablespoon of cold water.
Q: Can I freeze leftover gravy?
A: Yes, gravy can be frozen for up to 2 months. Thaw in the refrigerator overnight before reheating.
Final Thoughts
Making gravy from scratch can seem daunting, but it’s truly one of the most rewarding parts of preparing a Thanksgiving feast. This recipe is simple, adaptable, and guaranteed to impress your guests. Don’t be afraid to experiment with different herbs and seasonings to create a flavor that is uniquely yours. So gather your ingredients, grab your whisk, and get ready to create a gravy that will be the star of your holiday table. Happy cooking, and happy Thanksgiving! And remember Nana Elsie – a little patience and love go a long way.