
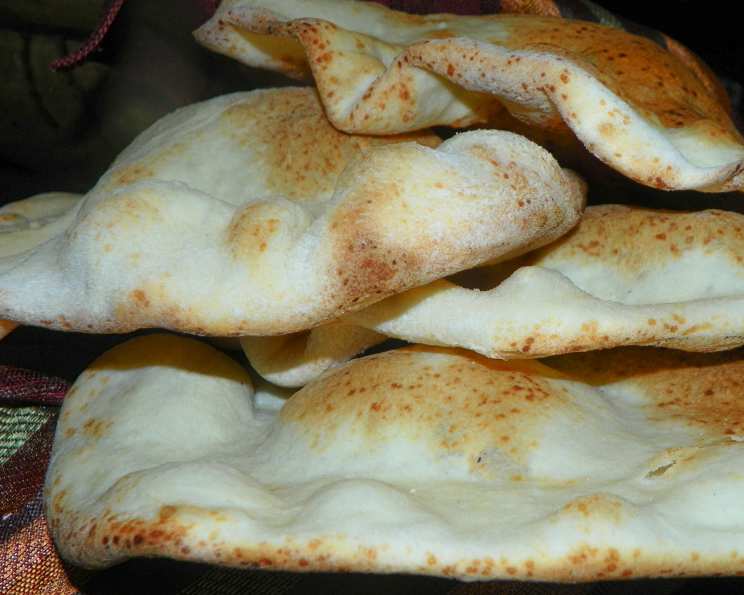
The Irresistible Charm of Homemade Turkish Pide: A Culinary Journey
The aroma of baking bread has always been my culinary compass, guiding me back to simpler times. I remember the first time I tasted authentic Turkish pide – it was in a small, family-run bakery tucked away in a bustling Istanbul side street. The warm, yeasty fragrance mingled with the scent of toasted sesame and spices, creating an irresistible pull. As I bit into the freshly baked flatbread, the soft, chewy texture and delicate flavor transported me. From that moment on, I was determined to recreate that magic in my own kitchen, capturing the essence of Turkish hospitality and culinary artistry.
Recipe Overview
- Prep Time: 1 hour 20 minutes (includes rising time)
- Cook Time: 30-40 minutes
- Total Time: 2 hours 36 minutes
- Servings: 8
- Yield: 8 breads
- Dietary Type: Vegetarian
Ingredients
- 4 teaspoons active dry yeast
- ½ teaspoon sugar
- ½ cup water
- ½ cup unbleached all-purpose flour
- 3 ½ cups bread flour
- 1 teaspoon salt
- 3 tablespoons olive oil
- 1 cup lukewarm water, plus
- 1 tablespoon lukewarm water
Equipment Needed
- Large mixing bowl
- Measuring cups and spoons
- Plastic wrap
- Clean kitchen towel
- Rolling pin
- Baking tiles (optional, but recommended)
- Large baking sheet or pizza peel
Instructions
-
Begin by activating the yeast. In a small bowl, dissolve 4 teaspoons of active dry yeast and ½ teaspoon of sugar in ½ cup of warm water. Let this mixture stand in a warm place for about 10 minutes, or until it becomes frothy. This indicates that the yeast is active and ready to use.
-
In the same bowl, stir in ½ cup of unbleached all-purpose flour. Cover the bowl tightly with plastic wrap and allow the mixture to rise in a warm place for 30 minutes. This creates a pre-ferment, or “starter”, that will contribute to the flavor and texture of the final pide.
-
In a large bowl, place 3 ½ cups of bread flour and create a well in the center. This well will serve as a reservoir for the wet ingredients.
-
Pour the yeast mixture (from step 2) into the well, followed by 1 teaspoon of salt, 3 tablespoons of olive oil, and 1 cup plus 1 tablespoon of lukewarm water.
-
Gradually incorporate the flour into the wet ingredients, mixing until a soft and sticky dough forms. It is important to add the flour slowly to avoid over-hydrating the dough.
-
Turn the dough out onto a lightly floured surface and knead it for 15 minutes. This is a crucial step for developing the gluten and achieving the desired chewy texture. The dough will be very sticky at first, but as you knead, it will gradually become smoother and less sticky.
-
Continue kneading until you have a damp and very springy dough that offers no resistance. This indicates that the gluten has been properly developed and the dough is ready for its first rise.
-
Place the dough in a lightly oiled bowl, turning it to coat all sides. Cover the bowl with plastic wrap and let it rise in a warm place for 1 hour, or until it has significantly swollen in volume. Alternatively, you can refrigerate the dough at this point until you are ready to use it. Refrigerating the dough will slow down the rising process and allow the flavors to develop further.
-
Once the dough has risen, gently place it on a lightly floured surface and roll it into a log shape. Divide the log into 8 equal pieces.
-
Roll each piece into a tight ball. This helps to create a smooth and even surface for shaping the pide.
-
Place the dough balls on a floured surface, cover them with a clean kitchen towel, and let them rest for 30 minutes. This resting period allows the gluten to relax, making the dough easier to roll out.
-
Preheat your oven to 450 degrees Fahrenheit (232 degrees Celsius). If you have baking tiles, place them in the oven to heat up for 30-40 minutes before baking. Baking tiles help to create a crispier crust by providing a consistent and high-temperature surface.
-
Roll out one dough ball on a floured surface using a rolling pin. Aim for a circle approximately 8 inches in diameter and about ¼ to ⅛ inch thick.
-
Brush the top of the rolled-out dough with olive oil. This will help to create a golden-brown crust and add flavor.
-
Bake the pide for 5-6 minutes, or until it is puffed up and golden brown. Remember that oven temperatures can vary, so keep a close eye on the pide as it bakes to prevent burning.
-
Repeat the rolling and baking process with the remaining dough balls.
-
As the pide come out of the oven, stack them in a large pan and keep them covered with a clean towel to keep them warm and soft until all are ready to eat.
-
If baking in batches, remember to allow the oven temperature to return to 450 degrees Fahrenheit after baking 2 or 3 pide to ensure even cooking.
-
Serve the pide hot. They can also be reheated by wrapping them in foil and placing them in a warm oven.
Expert Tips & Tricks
- Yeast Activation: Always check the expiration date of your yeast. If you’re unsure of its freshness, test it in a small amount of warm water with sugar before adding it to the rest of the ingredients. If it doesn’t foam after 10 minutes, the yeast is likely dead.
- Dough Stickiness: Don’t be afraid of a slightly sticky dough. Resist the urge to add too much flour, as this can result in a dry and tough pide.
- Oven Temperature: A hot oven is key to achieving a puffy, golden-brown crust. If your oven tends to run cool, increase the temperature slightly.
- Baking Stone Alternative: If you don’t have baking stones, use a heavy baking sheet preheated in the oven.
Serving & Storage Suggestions
Serve Turkish pide hot, straight from the oven. It’s delicious on its own or as an accompaniment to soups, stews, or grilled meats. Leftover pide can be stored at room temperature in an airtight container for up to 2 days, or in the refrigerator for up to 5 days. For longer storage, freeze the pide wrapped tightly in plastic wrap and then in a freezer bag. To reheat, wrap the pide in foil and warm in a 350°F (175°C) oven for 10-15 minutes, or until heated through.
Nutritional Information
| Nutrient | Amount per Serving | % Daily Value |
|---|---|---|
| Calories | 279.8 kcal | N/A |
| Calories from Fat | 52 g | 19% |
| Total Fat | 5.8 g | 8% |
| Saturated Fat | 0.8 g | 4% |
| Cholesterol | 0 mg | 0% |
| Sodium | 294.4 mg | 12% |
| Total Carbohydrate | 48.8 g | 16% |
| Dietary Fiber | 2.2 g | 8% |
| Sugars | 0.4 g | 1% |
| Protein | 7.3 g | 14% |
Variations & Substitutions
- Whole Wheat Pide: Substitute up to half of the bread flour with whole wheat flour for a nuttier flavor and added fiber.
- Garlic Herb Pide: Mix minced garlic and chopped fresh herbs (such as rosemary, thyme, or oregano) into the olive oil before brushing it on the dough.
- Seed Pide: Sprinkle sesame seeds, poppy seeds, or nigella seeds on top of the olive oil before baking.
- Gluten-Free Pide: While challenging, you can attempt a gluten-free version using a blend of gluten-free flours and a binder like xanthan gum. The texture will be different but still enjoyable.
FAQs (Frequently Asked Questions)
Q: Why is my pide dough so sticky?
A: Pide dough is naturally a bit sticky due to the high hydration level. Resist the urge to add too much flour, as this can make the bread tough. Just keep kneading on a lightly floured surface.
Q: Can I make the dough ahead of time?
A: Yes, you can refrigerate the dough after the first rise for up to 24 hours. This will allow the flavors to develop further.
Q: How do I get the pide to puff up during baking?
A: A hot oven and a well-developed gluten structure are key. Make sure your oven is preheated to the correct temperature and that you knead the dough thoroughly.
Q: My pide is browning too quickly. What should I do?
A: If your pide is browning too quickly, lower the oven temperature slightly or tent it with foil during the last few minutes of baking.
Q: Can I freeze the baked pide?
A: Yes, baked pide freezes well. Wrap them tightly in plastic wrap and then in a freezer bag. Reheat in a warm oven.
Final Thoughts
Embrace the joy of baking and embark on your own Turkish pide adventure! This recipe is a gateway to a world of flavors and textures, offering a delightful experience from start to finish. Don’t be afraid to experiment with variations and personalize it to your liking. And most importantly, share your creations with loved ones and savor the warmth and satisfaction of homemade bread. Happy baking!