
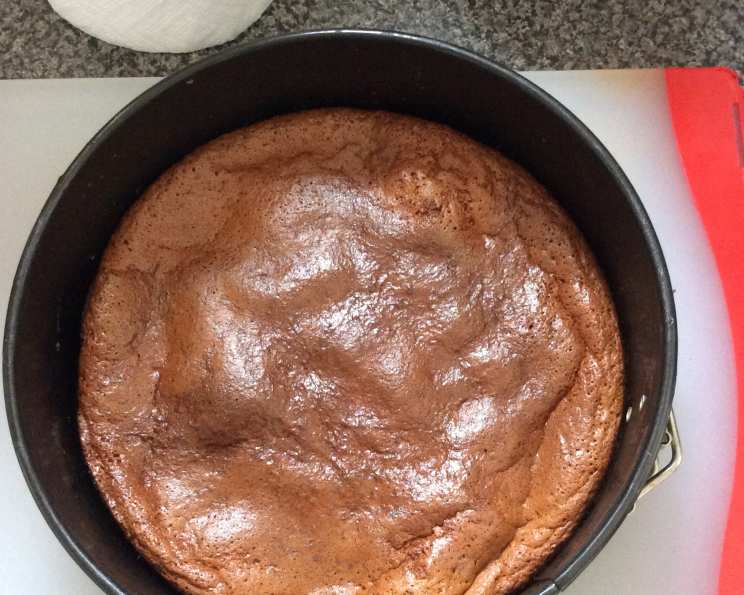
The Astonishingly Simple Two-Ingredient Chocolate Cake
I’ll never forget the first time I encountered this cake. I was a young, aspiring chef, slaving away in a Michelin-starred kitchen, surrounded by complex recipes and intricate techniques. One evening, during a rare lull, the pastry chef, a gruff but secretly kind soul, winked at me and said, “I’m going to show you something that will change your life.” He proceeded to whip up this incredibly simple chocolate cake, and the sheer audacity of its deliciousness, achieved with just two ingredients, blew my mind. It was a revelation that even the most sophisticated palate can be delighted by something utterly uncomplicated, proving that sometimes, less truly is more.
Recipe Overview
- Prep Time: 15 minutes
- Cook Time: 30-40 minutes
- Total Time: 45-55 minutes
- Servings: 6
- Yields: 1 cake
- Dietary Type: Can be Gluten-Free (depending on the chocolate)
Ingredients
- 3 eggs
- 165g milk chocolate (High quality recommended)
Equipment Needed
- Mixing bowls (at least two)
- Whisk (electric or manual)
- Spatula
- Baking tin (round or square, approximately 6-8 inches)
- Baking paper
- Oven
Instructions
-
Preheat your oven to 170 degrees Celsius (338 degrees Fahrenheit). This is crucial for even baking and achieving the right texture.
-
Separate the 3 eggs, placing the whites in one bowl and the yolks in another. Ensure no yolk contaminates the whites, as this will prevent them from whipping properly.
-
Using a whisk (electric is recommended for speed and volume), whisk the 3 egg whites until they form stiff, meringue-like peaks. This is the key to the cake’s airy texture, so don’t rush this step. You should be able to turn the bowl upside down without the whites falling out.
-
Gently melt the 165g of milk chocolate. You can do this in a microwave in 30-second intervals, stirring in between to prevent burning, or over a double boiler. If using a microwave, be very careful not to overheat the chocolate, as it can seize up.
-
Once the chocolate is melted and smooth, add the 3 egg yolks to the chocolate and whisk thoroughly until well combined. The mixture should be glossy and homogenous.
-
Now comes the delicate part. Take about one-third of the whipped egg whites and gently fold them into the chocolate-yolk mixture. Don’t worry about being too gentle at this stage; you’re just lightening the base.
-
Next, carefully fold in the remaining egg whites using a spatula. It’s important to use a folding motion, not stirring, to preserve the air in the whites. Work from the bottom of the bowl upwards, gently turning the mixture over until just combined. Be careful not to overmix, as this will deflate the whites and result in a dense cake. A few streaks of white are okay.
-
Line your baking tin with baking paper. This will prevent the cake from sticking and make it easier to remove after baking. Ensure the paper extends slightly above the rim of the tin.
-
Pour the chocolate mixture into the prepared baking tin.
-
Gently drop the pan on the counter a few times. This releases trapped air bubbles and helps to create a more even texture.
-
Bake in the preheated oven for 30-40 minutes. The baking time will depend on your oven and the size of your baking tin. The cake is done when the top is set and slightly springy to the touch. A toothpick inserted into the center may come out with moist crumbs attached.
-
Allow the cake to cool completely in the tin before removing it. This prevents it from breaking apart.
-
Once cooled, carefully remove the cake from the tin and peel off the baking paper. Serve and enjoy!
Expert Tips & Tricks
- Use high-quality chocolate: Since there are only two ingredients, the quality of the chocolate really shines through. Opt for a milk chocolate you enjoy eating on its own.
- Don’t overmix: Overmixing will deflate the egg whites, resulting in a dense, flat cake. Fold gently until just combined.
- Room temperature eggs: Allow your eggs to come to room temperature before whisking. This will help them whip up to a greater volume.
- For a richer flavor: Add a pinch of sea salt to the melted chocolate. This enhances the sweetness and adds depth of flavor.
- If the cake cracks: Don’t worry if the cake cracks on top. This is common and doesn’t affect the taste. You can cover it with whipped cream or chocolate ganache to hide any imperfections.
Serving & Storage Suggestions
This two-ingredient chocolate cake is delicious on its own, but it also pairs well with a variety of toppings. Serve it with a scoop of vanilla ice cream, a dollop of whipped cream, fresh berries, or a dusting of cocoa powder. You can also drizzle it with chocolate sauce or caramel for an extra decadent treat.
Leftovers can be stored in an airtight container at room temperature for up to 2 days, or in the refrigerator for up to 4 days. The cake is best served at room temperature. To reheat, you can microwave individual slices for a few seconds. Freezing is not recommended as it can alter the texture.
Nutritional Information
(Estimates only, based on typical milk chocolate composition.)
| Nutrient | Amount per Serving | % Daily Value |
|---|---|---|
| Calories | 275 kcal | 14% |
| Total Fat | 18g | 28% |
| Saturated Fat | 11g | 55% |
| Cholesterol | 105mg | 35% |
| Sodium | 60mg | 3% |
| Total Carbohydrate | 22g | 7% |
| Dietary Fiber | 1g | 4% |
| Sugars | 20g | – |
| Protein | 6g | 12% |
Variations & Substitutions
- Dark Chocolate Cake: Substitute milk chocolate with dark chocolate for a richer, more intense flavor. You may want to add a tablespoon of sugar to balance the bitterness.
- Gluten-Free: Ensure the chocolate you use is certified gluten-free.
- Chocolate Orange: Add a teaspoon of orange zest to the melted chocolate for a bright, citrusy twist.
- Mocha Cake: Add a teaspoon of instant coffee powder to the melted chocolate for a coffee-infused flavor.
- Espresso Glaze: Mix instant espresso with a little hot water and powdered sugar for a simple glaze.
FAQs (Frequently Asked Questions)
Q: Can I use a different type of chocolate?
A: Yes, you can use dark chocolate, white chocolate, or even flavored chocolate. Just be sure to adjust the sweetness as needed.
Q: Why is it important to whip the egg whites to stiff peaks?
A: The stiff egg whites are what give the cake its light and airy texture. If the whites aren’t stiff enough, the cake will be dense and flat.
Q: Can I use a different size baking tin?
A: Yes, but you may need to adjust the baking time. A smaller tin will require a longer baking time, while a larger tin will require a shorter baking time.
Q: My cake sank in the middle. What did I do wrong?
A: This is likely due to overmixing the batter or not whipping the egg whites to stiff enough peaks.
Q: Can I add other ingredients to the batter?
A: While this is a two-ingredient cake, you can experiment with adding small amounts of other ingredients like vanilla extract, cocoa powder, or spices.
Final Thoughts
This two-ingredient chocolate cake is a testament to the fact that simple can be extraordinary. It’s a perfect recipe for beginner bakers, busy weeknights, or anyone looking for a quick and easy dessert that is guaranteed to impress. Don’t be intimidated by the minimal ingredients; the technique is key. Give it a try, and let me know what you think. I’d love to hear about your variations and pairings. Happy baking!