
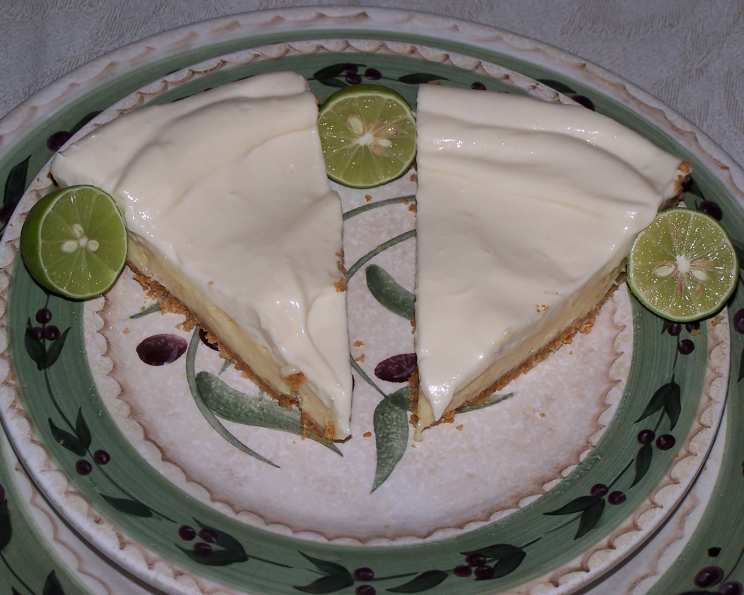
Two-Layer Key Lime Pie: A Slice of Sunshine
The memory is as clear as the Florida sunshine: a small, brightly colored diner, the air thick with the scent of saltwater and citrus. I was maybe ten years old, on a family road trip, and my first bite of Key Lime Pie was a revelation. The tangy, creamy filling, the subtle sweetness, the crisp graham cracker crust – it was a flavor explosion that transported me instantly to a tropical paradise. Even now, decades later, the taste of Key Lime Pie evokes that feeling of pure, childlike joy. This two-layer version takes that classic dessert and elevates it to something truly special.
Recipe Overview
- Prep Time: 20 minutes
- Cook Time: 33 minutes
- Total Time: 4 hours 53 minutes (includes chilling time)
- Servings: 8
- Yield: 1 pie
- Dietary Type: Not Gluten-Free
Ingredients
For the Crust:
- 3/4 cup granola cereal (without raisins or other dried fruit)
- 3/4 cup graham cracker crumbs (from 6 whole graham crackers)
- 1/4 cup unsalted butter, melted
- 3 tablespoons sugar
For the First Layer (Baked):
- 1 (14 ounce) can sweetened condensed milk
- 1/2 cup fresh lime juice
- 3 large egg yolks
For the Second Layer (Cream Cheese):
- 1 (8 ounce) package cream cheese, softened to room temperature
- 1/2 cup sweetened condensed milk
- 1/4 cup fresh lime juice
- 2 tablespoons sugar
- 1 teaspoon vanilla extract
For Garnish (Optional):
- Sweetened whipped cream or Cool Whip
Equipment Needed
- Food processor
- Mixing bowls
- 9-inch diameter deep dish glass pie plate
- Electric mixer
- Butter knife
- Measuring cups and spoons
Instructions
-
Preheat your oven to 350°F (175°C).
-
Prepare the granola: Using on/off turns, blend the granola in a food processor until coarsely ground. Be careful not to over-process it into a powder; you want some texture.
-
In a mixing bowl, combine the ground granola, graham cracker crumbs, melted butter, and sugar.
-
Press the mixture firmly and evenly into the bottom and up the sides of a 9-inch diameter deep dish glass pie plate. Use the bottom of a measuring cup to help create a smooth, compacted crust.
-
Bake the crust for 8 minutes, or until it is golden brown. Keep a close eye on it; graham cracker crusts can burn easily.
-
Remove the crust from the oven and let it cool completely on a wire rack. This is crucial; adding the filling to a warm crust could result in a soggy base.
-
Reduce the oven temperature to 300°F (150°C).
-
While the crust is cooling, prepare the first layer of filling. In a bowl, whisk together the sweetened condensed milk, lime juice, and egg yolks until well blended and smooth. The mixture will thicken slightly as you whisk.
-
Pour the filling into the cooled pie crust.
-
Bake for approximately 25 minutes, or until the mixture is set. The filling should be firm around the edges but still have a slight jiggle in the center. To check for doneness, gently shake the pie; if the center still looks liquid, bake for a few more minutes.
-
Cool the pie to room temperature. This allows the filling to set further before adding the cream cheese layer.
-
In a large mixing bowl, using an electric mixer, beat the softened cream cheese, sweetened condensed milk, lime juice, sugar, and vanilla extract until smooth and creamy. Make sure your cream cheese is truly at room temperature to avoid lumps in the filling.
-
Pour the cream cheese mixture over the cooled baked layer.
-
Using a butter knife or offset spatula, spread the cream cheese layer evenly over the baked layer, smoothing out the top.
-
Cover the pie with plastic wrap, pressing it gently against the surface of the cream cheese layer to prevent a skin from forming.
-
Refrigerate the pie for at least 4 hours, or preferably overnight, until the cream cheese layer is firm.
-
Before serving, top with sweetened whipped cream or Cool Whip, if desired.
Expert Tips & Tricks
- For a more intense lime flavor, add a teaspoon of lime zest to either the first or second layer filling. Be sure to only zest the green part of the lime, avoiding the bitter white pith.
- If you’re short on time, you can skip the homemade crust and use a store-bought graham cracker crust.
- To prevent the crust from getting soggy, you can brush it with melted white chocolate after it has cooled completely from the initial baking. The chocolate creates a barrier that protects the crust from the moisture of the filling.
- If you notice the crust is browning too quickly during the initial bake, tent it loosely with foil.
- Don’t overbake the first layer. It should have a slight jiggle when you remove it from the oven. It will continue to set as it cools.
Serving & Storage Suggestions
Serve the Two-Layer Key Lime Pie chilled, straight from the refrigerator. A dollop of homemade whipped cream or a swirl of Cool Whip adds a touch of sweetness and visual appeal. A sprinkle of lime zest can also enhance the presentation.
Store leftover pie covered in the refrigerator for up to 3 days. The crust may soften slightly over time. This pie is best consumed within the first 24 hours for optimal texture and flavor. Freezing is not recommended, as the texture of the cream cheese layer can change and become grainy upon thawing.
Nutritional Information
(Estimated per serving)
| Nutrient | Amount per Serving | % Daily Value |
|---|---|---|
| Calories | 516 kcal | N/A |
| Total Fat | 26.7 g | 41% |
| Saturated Fat | 14.1 g | 70% |
| Cholesterol | 139 mg | 46% |
| Sodium | 223.3 mg | 9% |
| Total Carbohydrate | 60.8 g | 20% |
| Dietary Fiber | 1.3 g | 5% |
| Sugars | 51.4 g | N/A |
| Protein | 10.5 g | 21% |
Variations & Substitutions
- Gluten-Free: Substitute gluten-free graham crackers and granola for the regular versions.
- Dairy-Free: While difficult to replicate the exact flavor and texture, you could try using a dairy-free cream cheese alternative and coconut condensed milk. Be aware that the results may vary.
- Key Lime vs. Regular Lime: While Key Limes are traditional, regular limes can be used if Key Limes are unavailable. The flavor will be slightly different, but still delicious.
- Lemon Variation: Substitute lemon juice for the lime juice for a Two-Layer Lemon Pie.
FAQs (Frequently Asked Questions)
Q: Can I use bottled lime juice instead of fresh?
A: Fresh lime juice provides the best flavor, but bottled lime juice can be used in a pinch. Opt for a high-quality bottled juice without added preservatives.
Q: Why is my cream cheese layer lumpy?
A: This usually happens when the cream cheese isn’t fully softened to room temperature. Make sure it’s soft before beating it with the other ingredients.
Q: Can I make this pie ahead of time?
A: Yes! In fact, it’s best to make it at least 4 hours in advance to allow the filling to set properly. You can even make it the day before serving.
Q: My crust is soggy. What did I do wrong?
A: The crust may have been underbaked, or the filling may have been added before the crust was completely cooled. Make sure to bake the crust until golden brown and let it cool fully before adding the filling.
Q: Can I freeze this pie?
A: Freezing is not recommended, as the texture of the cream cheese layer can change and become grainy upon thawing.
Final Thoughts
This Two-Layer Key Lime Pie is more than just a dessert; it’s a taste of sunshine, a reminder of warm breezes and happy memories. It’s surprisingly simple to make, yet delivers a complex and satisfying flavor profile. So, gather your ingredients, preheat your oven, and prepare to transport yourself to a tropical paradise with every bite. Don’t be afraid to experiment with the variations and make it your own. And please, share your creations and feedback – I’d love to hear how it turns out! Pair a slice of this pie with a refreshing glass of iced tea or a light, crisp white wine for the perfect ending to any meal.