
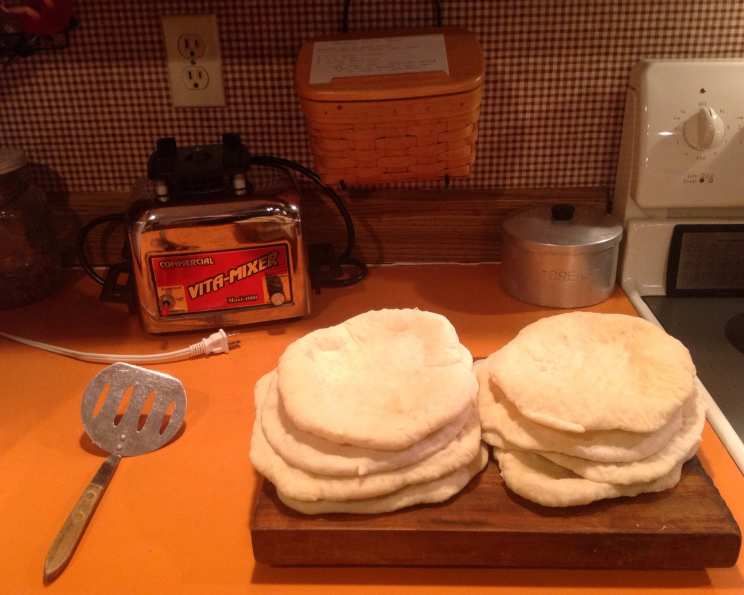
Tyler Florence’s Pita Bread: A Bread Machine Dream
The scent of freshly baked bread always transports me back to my grandmother’s kitchen. She wasn’t a fancy baker, but her simple loaves, warm from the oven, were pure comfort. Years later, when I first tasted truly exceptional pita bread – soft, pliable, and begging to be filled – I knew I had to learn how to make it myself. This recipe, inspired by Tyler Florence and adapted for the convenience of a bread machine, brings that same heartwarming experience into my own home, filling it with the irresistible aroma of homemade goodness.
Recipe Overview
- Prep Time: 20 minutes
- Cook Time: 4-5 minutes per batch
- Total Time: 2 hours 35 minutes (including bread machine time)
- Servings: 8
- Yield: 8 pitas
- Dietary Type: Vegetarian
Ingredients
- 1 1/2 cups warm water
- 1 teaspoon olive oil
- 3 1/2 cups bread flour, plus more for dusting
- 1 teaspoon sugar
- 1 teaspoon salt
- 2 1/4 teaspoons active dry yeast
Equipment Needed
- Bread machine
- Pizza stone (or cookie sheet)
- Rolling pin
- Cooling rack
- Kitchen towel
Instructions
-
Combine the Ingredients: Add the warm water, olive oil, bread flour, sugar, salt, and active dry yeast to the bread machine pan, in that order. This order is recommended for most bread machines to ensure the yeast doesn’t come into direct contact with the water or salt immediately.
-
Start the Dough Cycle: Set the bread machine for a 2-pound dough cycle. This cycle will handle the kneading and the first rise for you.
-
Preheat the Oven and Pizza Stone: Toward the end of the dough cycle, place the pizza stone on the lowest oven rack and preheat the oven to 500 degrees Fahrenheit. If you don’t have a pizza stone, a heavy-duty cookie sheet will work, though the results might be slightly different. It’s critical that the stone or cookie sheet is fully preheated for the best puff.
-
Divide and Shape the Dough: When the dough cycle is complete, punch down the dough to release the air. On a lightly floured surface, divide the dough into 8 equal-sized balls. Keep the dough lightly floured and covered with a clean kitchen towel to prevent it from drying out.
-
Rest the Dough: Allow the covered dough balls to rest for 15 minutes. This allows the gluten to relax, making the dough easier to roll out.
-
Roll Out the Pitas: Roll each dough ball into an 8-inch circle, approximately 1/4 inch thick. Ensure the circles are completely smooth, with no creases or seams. Any imperfections can prevent the pita from puffing properly. Do not stack the disks, but keep them covered with the kitchen towel to prevent them from drying out.
-
Bake the Pitas: Carefully place 2 pitas onto the preheated pizza stone. Bake for 4-5 minutes, or until the pitas are puffed and a pale golden color. Watch them closely as they cook very quickly at this high temperature, and you don’t want them to burn.
-
Cool and Deflate: Remove the baked pitas from the oven and place them on a cooling rack. Allow them to cool for about 5 minutes. As they cool, they will naturally deflate, creating the characteristic pocket.
-
Keep Soft: Wrap the cooled pitas in a clean kitchen towel to keep them soft and pliable. This will prevent them from drying out.
Expert Tips & Tricks
- Dough Consistency: The dough should be slightly tacky but not sticky. If it’s too sticky, add a tablespoon of flour at a time until it reaches the right consistency.
- Preheating is Key: Don’t skip preheating the pizza stone or cookie sheet. This is crucial for achieving the puffed-up texture of pita bread. A hot surface provides the initial burst of heat that helps the pita rise.
- Don’t Overbake: Overbaking will result in hard, crispy pitas. You want them to be soft and pliable.
- Even Rolling: Ensure you roll the dough to an even thickness for even baking. Uneven thickness can result in some parts burning while others are still doughy.
- Troubleshooting Puffing: If your pitas aren’t puffing, it could be due to several factors: the oven isn’t hot enough, the dough wasn’t rolled thin enough, or there are imperfections in the dough surface.
- Using a Cookie Sheet: If you’re using a cookie sheet instead of a pizza stone, make sure it’s heavy-duty to withstand the high heat. You might need to adjust the baking time slightly.
Serving & Storage Suggestions
Serve the pita bread warm, straight from the oven if possible. They’re perfect for filling with hummus, falafel, shawarma, or any of your favorite fillings. They also make a great accompaniment to soups and salads.
- Storage: Store cooled pitas in an airtight container at room temperature for up to 2 days.
- Refrigeration: For longer storage, refrigerate them in an airtight container for up to 5 days.
- Freezing: Pitas can be frozen for up to 2 months. Wrap them individually in plastic wrap and then place them in a freezer bag.
- Reheating: To reheat, warm them in a dry skillet over medium heat, in a toaster oven, or wrapped in foil in a preheated oven at 350 degrees Fahrenheit for a few minutes until heated through. You can also microwave them for a few seconds, but be careful not to overdo it, as they can become tough.
Nutritional Information
| Nutrient | Amount per Serving | % Daily Value |
|---|---|---|
| Calories | 210 kcal | 10% |
| Total Fat | 1.2g | 1% |
| Saturated Fat | 0.2g | 0% |
| Cholesterol | 0mg | 0% |
| Sodium | 293.7mg | 12% |
| Total Carbohydrate | 42.7g | 14% |
| Dietary Fiber | 1.8g | 7% |
| Sugars | 0.7g | 2% |
| Protein | 6.1g | 12% |
Note: Nutritional information is an estimate and may vary based on specific ingredients and portion sizes.
Variations & Substitutions
- Whole Wheat Pita: Substitute up to half of the bread flour with whole wheat flour for a nuttier flavor and increased fiber.
- Gluten-Free Pita: While more challenging, you can attempt a gluten-free version using a gluten-free bread flour blend. You’ll likely need to add a binder like xanthan gum to help with the structure. Follow the instructions on your gluten-free flour blend.
- Herb-Infused Pita: Add 1-2 tablespoons of finely chopped fresh herbs (such as rosemary, thyme, or oregano) to the dough for added flavor.
- Garlic Pita: Mix a teaspoon of garlic powder into the dry ingredients.
- Spicy Pita: Add a pinch of red pepper flakes to the dough.
FAQs (Frequently Asked Questions)
Q: Can I make this pita bread without a bread machine?
A: Yes, you can. Knead the dough by hand or with a stand mixer until it’s smooth and elastic, about 8-10 minutes. Allow it to rise in a warm place for about an hour, or until doubled in size, before proceeding with the recipe.
Q: Why aren’t my pitas puffing up?
A: The most common reasons are that the oven isn’t hot enough, the dough wasn’t rolled thin enough, or there are imperfections in the dough surface. Ensure your oven is preheated to the correct temperature and that you’ve rolled the dough to an even 1/4 inch thickness.
Q: Can I use all-purpose flour instead of bread flour?
A: Bread flour is recommended because it has a higher protein content, which results in a chewier and more elastic pita. However, you can use all-purpose flour in a pinch. The texture might be slightly different.
Q: How do I prevent the pitas from drying out?
A: The best way to keep the pitas soft is to wrap them in a clean kitchen towel immediately after baking. This traps the steam and keeps them from drying out.
Q: Can I make the dough ahead of time?
A: Yes, you can make the dough ahead of time. After the dough cycle is complete, place the dough in a lightly oiled bowl, cover it with plastic wrap, and refrigerate it for up to 24 hours. Let it come to room temperature before proceeding with the recipe.
Final Thoughts
This bread machine pita bread recipe is a wonderfully accessible way to enjoy fresh, homemade pita bread. It’s simpler than you might think, thanks to the convenience of the bread machine. Embrace the process, experiment with different flavors and fillings, and share the warm, delicious results with your loved ones. Whether you’re enjoying it with hummus or using it as a wrap for your favorite ingredients, this pita bread is sure to elevate any meal. Give it a try and let me know what you think!