
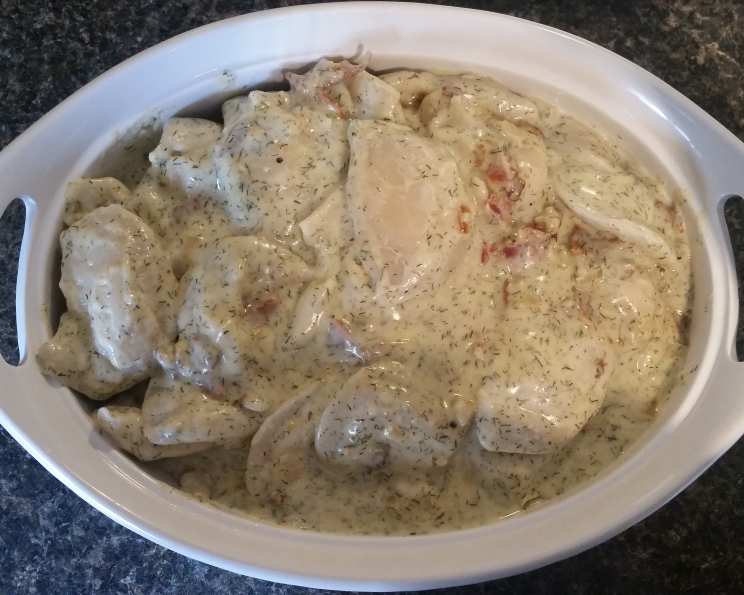
The Soulful Simplicity of Ukrainian Dill Sauce
I can almost smell it now – my Baba’s kitchen, filled with the comforting aroma of simmering broth and freshly chopped dill. Every Easter, after the solemnity of the church service, we’d gather around her table, laden with traditional Ukrainian fare. While the paska and kielbasa were always highlights, it was Baba’s creamy dill sauce, drizzled generously over everything, that truly captured the essence of home and family. The bright, herbaceous notes perfectly balanced the richness of the meal, and a simple sauce elevated everything it touched. It was more than just a sauce; it was love in liquid form.
Recipe Overview
- Prep Time: 5 minutes
- Cook Time: 10 minutes
- Total Time: 15 minutes
- Servings: 4-6
- Yield: About 1.5 cups
- Dietary Type: Vegetarian (can be made gluten-free)
Ingredients
- 2 tablespoons butter
- 2 tablespoons flour (all-purpose; use gluten-free blend for GF option)
- 1 cup fish stock or chicken stock (vegetable stock for vegetarian option)
- ½ cup light cream (or half-and-half or a plant-based alternative for a lighter option)
- ½ teaspoon salt
- 1 tablespoon finely chopped dill (fresh is best!)
- 1 tablespoon lemon juice (freshly squeezed)
Equipment Needed
- Medium saucepan
- Whisk
- Measuring spoons and cups
- Cutting board
- Knife
Instructions
-
Begin by melting the butter in a medium saucepan over medium heat. Watch carefully so the butter doesn’t burn.
-
Once the butter is melted, add the flour and whisk continuously. This creates a roux, the base of our sauce. It’s crucial not to let the flour brown or turn color. You want it to remain a pale, creamy yellow.
-
Continue to cook the flour and butter mixture, whisking constantly, for about 2 minutes. This cooks out the raw flour taste, which is essential for a smooth, flavorful sauce.
-
Slowly pour in the fish stock (or chicken stock), whisking constantly to prevent lumps from forming. Gradually incorporating the liquid is key to a smooth sauce.
-
Continue whisking until the sauce is smooth and free of any lumps. If you do get lumps, you can try using an immersion blender or straining the sauce through a fine-mesh sieve.
-
Bring the sauce to a gentle simmer, and cook for several minutes, stirring occasionally, until it has thickened to your desired consistency. This usually takes about 5-7 minutes. The sauce should coat the back of a spoon nicely.
-
Remove the saucepan from the heat. This is important because adding the cream while the sauce is still very hot can cause it to curdle.
-
Stir in the light cream, salt, finely chopped dill, and lemon juice. Mix well to combine all the ingredients. The lemon juice adds a bright tanginess that balances the richness of the cream and butter, while the dill provides a fresh, herbaceous flavor.
-
Taste the sauce and adjust the seasoning as needed. You may want to add a pinch more salt or a squeeze more lemon juice, depending on your preference.
-
Serve warm.
Expert Tips & Tricks
-
Fresh Dill is Key: While dried dill can be used in a pinch, fresh dill provides a much brighter and more vibrant flavor. If using dried dill, use about 1 teaspoon.
-
Make-Ahead Option: The sauce can be made ahead of time and stored in the refrigerator for up to 3 days. Reheat gently over low heat, whisking frequently, before serving. You may need to add a splash of stock or cream to thin it out if it has thickened too much.
-
Preventing Curdling: To prevent the cream from curdling, make sure the sauce is not too hot when you add it. You can also temper the cream by whisking a spoonful or two of the warm sauce into the cream before adding the cream to the sauce.
-
Thickening the Sauce: If the sauce isn’t thick enough, you can whisk in a cornstarch slurry (1 tablespoon cornstarch mixed with 2 tablespoons cold water) and simmer for a minute or two until thickened.
-
Adding Depth of Flavor: For a richer flavor, try sautéing a finely minced shallot or garlic in the butter before adding the flour.
Serving & Storage Suggestions
Ukrainian dill sauce is incredibly versatile and can be served with a variety of dishes. It’s traditionally served with boiled or roasted potatoes, fish, chicken, or vegetables. It’s also delicious as a dipping sauce for bread or as a topping for pierogi or holubtsi (cabbage rolls).
Store leftover sauce in an airtight container in the refrigerator for up to 3 days. To reheat, gently warm over low heat, whisking frequently. You can also reheat it in the microwave in 30-second intervals, stirring in between. Freezing is not recommended as the sauce may separate upon thawing.
Nutritional Information
| Nutrient | Amount per Serving | % Daily Value |
|---|---|---|
| Calories | 137 kcal | 7% |
| Total Fat | 12 g | 15% |
| Saturated Fat | 7 g | 35% |
| Cholesterol | 36 mg | 12% |
| Sodium | 435 mg | 19% |
| Total Carbohydrate | 5 g | 2% |
| Dietary Fiber | 0 g | 0% |
| Sugars | 0 g | 0% |
| Protein | 3 g | 6% |
Nutritional information is an estimate and may vary based on specific ingredients and portion sizes.
Variations & Substitutions
- Dairy-Free: Substitute the butter with olive oil or vegan butter and the light cream with coconut cream or cashew cream for a dairy-free version.
- Gluten-Free: Use a gluten-free all-purpose flour blend in place of the regular flour.
- Herb Variations: While dill is the star, you can add other herbs like parsley, chives, or tarragon for a different flavor profile.
- Spice it Up: Add a pinch of red pepper flakes for a subtle kick.
- Lemon Zest: Add the zest of half a lemon along with the juice for a more intense citrus flavor.
FAQs (Frequently Asked Questions)
Q: Can I use dried dill instead of fresh?
A: Yes, you can, but fresh dill provides a much brighter and more vibrant flavor. If using dried dill, use about 1 teaspoon in place of 1 tablespoon of fresh dill.
Q: How do I prevent lumps from forming in the sauce?
A: The key is to whisk constantly while adding the stock to the flour and butter mixture. Make sure the flour and butter are well combined before adding the liquid, and add the liquid slowly, whisking continuously.
Q: Can I make this sauce ahead of time?
A: Yes, the sauce can be made ahead of time and stored in the refrigerator for up to 3 days. Reheat gently over low heat, whisking frequently, before serving.
Q: My sauce is too thick. How can I thin it out?
A: Add a splash of stock or cream to thin the sauce out. Heat gently, stirring constantly, until it reaches your desired consistency.
Q: Can I freeze this sauce?
A: Freezing is not recommended as the sauce may separate upon thawing.
Final Thoughts
This Ukrainian dill sauce is more than just a condiment; it’s a taste of tradition, a spoonful of comfort, and a celebration of simple, fresh ingredients. Whether you’re drizzling it over potatoes, fish, or vegetables, this sauce is sure to elevate your meal and bring a touch of Ukrainian warmth to your table. I encourage you to try this recipe and share the flavors of my heritage with your loved ones. Don’t be afraid to experiment with variations and make it your own! Enjoy!