
Ultra Moist Starbucks Chocolate Cake (Or Cupcakes)
The scent of chocolate baking always takes me back to my grandmother’s kitchen. She wasn’t a fancy pastry chef, but she made the most comforting, fudgy chocolate cake imaginable. It wasn’t just the taste, but the warmth radiating from the oven, the gentle stirring, and the shared laughter that made it so special. This recipe reminds me of those cozy afternoons, elevated with a touch of grown-up sophistication thanks to the addition of coffee – a secret ingredient that unlocks the cake’s deepest chocolate potential.
Recipe Overview
- Prep Time: 15 minutes
- Cook Time: 20-25 minutes
- Total Time: 45 minutes
- Servings: 10
- Yield: Two 9-inch round cake pans or 24 cupcakes
- Dietary Type: Not specified
Ingredients
- 2 cups flour
- 2 cups sugar
- ¾ cup cocoa powder
- 2 teaspoons baking soda
- 1 teaspoon baking powder
- 1 teaspoon salt
- 2 large eggs
- ½ cup canola oil
- 1 cup milk
- 1 teaspoon vanilla
- 8 ounces Starbucks black coffee, cooled (or any brand can be substituted)
- Your favorite frosting (Magnolia Bakery’s Buttercream Frosting recommended)
- Optional: Food coloring gels (Wilton’s Icing Colors recommended)
Equipment Needed
- Large bowl
- Whisk
- Two 9-inch round cake pans or two 12-cup muffin tins
- Measuring cups and spoons
- Toothpick
- Cooling rack
- Optional: Pastry bag, long metal spatula, Wilton 2D Drop Flower tip
Instructions
-
Preheat your oven to 350°F (175°C). Make sure your oven rack is in the center position for even baking.
-
In a large bowl, whisk together the eggs, canola oil, vanilla, and cooled black coffee. Ensure the coffee has cooled down sufficiently, as adding it hot could partially cook the eggs.
-
To the wet ingredients, add the sugar, cocoa powder, salt, baking soda, and baking powder. Stir until just combined. Be careful not to overmix at this stage, as it can lead to a tougher cake.
-
Now, alternate stirring in the flour and milk. Begin and end with the flour. This method helps to prevent gluten development, resulting in a more tender crumb. Mix until just combined, ensuring there are no large lumps of flour remaining.
-
Don’t be alarmed if the batter seems thin or runny; this is perfectly normal for this recipe and is the key to achieving its ultra-moist texture.
-
Prepare your baking pans: Grease and flour two 9-inch round cake pans to prevent sticking. Alternatively, for cupcakes, line two 12-cup muffin tins with cupcake papers.
-
Pour the batter evenly into the prepared cake pans. If making cupcakes, spoon (or pour) the batter into the cups, filling them about three-quarters full to allow for rising.
-
Bake the cake pans for 25 minutes, or the cupcakes for 20-23 minutes. Start checking for doneness at the earlier time. Insert a toothpick into the center of the cake or cupcakes; it should come out clean or with just a few moist crumbs attached when they are done. If the toothpick comes out with wet batter, bake for a few more minutes and test again.
-
Allow the cakes or cupcakes to cool in the pans for about 10 minutes before inverting them onto a cooling rack to cool completely.
-
Once the cake or cupcakes are completely cool, frost with your favorite icing. If using Magnolia Bakery’s Buttercream Frosting (or any other buttercream), ensure it’s at a spreadable consistency for optimal results.
-
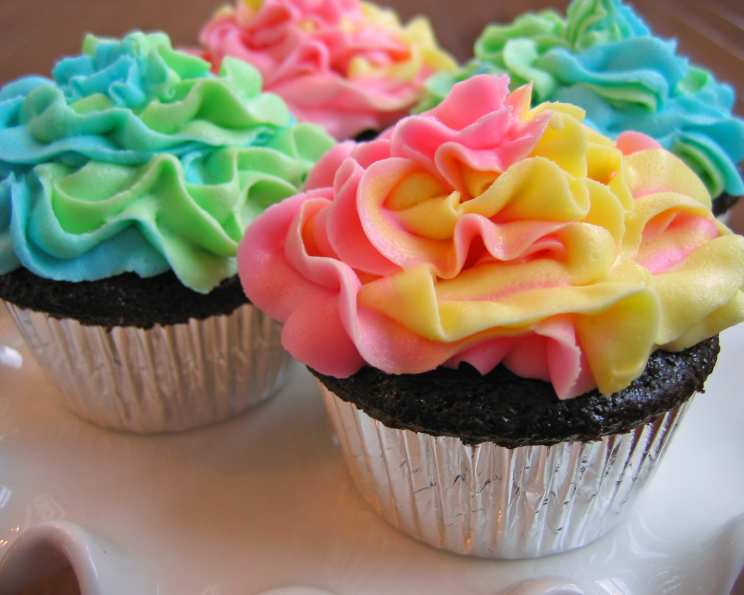
Optional Two-Tone Frosting Instructions: To create the two-tone icing effect as shown in the photo, prepare your favorite buttercream icing recipe. Divide it into four equal batches. Add a small dab of food coloring gel to each batch (Wilton’s Icing Colors gels are recommended). Use four different colors (e.g., yellow, pink, sky blue, and leaf green). Fill a pastry bag with two colors, placing one color down each side of the bag. When you twist the top of the bag closed, the colors will create a “striped” effect. Use the Wilton 2D Drop Flower tip to decorate the cupcakes, starting on the outer edge and working your way to the center in a circular motion. Each cupcake will be unique and beautiful!
Expert Tips & Tricks
- For an even more intense chocolate flavor, try using Dutch-processed cocoa powder.
- If you find your cake is browning too quickly in the oven, tent it loosely with aluminum foil for the last few minutes of baking.
- To ensure your cake layers are even, use a kitchen scale to weigh the batter before dividing it between the pans.
- Don’t overmix the batter once you add the flour. Overmixing develops the gluten, leading to a tough cake.
- For easier frosting, chill the cake layers in the refrigerator for about 30 minutes before frosting. This will make them firmer and less prone to crumbling.
Serving & Storage Suggestions
Serve this delicious chocolate cake or cupcakes at room temperature. For a simple yet elegant presentation, dust the cake with powdered sugar or cocoa powder before serving.
Leftover cake or cupcakes should be stored in an airtight container at room temperature for up to 3 days or in the refrigerator for up to 5 days. Cupcakes, especially, tend to dry out, so storing them properly is crucial.
For longer storage, you can freeze the unfrosted cake layers or cupcakes. Wrap them individually in plastic wrap and then place them in a freezer-safe bag or container. They can be frozen for up to 2-3 months. Thaw them overnight in the refrigerator before frosting and serving.
Nutritional Information
| Nutrient | Amount per Serving | % Daily Value |
|---|---|---|
| Calories | 389 kcal | N/A |
| Calories from Fat | N/A | N/A |
| Total Fat | 13.9 g | 21% |
| Saturated Fat | 2.2 g | 11% |
| Cholesterol | 40.6 mg | 13% |
| Sodium | 550.6 mg | 22% |
| Total Carbohydrate | 64.2 g | 21% |
| Dietary Fiber | 2.8 g | 11% |
| Sugars | 40.2 g | N/A |
| Protein | 6 g | 12% |
Note: Nutritional information is an estimate and may vary based on specific ingredients and serving sizes.
Variations & Substitutions
- Gluten-Free: Substitute the all-purpose flour with a gluten-free all-purpose baking flour blend. Be sure to include xanthan gum if the blend doesn’t already contain it.
- Dairy-Free: Replace the milk with a plant-based milk alternative like almond milk, soy milk, or oat milk.
- Coffee-Free: If you absolutely dislike coffee, you can substitute the coffee with an equal amount of hot water. However, keep in mind that the coffee enhances the chocolate flavor and doesn’t leave a distinct coffee taste.
- Different Frosting: Experiment with different frostings like cream cheese frosting, chocolate ganache, or a simple glaze.
- Add-ins: Incorporate chocolate chips, chopped nuts, or dried fruit into the batter for added texture and flavor.
FAQs (Frequently Asked Questions)
Q: Why is the batter so thin?
A: The thin batter is intentional and contributes to the cake’s moist texture. Don’t worry, it will bake up beautifully!
Q: Can I use instant coffee instead of brewed coffee?
A: Yes, you can substitute instant coffee. Dissolve the instant coffee granules in the required amount of hot water before adding it to the batter.
Q: Can I make this cake in a different pan size?
A: Yes, you can adapt this recipe to different pan sizes. However, you may need to adjust the baking time accordingly. Keep an eye on the cake and check for doneness frequently.
Q: What if I don’t have canola oil?
A: You can substitute canola oil with other neutral-flavored oils such as vegetable oil, sunflower oil, or melted coconut oil.
Q: Why are my cupcakes sticking to the liners?
A: Ensure you are using high-quality cupcake liners. Also, allowing the cupcakes to cool completely before removing them from the liners can help prevent sticking.
Final Thoughts
This Ultra Moist Starbucks Chocolate Cake (or Cupcakes!) is a testament to the magic that happens when simple ingredients come together. The subtle coffee infusion elevates the chocolate to new heights, creating a truly unforgettable dessert experience. So, preheat your oven, gather your ingredients, and prepare to indulge in a slice of pure chocolate bliss. I can’t wait to hear about your baking adventures and any creative twists you add to this timeless recipe! Feel free to share your experiences and photos – happy baking!