
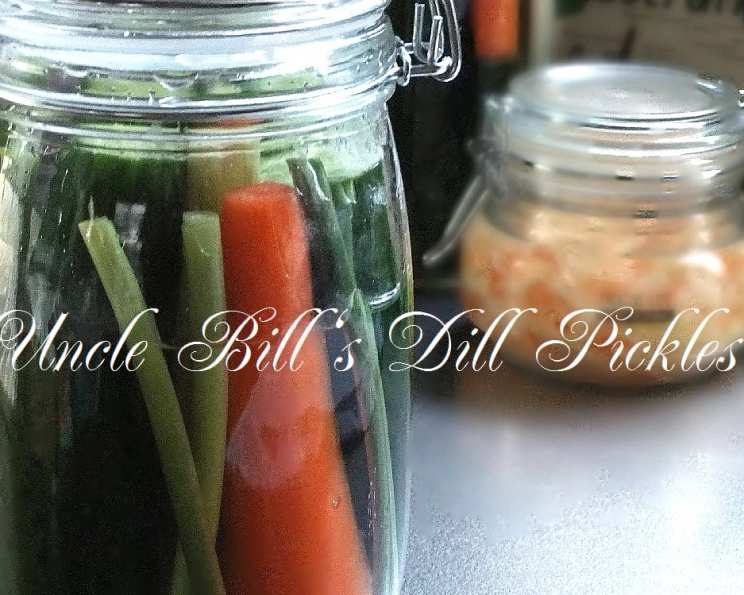
Uncle Bill’s Dill Pickles: A Family Tradition Preserved
The memory is as vivid as the first bite of a perfectly crisp pickle. I remember summers spent at my Uncle Bill’s farm, the air thick with the scent of dill and sunshine. He always had a jar of his homemade dill pickles ready, a tangy, crunchy delight that was the star of every family gathering. It wasn’t just a pickle; it was a taste of home, a testament to his dedication, and a symbol of the love he poured into everything he made. Every jar opened was a small celebration.
Recipe Overview
- Prep Time: 16 hours 10 minutes (includes chilling time)
- Cook Time: 10 minutes
- Total Time: 16 hours 20 minutes
- Yields: 4 quarts
- Dietary Type: Vegan (naturally)
Ingredients
- 8 lbs young fresh dill cucumbers (4-5 inches long)
- 8 large dill weed heads and stems
- 5 large carrots, peeled and sliced into wedges
- 20 garlic cloves
- 4 medium jalapeno peppers (optional, for heat)
- 12 pieces horseradish root
- Brine:
- 3 1/2 cups water
- 1 1/2 cups white vinegar
- 4 tablespoons pickling salt or 4 tablespoons coarse salt
- 1/2 cup brown sugar, lightly packed
Equipment Needed
- Large tub or clean laundry tub
- Cooking pot
- 4 – 1 quart wide mouth canning jars
- Oven
- Canning rack
- Canner
- Dish towels
Instructions
- Prepare the Cucumbers (Night Before): Begin by removing the blossom ends and stems from the dill cucumbers and discard them. These parts can contain enzymes that soften the pickles, so it’s crucial to remove them.
- Chill the Cucumbers: Place the prepared cucumbers into a large tub or a clean laundry tub. Cover them completely with cold water. Add 2 bags of ice cubes or 1 block of ice. This step is vital for ensuring crisp pickles. Let the cucumbers chill overnight (approximately 12-16 hours) in the refrigerator, or a cool place.
- Make the Brine: In a cooking pot, combine the water, white vinegar, pickling salt (or coarse salt), and brown sugar. Bring the mixture to a boil over medium-high heat. Once boiling, reduce the heat slightly and continue to boil for 2 minutes, stirring occasionally to ensure the salt and sugar are fully dissolved. This brine is what will preserve and flavor your pickles.
- Prepare the Jars: While the brine is cooking, prepare your canning jars. Wash four 1-quart wide-mouth canning jars thoroughly with soap and water, then rinse well with hot water. Place the jars upside down on the rack in the oven and heat at 325°F (163°C) for about 15 minutes. This sterilizes the jars, preventing spoilage. Do not overheat; you simply want to sterilize the jars.
- Assemble the Jars: Wash and drain the chilled dill cucumbers. Place 1 dill head and stem in the bottom of each jar. Pack the jars tightly with the cucumbers, arranging them vertically to maximize space.
- Add Flavorings: Stuff a few slices of carrots, 5 garlic cloves, and 4 pieces of horseradish root into the voids between the cucumbers in each jar. If you’re using them, stuff one jalapeno pepper into each jar.
- Top with Dill: Place another dill head and stem on top of the cucumbers in each jar.
- Fill with Brine: Carefully fill the jars with the hot brine, leaving approximately 1/2 inch of headspace (the space between the top of the liquid and the lid). Ensure that none of the dill head is touching the top of the jar. If necessary, gently push the dill heads down to maintain the proper headspace.
- Prepare for Sealing: Wipe the tops of the jars clean with a damp cloth to remove any spills or residue. Prepare the canning lids according to the manufacturer’s instructions (usually simmering them in hot water). Place the lids on the jars and screw on the screw tops, tightening them only finger-tight. This allows air to escape during processing.
- Process the Jars: Prepare a canner and bring the water to a rolling boil. Carefully place the jars in the rack with the lids facing up, ensuring they are fully immersed in the boiling water. Boil or process the jars for 10 minutes. This heat treatment creates a vacuum seal, preserving the pickles.
- Cool and Seal: Remove the jars from the canner using jar lifters and place them on a dish towel-lined surface. Cover them with another dish towel to help them cool evenly. As the jars cool, you should hear a “pop” sound, indicating that the lids have sealed properly. The lids will also become concave (curved downward).
- Check the Seal: After the jars have cooled completely (about 12-24 hours), check the seals. If any jar did not seal (the lid doesn’t pop and is not concave), remove the lid, discard it, and place another prepared lid on the jar. Repeat the processing steps.
- Store: Once cooled and sealed, label the jars with the date and store them in a cool, dark place, like a pantry or cellar. Allow the pickles to sit for at least 4 to 5 weeks before opening. This allows the flavors to fully develop and meld together.
Expert Tips & Tricks
- Cucumber Size Matters: Use cucumbers that are 4-5 inches long for the best results. Larger cucumbers tend to be less crisp.
- Freshness is Key: Use the freshest cucumbers possible for the crunchiest pickles.
- Salt Selection: Use pickling salt for the clearest brine, but coarse salt also works well. Avoid iodized salt, as it can darken the pickles.
- Headspace: Maintaining the correct headspace is crucial for a good seal. Too little headspace, and the jar may not seal properly. Too much, and the food may spoil.
- Finger-Tight: Remember to only tighten the screw bands finger-tight. Over-tightening can prevent air from escaping and cause the jars to buckle or break.
- Altitude Adjustments: If you live at a high altitude, you may need to increase the processing time. Consult your local extension office for specific recommendations.
Serving & Storage Suggestions
Uncle Bill’s Dill Pickles are a perfect accompaniment to sandwiches, burgers, and charcuterie boards. They also make a delicious snack straight from the jar. Store unopened jars in a cool, dark place for up to a year. Once opened, refrigerate the pickles, where they will stay fresh for several weeks. Properly sealed jars should not be stored at room temperature.
Nutritional Information
Please note that these values are estimates and can vary based on specific ingredients and portion sizes.
| Nutrient | Amount per Serving | % Daily Value |
|---|---|---|
| Calories | 317.9 kcal | N/A |
| Calories from Fat | 11 g | 4% |
| Total Fat | 1.3 g | 1% |
| Saturated Fat | 0.4 g | 1% |
| Cholesterol | 0 mg | 0% |
| Sodium | 7078.6 mg | 294% |
| Total Carbohydrate | 74.1 g | 24% |
| Dietary Fiber | 7.4 g | 29% |
| Sugars | 46.2 g | 184% |
| Protein | 7.7 g | 15% |
Variations & Substitutions
- Spicier Pickles: For an extra kick, add more jalapeno peppers or a pinch of red pepper flakes to each jar.
- Sweeter Pickles: If you prefer a sweeter pickle, increase the amount of brown sugar to 3/4 cup.
- Herbs & Spices: Experiment with different herbs and spices like mustard seeds, black peppercorns, or bay leaves.
- Garlic Lovers: Add a few extra garlic cloves if you love that garlicky flavor.
- Vinegar Variety: While white vinegar is traditional, you can also use apple cider vinegar for a slightly different flavor profile.
FAQs (Frequently Asked Questions)
Q: Why do I need to chill the cucumbers overnight?
A: Chilling the cucumbers in ice water helps them stay crisp during the pickling process. This step is essential for achieving that satisfying crunch.
Q: Can I use table salt instead of pickling salt?
A: It’s best to use pickling salt or coarse salt. Table salt contains iodine, which can darken the pickles and affect their flavor.
Q: How long do I need to wait before eating the pickles?
A: For the best flavor, wait at least 4 to 5 weeks before opening the jars. This allows the flavors to fully develop and meld together.
Q: What if my jars don’t seal properly?
A: If a jar doesn’t seal, you can reprocess it with a new lid within 24 hours. If it still doesn’t seal, refrigerate the pickles and consume them within a few weeks.
Q: Can I reuse the brine?
A: No, it’s not recommended to reuse the brine from previous batches of pickles. The brine may contain bacteria that can cause spoilage. Always make a fresh batch of brine for each batch of pickles.
Final Thoughts
Making Uncle Bill’s Dill Pickles is more than just following a recipe; it’s about preserving a tradition, sharing a piece of family history, and enjoying the simple pleasure of homemade goodness. Gather your ingredients, roll up your sleeves, and prepare to create a batch of pickles that will bring a smile to your face and a taste of summer to your table. I encourage you to try this recipe, adapt it to your liking, and share it with your loved ones. Each bite is a reminder of the love and dedication that goes into creating something truly special. Enjoy!