
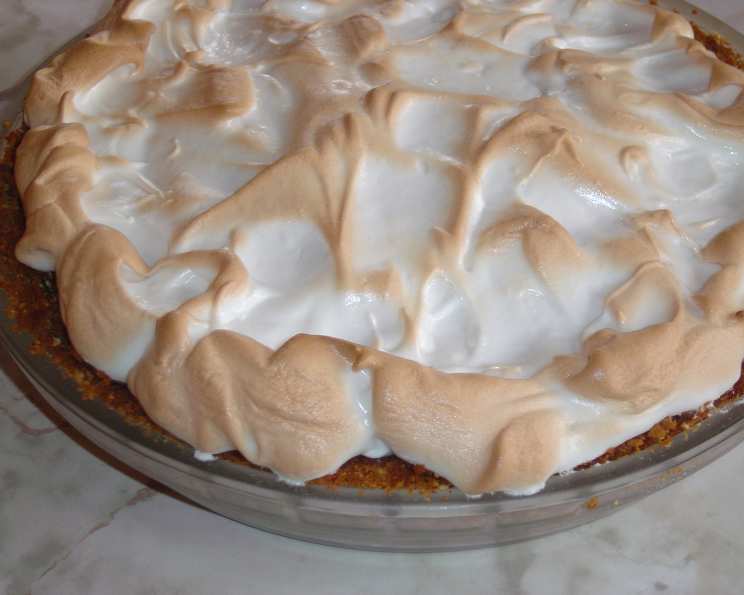
Uncle Bill’s Graham and Vanilla Wafer Pie Crust: A Foundation for Sweet Success
I can still remember the first time I tasted a pie made with this particular crust. It wasn’t at a fancy bakery or a celebrated restaurant, but rather at a humble family gathering. My Uncle Bill, the kind of man who could fix anything with duct tape and bake a pie that would bring tears to your eyes, proudly presented his creation. The subtle sweetness, the gentle crunch – it was a revelation, a comforting embrace of familiar flavors in a surprisingly sophisticated package. It transformed every filling it held into something truly special.
Recipe Overview
- Prep Time: 35 minutes
- Cook Time: 15 minutes
- Total Time: 50 minutes
- Servings: 8
- Yield: 1 pie crust
- Dietary Type: Not specified (can be modified to be gluten-free with substitutions)
Ingredients
- ¾ cup graham wafer crumbs
- ¾ cup vanilla wafer crumbs
- ½ cup finely chopped lightly toasted almonds
- ¼ cup butter, softened
- Vegetable oil spray, for pie dish
- 1 tablespoon all-purpose flour
Equipment Needed
- 9-inch oven-proof pie dish
- Mixing bowl
- Pastry blender or fork
- Rounded soup spoon
- Potato masher (with small holes or squares)
Instructions
-
Begin by combining the graham wafer crumbs, vanilla wafer crumbs, and finely chopped toasted almonds in a mixing bowl. Ensure the ingredients are thoroughly mixed. The almonds add a wonderful nutty depth that complements the sweetness of the wafers.
-
Next, cut in the softened butter using a pastry blender or a fork. The goal is to incorporate the butter until the mixture resembles coarse crumbs. Don’t overmix; you want small pockets of butter for a tender, flaky crust.
-
Prepare your 9-inch oven-proof pie dish by lightly spraying it with vegetable oil. Then, dust the dish with all-purpose flour, ensuring every nook and cranny is coated. Shake off any excess flour and discard it. This step is crucial to prevent the crust from sticking to the dish after baking.
-
Spoon the crumb mixture into the prepared pie dish. Using a rounded soup spoon, press the mixture evenly onto the bottom and up the sides of the dish. Pay close attention to creating a uniform thickness.
-
For a firmer bottom crust, use a potato masher (preferably one with small holes or squares) to compact the crumb mixture. This will help prevent the crust from becoming soggy when filled. Aim for a final crust thickness of approximately ¼ inch.
-
Place the prepared pie dish in the freezer compartment for 30 minutes. This chilling period helps the crust maintain its shape during baking and prevents it from shrinking.
-
Preheat your oven to 400°F (200°C).
-
Bake the frozen pie crust for 15 minutes to set the crust. The edges should be lightly golden brown.
-
Remove the baked pie crust from the oven and let it cool completely before adding your desired pie filling. The crust is now ready to become the foundation for your favorite sweet creation.
Expert Tips & Tricks
- For an even richer flavor, lightly brown the butter before adding it to the crumb mixture. Be careful not to burn it!
- If you don’t have a pastry blender, you can use your fingers to rub the butter into the crumbs. Just make sure your hands are cold to prevent the butter from melting too quickly.
- If you find the crust is browning too quickly during baking, tent it loosely with aluminum foil.
- To prevent the crust from puffing up during baking, prick the bottom several times with a fork before freezing.
- For a no-bake version, melt the butter and mix it with the crumbs. Press into the pie dish and chill for at least an hour to set. This works best for pies with fillings that don’t require baking.
Serving & Storage Suggestions
This pie crust is incredibly versatile and can be used with a variety of fillings, from classic chocolate to creamy lemon. Once filled, serve your pie chilled for the best flavor and texture.
If you have leftover pie, store it in the refrigerator, covered tightly with plastic wrap or in an airtight container. It will typically last for 3-4 days. The crust may soften slightly over time, but the flavor will remain delicious.
Baked pie crusts (without filling) can be stored at room temperature for up to 2 days, wrapped tightly. For longer storage, freeze the baked crust for up to 2 months. Thaw completely before filling.
Nutritional Information
Note: Nutritional information is an estimate and may vary based on specific ingredients and portion sizes.
| Nutrient | Amount per Serving | % Daily Value |
|---|---|---|
| Calories | 239 kcal | 12% |
| Total Fat | 16.6g | 25% |
| Saturated Fat | 5.2g | 26% |
| Cholesterol | 15mg | 5% |
| Sodium | 183mg | 8% |
| Total Carbohydrate | 23.6g | 8% |
| Dietary Fiber | 1.7g | 7% |
| Sugars | 2.9g | – |
| Protein | 3.5g | 7% |
Variations & Substitutions
- Gluten-Free: Substitute gluten-free graham crackers and vanilla wafers for the traditional versions. Ensure the almonds are certified gluten-free as well.
- Nut-Free: Replace the almonds with shredded coconut or more graham cracker/vanilla wafer crumbs.
- Vegan: Use a vegan butter substitute and ensure your wafers are vegan-friendly.
- Spiced Crust: Add a pinch of cinnamon, nutmeg, or ginger to the crumb mixture for a warm, spiced flavor.
- Chocolate Crust: Substitute some of the graham cracker crumbs with unsweetened cocoa powder for a chocolate-flavored crust.
FAQs (Frequently Asked Questions)
Q: Can I use a pre-made graham cracker crust instead?
A: While you can, this recipe offers a unique blend of graham and vanilla wafers, plus the nutty flavor of almonds, which elevates the crust significantly.
Q: My crust always shrinks when I bake it. What am I doing wrong?
A: Shrinkage is often caused by gluten development. Chilling the crust before baking helps prevent this. Make sure not to overwork the dough.
Q: Can I make this crust ahead of time?
A: Absolutely! The baked crust can be stored at room temperature for a couple of days or frozen for longer storage.
Q: My crust is too crumbly and won’t hold together. What should I do?
A: This usually means there isn’t enough butter. Add a tablespoon or two more of melted butter until the mixture holds its shape when pressed.
Q: Can I use other types of nuts besides almonds?
A: Yes, pecans, walnuts, or hazelnuts would all be delicious substitutes for the almonds. Just make sure they are finely chopped and lightly toasted.
Final Thoughts
This Graham and Vanilla Wafer Pie Crust is more than just a recipe; it’s a foundation for creating unforgettable desserts. It’s an invitation to experiment with flavors, to build upon a classic, and to share something truly special with those you care about. I encourage you to try this recipe and make it your own. Don’t be afraid to get creative with the variations and find the perfect combination that suits your taste. And most importantly, enjoy the process of creating something delicious!