
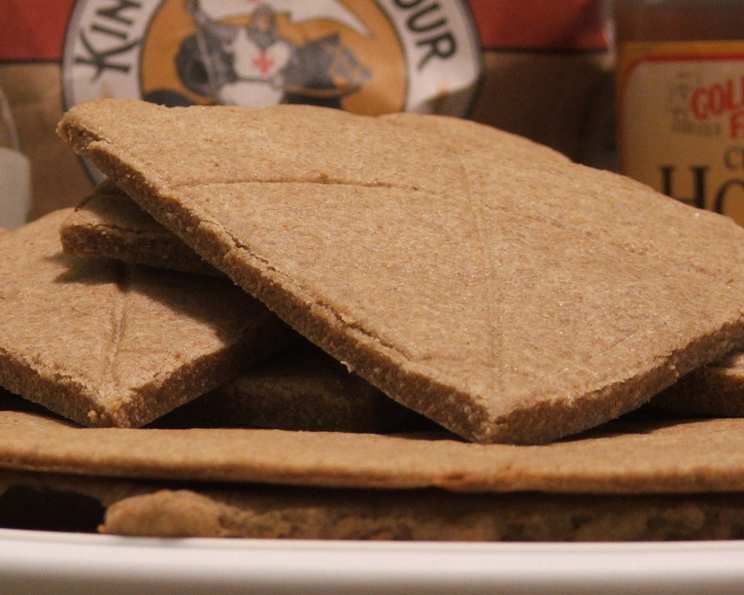
Unleavened Whole Wheat Bread: A Taste of Tradition
The aroma of freshly baked bread has always held a special place in my heart, evoking memories of my grandmother’s kitchen. But it wasn’t the fluffy, yeasty loaves that truly captivated me; it was the simple, hearty unleavened bread she crafted. There was a quiet reverence in its preparation, a connection to centuries of tradition, a feeling of sustenance that went beyond mere nourishment. This recipe, adapted from a family friend’s, captures that essence, bringing the rustic simplicity of unleavened bread into your home.
Recipe Overview
- Prep Time: 15 minutes
- Cook Time: 10 minutes
- Total Time: 25 minutes
- Yields: 3 flat loaves
- Serves: 18
- Dietary Type: Vegetarian
Ingredients
- 3 1/2 cups whole wheat flour
- 1 pinch of salt
- 1/3 cup honey
- 1/2 cup vegetable oil (or olive oil for a more traditional flavor)
- 1 egg yolk
- 7/8 cup warm milk (or goat’s milk for a more authentic touch)
Equipment Needed
- Large mixing bowl
- Measuring cups and spoons
- Rolling pin
- Cookie sheet
- Shot glass, saucer, and salad plate (for scoring – optional)
Instructions
- Begin by gently warming the honey and vegetable oil (or olive oil) together in a small saucepan or microwave-safe bowl. The goal is not to cook them, but to make them more fluid and easier to incorporate into the dough.
- In a separate bowl, whisk the egg yolk into the warm milk until well combined. This mixture will add richness and binding to the dough.
- In a large mixing bowl, whisk together the whole wheat flour and salt. This ensures the salt is evenly distributed throughout the flour.
- Pour the warmed honey and oil mixture into the flour mixture. Using your hands or a sturdy spoon, begin to combine the ingredients.
- Gradually add the egg and milk mixture to the flour mixture, kneading or stirring as you go. The dough should come together into a slightly sticky ball. If it’s too dry, add a tablespoon of milk at a time until it reaches the right consistency.
- Divide the dough into three equal pieces. This makes it easier to roll out the bread thinly.
- Working with one piece of dough at a time, roll it out on a lightly floured surface until it is very thin, approximately the size of a dinner plate. The thinner the dough, the crispier the final product will be.
- If desired, score the dough using a shot glass for the center circle, a saucer for the middle circle, and a salad plate for the outer circle. These are approximate guides, so use whatever circular objects you have on hand. Then, score twelve spokes out from the center circle, dividing the bread into segments. This is optional, but it creates a beautiful and traditional presentation.
- Place the rolled-out dough onto a cookie sheet.
- Bake in a preheated oven at 350 degrees Fahrenheit (175 degrees Celsius) for 10 minutes, or until lightly golden brown. Keep a close eye on it, as the baking time can vary depending on your oven.
- Once baked, remove the bread from the oven and wrap it in a clean kitchen towel while it is still warm. This will help to keep it soft and pliable.
- Store the wrapped bread in the refrigerator or freezer to maintain its freshness.
Expert Tips & Tricks
- Warming the honey and oil is crucial for even distribution and easier incorporation into the dry ingredients. Be careful not to overheat them, as this could cook the egg yolk.
- Kneading the dough is important for developing the gluten in the whole wheat flour, which will give the bread a slightly chewier texture. However, be careful not to over-knead, as this can make the bread tough.
- Rolling the dough very thin is key to achieving a crispy, cracker-like texture. If the dough is too thick, the bread will be soft and doughy.
- Scoring the dough is not only aesthetically pleasing, but it also helps to prevent the bread from puffing up too much during baking.
- Monitor the baking time closely, as ovens can vary. The bread is done when it is lightly golden brown and firm to the touch.
- If you find the dough too sticky to handle, lightly flour your hands and the rolling surface.
- For a slightly sweeter bread, increase the amount of honey to 1/2 cup.
- If you prefer a softer bread, you can add a tablespoon of olive oil to the dough.
Serving & Storage Suggestions
This unleavened whole wheat bread is incredibly versatile and can be served in a variety of ways. It’s excellent as a side to soups, stews, or salads, or can be enjoyed as a snack with cheese, hummus, or your favorite spread. For a truly authentic experience, serve it with a drizzle of olive oil and a sprinkle of sea salt.
To store, wrap the bread tightly in plastic wrap or place it in an airtight container. It will keep at room temperature for up to 2 days, in the refrigerator for up to a week, or in the freezer for up to 2 months. To reheat, simply warm it in a toaster oven or microwave until heated through. If frozen, thaw completely before reheating.
Nutritional Information
| Nutrient | Amount per Serving | % Daily Value |
|---|---|---|
| Calories | 162 kcal | – |
| Calories from Fat | 64 | – |
| Total Fat | 7.2 g | 11% |
| Saturated Fat | 1.2 g | 6% |
| Cholesterol | 12.2 mg | 4% |
| Sodium | 16.2 mg | 0% |
| Total Carbohydrate | 22.7 g | 7% |
| Dietary Fiber | 2.9 g | 11% |
| Sugars | 5.2 g | – |
| Protein | 3.7 g | – |
Variations & Substitutions
- For a gluten-free version, substitute the whole wheat flour with a gluten-free flour blend. You may need to adjust the amount of liquid to achieve the right consistency.
- For a dairy-free version, use almond milk, soy milk, or any other plant-based milk in place of the cow’s milk.
- Add herbs and spices to the dough for added flavor. Rosemary, thyme, oregano, and garlic powder are all excellent choices.
- For a sweeter bread, add dried fruit such as raisins, cranberries, or apricots to the dough.
- Substitute the honey with maple syrup or agave nectar for a vegan alternative.
FAQs (Frequently Asked Questions)
Q: Can I use regular all-purpose flour instead of whole wheat flour?
A: While you can, the texture and flavor will be different. Whole wheat flour provides a heartier, nuttier taste and a denser texture. All-purpose flour will result in a lighter, less nutritious bread.
Q: Why is it important to roll the dough out so thinly?
A: Rolling the dough thinly is essential for achieving the desired crispness. Thick dough will result in a soft, doughy bread that doesn’t have the same satisfying snap.
Q: Can I bake this bread in a convection oven?
A: Yes, you can. Reduce the baking temperature by 25 degrees Fahrenheit (approximately 15 degrees Celsius) and check the bread frequently, as it may cook faster.
Q: How do I prevent the bread from becoming too hard?
A: Wrapping the bread in a clean kitchen towel while it’s still warm helps to retain moisture. Storing it properly in an airtight container will also prevent it from drying out.
Q: What can I serve with this unleavened bread?
A: This bread is incredibly versatile. It pairs well with soups, stews, salads, cheeses, hummus, dips, and even as a simple snack with olive oil and sea salt.
Final Thoughts
I encourage you to try this simple yet deeply satisfying recipe for unleavened whole wheat bread. It’s a wonderful way to connect with the past, to appreciate the beauty of simple ingredients, and to nourish your body and soul. Whether you enjoy it as a humble accompaniment to a meal or as a standalone treat, I hope this bread brings a touch of warmth and tradition to your table. Don’t hesitate to experiment with variations and substitutions to make it your own. And please, share your creations and feedback! I’d love to hear how it turns out for you.