
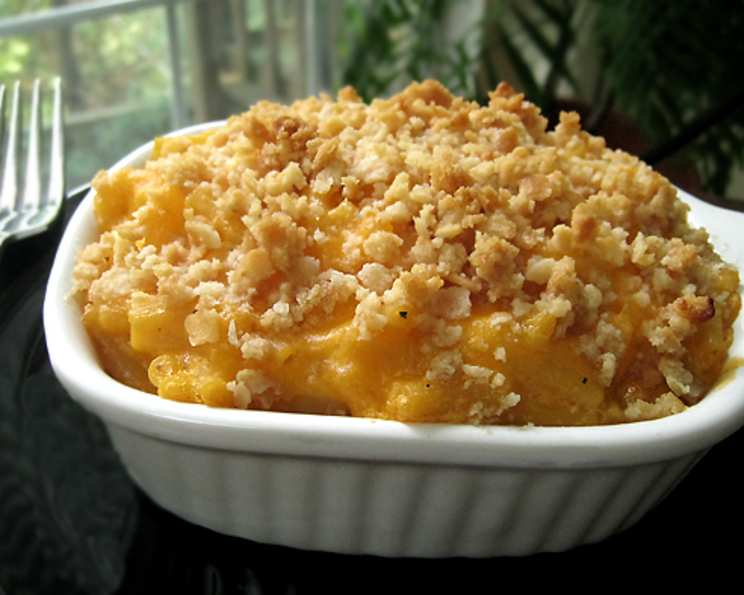
Elevate Your Comfort Food: Upgraded Kraft Mac N Cheese
My earliest memories are filled with the simple, comforting pleasure of mac and cheese. As a child, I remember the sheer delight of watching those golden noodles emerge from the pot, coated in that undeniably cheesy sauce. It was pure, unadulterated joy in a bowl. While my culinary journey has taken me through Michelin-starred kitchens and exotic flavors, there’s always a special place in my heart for this humble dish—especially when elevated with a few simple, yet brilliant, additions. This recipe takes the nostalgia of Kraft Mac N Cheese and transforms it into something truly special.
Recipe Overview
- Prep Time: 5 minutes
- Cook Time: 25 minutes
- Total Time: 30 minutes
- Servings: 5
- Dietary Type: Vegetarian
Ingredients
- 1 (14 ounce) package Kraft macaroni and cheese dinner (blue box, dinner style with cheese sauce pouch)
- 1 cup shredded cheddar cheese, divided
- ½ cup sour cream
- ¼ teaspoon ground red pepper (or black pepper)
- 6 butter flavored crackers, crushed (like Ritz)
- 1 tablespoon butter, melted (or margarine)
Equipment Needed
- Oven
- 1 ½ quart baking dish
- Large pot
- Colander
- Mixing spoon
- Small bowl
Instructions
-
Preheat your oven to 375°F (190°C). This ensures the mac and cheese bakes evenly and the topping gets perfectly golden-brown.
-
Prepare the Kraft Mac N Cheese dinner according to the package directions. Make sure to drain the macaroni thoroughly after cooking. Nobody likes watery mac and cheese!
-
Once the macaroni is cooked and drained, return it to the pot. Now, for the magic! Stir in ½ cup of the shredded cheddar cheese, the sour cream, and the ground red pepper (or black pepper, depending on your preference). The sour cream adds a wonderful tang and creaminess, while the pepper gives it a subtle kick that balances the richness of the cheese.
-
Spoon the cheesy macaroni mixture into a greased 1 ½ quart baking dish. A little cooking spray or butter will prevent sticking and make serving easier.
-
Sprinkle the remaining ½ cup of shredded cheddar cheese evenly over the top of the mac and cheese. This will create a beautiful, bubbly, cheesy crust as it bakes.
-
In a small bowl, combine the crushed butter flavored crackers with the melted butter. Mix well until the crumbs are evenly coated.
-
Sprinkle the cracker crumb mixture over the cheese-covered mac and cheese. This provides a delightful textural contrast and a buttery, savory finish.
-
Bake in the preheated oven for 20 minutes, or until the cheese is melted, bubbly, and the cracker topping is golden brown. Keep a close eye on it to prevent the topping from burning.
-
Remove from the oven and let stand for 5 minutes before serving. This allows the mac and cheese to set slightly and prevents it from being too runny.
Expert Tips & Tricks
-
Cheese Upgrade: While cheddar is classic, experiment with other cheeses like Gruyere, Monterey Jack, or even a touch of smoked Gouda for a more complex flavor profile.
-
Pepper Power: Adjust the amount of red pepper to your liking. If you prefer a milder flavor, use black pepper or omit it altogether. For a spicier kick, try a pinch of cayenne pepper.
-
Cracker Crunch: Don’t have butter crackers on hand? Use plain breadcrumbs tossed with melted butter and a pinch of salt. Panko breadcrumbs will provide an extra crispy topping.
-
Make-Ahead Magic: Assemble the mac and cheese up to the point of baking. Cover and refrigerate for up to 24 hours. Add a few minutes to the baking time if baking straight from the refrigerator.
-
Reviving Leftovers: If your leftover mac and cheese seems dry, add a splash of milk or cream while reheating to restore its creamy texture.
Serving & Storage Suggestions
Serve this upgraded mac and cheese warm, straight from the oven. It’s a fantastic side dish for roasted chicken, grilled sausages, or even a simple green salad. Garnish with a sprinkle of fresh parsley or chives for a pop of color.
Leftovers can be stored in an airtight container in the refrigerator for up to 3 days. Reheat gently in the microwave or oven until heated through. For longer storage, freeze in individual portions for up to 2 months. Thaw overnight in the refrigerator before reheating.
Nutritional Information
| Nutrient | Amount per Serving | % Daily Value |
|---|---|---|
| Calories | 350 kcal | 18% |
| Total Fat | 22g | 34% |
| Saturated Fat | 12g | 60% |
| Cholesterol | 50mg | 17% |
| Sodium | 600mg | 25% |
| Total Carbohydrate | 25g | 8% |
| Dietary Fiber | 1g | 4% |
| Sugars | 3g | N/A |
| Protein | 12g | 24% |
Variations & Substitutions
-
Spicy Mac: Add a tablespoon of your favorite hot sauce or a diced jalapeño to the cheese sauce for a fiery kick.
-
Veggie Boost: Stir in steamed broccoli florets, peas, or diced tomatoes for added nutrients and flavor.
-
Meat Lovers: Add cooked and crumbled bacon, sausage, or ground beef for a heartier meal.
-
Creamy Dreamy: Substitute heavy cream for the sour cream for an even richer and more decadent mac and cheese.
-
Garlic Goodness: Add a clove of minced garlic to the melted butter for the cracker topping for a savory twist.
FAQs (Frequently Asked Questions)
Q: Can I use the powdered cheese sauce version of Kraft Mac N Cheese?
A: Yes, but it’s recommended to use two boxes and add a little extra milk or sour cream to prevent it from drying out during baking.
Q: Can I make this ahead of time?
A: Absolutely! Assemble the mac and cheese, cover, and refrigerate for up to 24 hours before baking.
Q: What can I use if I don’t have butter flavored crackers?
A: Plain breadcrumbs or Panko breadcrumbs tossed with melted butter and a pinch of salt make a great substitute.
Q: Can I freeze this mac and cheese?
A: Yes, you can freeze it in individual portions for up to 2 months. Thaw overnight in the refrigerator before reheating.
Q: How do I prevent the topping from burning?
A: Keep a close eye on the mac and cheese while it’s baking and cover it loosely with foil if the topping starts to brown too quickly.
Final Thoughts
This upgraded Kraft Mac N Cheese is a testament to the fact that even the simplest dishes can be transformed into something extraordinary with a few thoughtful additions. It’s a comforting, crowd-pleasing meal that’s perfect for weeknight dinners or potlucks. So, go ahead, embrace your inner child and give this recipe a try. I’m confident it will become a new family favorite! Don’t hesitate to experiment with different cheeses, spices, and toppings to create your own unique version. And most importantly, enjoy the process! Happy cooking!