
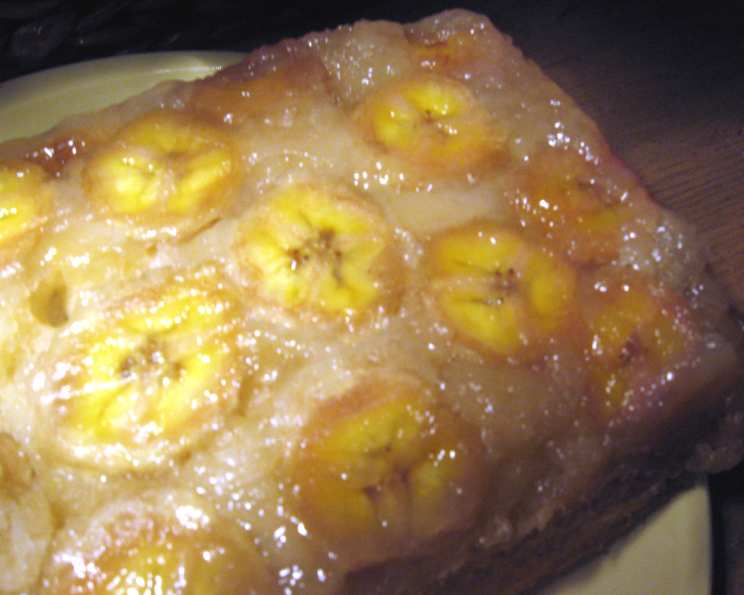
Upside-Down Banana Cake: A Taste of Sunshine
My grandmother, Nana Elsie, had a knack for making even the simplest things feel special. I remember one afternoon, the air thick with the humid summer heat, she pulled a warm, golden cake from her ancient oven. The caramelized bananas clinging to the top glistened like jewels. That first bite – the soft, moist crumb, the intense banana flavor, and the sticky sweetness of the topping – was pure magic. It wasn’t just a cake; it was love baked into something tangible. This upside-down banana cake is my attempt to recapture that moment and share it with you.
Recipe Overview
- Prep Time: 20 minutes
- Cook Time: 60 minutes
- Total Time: 1 hour 20 minutes
- Servings: 8
- Yield: 1 cake
- Dietary Type: Vegetarian
Ingredients
For the Topping:
- 50g unsalted butter, melted
- 1/2 cup caster sugar
- 2 large bananas, ripe
For the Cake:
- 125g unsalted butter, at room temperature
- 1/2 cup caster sugar
- 1 teaspoon vanilla extract
- 1 egg, lightly beaten
- 2 bananas, extremely ripe, mashed
- 1 1/4 cups self-raising flour
- 1/3 cup milk
Serving Suggestions (Optional):
- 125g cream cheese, at room temperature
- 2 tablespoons icing sugar
- 1/2 cup slivered almonds
Equipment Needed
- 14cm x 24cm loaf pan
- Baking paper
- Small bowl
- Large bowl
- Electric mixer (optional, but recommended)
- Wire rack
Instructions
-
Prepare the Pan: Generously grease a 14cm x 24cm loaf pan. Cut baking paper to fit the base and sides of the pan, leaving an overhang for easy removal later. This will prevent the cake from sticking and make it simple to invert.
-
Make the Topping: In a small bowl, combine the melted butter and caster sugar. Stir until the sugar has mostly dissolved. This creates the luscious caramel base for the bananas. Spread this mixture evenly over the base of the prepared pan.
-
Arrange the Bananas: Cut each of the 2 large ripe bananas into approximately 9cm lengths. Then, cut each length into four even slices lengthwise. Arrange the banana slices, cut-side facing downwards, on top of the butter-sugar mixture in the pan. This ensures that the caramelized surface of the bananas will be visible when the cake is inverted.
-
Cream the Butter and Sugar: In a small bowl, beat together the softened butter, caster sugar, and vanilla extract until the mixture is light and fluffy. An electric mixer makes this process much easier, but you can also do it by hand. This step is crucial for creating a tender cake crumb.
-
Incorporate the Egg: Beat in the lightly beaten egg until it is fully combined with the butter and sugar mixture. Don’t overbeat at this stage, just ensure it’s well incorporated.
-
Combine Wet and Dry Ingredients: Transfer the butter mixture to a large bowl. Stir in the mashed bananas. Then, gradually stir in the self-raising flour and milk, alternating between the two, until just combined. Be careful not to overmix the batter, as this can result in a tough cake.
-
Pour Batter into Pan: Spoon the cake batter into the prepared pan, spreading it evenly over the banana slices.
-
Bake the Cake: Bake in a moderate oven (180°C or 350°F) for one hour, or until a skewer inserted into the center of the cake comes out clean. If the top of the cake starts to brown too quickly, you can loosely cover it with foil for the last 15 minutes of baking.
-
Cool and Invert: Allow the cake to rest in the pan for 5-10 minutes after baking. This helps it to set slightly and makes it easier to invert. Then, carefully turn the cake out onto a wire rack to cool completely.
-
Serve: The banana cake can be served warm or at room temperature.
-
Optional Cream Cheese Topping: To make a sweetened cream cheese topping, beat 125g of cream cheese with 2 tablespoons of icing sugar until the mixture is smooth. Serve in a separate bowl alongside the cake.
-
Garnish: Sprinkle the cake with slivered almonds before serving for added texture and visual appeal.
Expert Tips & Tricks
- Ripe Bananas are Key: The riper the bananas, the more intense the banana flavor and the sweeter the cake will be. Don’t be afraid to use bananas that are almost black!
- Prevent Sticking: Make sure your loaf pan is well-greased and lined with baking paper to ensure the cake releases easily.
- Even Baking: If your oven tends to bake unevenly, rotate the pan halfway through the baking time.
- Moist Cake: Avoid overbaking the cake to prevent it from drying out. The skewer test is your best friend here!
- Caramel Boost: For an extra-caramelized topping, you can sprinkle a little brown sugar on top of the melted butter before arranging the banana slices.
Serving & Storage Suggestions
Serve the upside-down banana cake warm or at room temperature. A dollop of freshly whipped cream, a scoop of vanilla ice cream, or the sweetened cream cheese topping are all delicious accompaniments. The cake can be stored in an airtight container at room temperature for up to 2 days, or in the refrigerator for up to 5 days. You can also freeze the cake for up to 2 months. Wrap it tightly in plastic wrap and then foil to prevent freezer burn. To reheat, thaw the cake in the refrigerator overnight and then warm it in a low oven (150°C or 300°F) for about 10-15 minutes.
Nutritional Information
| Nutrient | Amount per Serving | % Daily Value |
|---|---|---|
| Calories | 513 kcal | N/A |
| Total Fat | 28 g | 43% |
| Saturated Fat | 15.5 g | 77% |
| Cholesterol | 92 mg | 30% |
| Sodium | 311 mg | 12% |
| Total Carbohydrate | 62 g | 20% |
| Dietary Fiber | 3 g | 11% |
| Sugars | 39 g | N/A |
| Protein | 6.5 g | 13% |
Note: Nutritional information is an estimate and may vary based on specific ingredients and portion sizes.
Variations & Substitutions
- Nuts: Add chopped walnuts, pecans, or macadamia nuts to the batter for extra flavor and texture.
- Spices: Add 1/2 teaspoon of ground cinnamon, nutmeg, or cardamom to the batter for a warm, spiced twist.
- Gluten-Free: Substitute the self-raising flour with a gluten-free self-raising flour blend. You may need to add a binder like xanthan gum to improve the texture.
- Dairy-Free: Use a plant-based butter alternative and non-dairy milk.
- Chocolate Chips: Fold in 1/2 cup of chocolate chips into the batter for a chocolatey banana cake.
- Rum Glaze: Brush the warm cake with a rum glaze made from equal parts rum and melted butter for an extra-special treat.
FAQs (Frequently Asked Questions)
Q: Can I use regular all-purpose flour instead of self-raising flour?
A: Yes, but you’ll need to add a leavening agent. For every cup of all-purpose flour, add 1 1/2 teaspoons of baking powder and 1/4 teaspoon of salt.
Q: My bananas are frozen. Can I still use them?
A: Absolutely! Thaw the frozen bananas completely and drain any excess liquid before mashing them. Frozen bananas actually tend to be sweeter and more flavorful than fresh ones.
Q: How do I prevent the bananas from burning in the topping?
A: The sugar and butter mixture helps to protect the bananas. If you notice them browning too quickly, tent the loaf pan loosely with aluminum foil.
Q: Can I make this cake ahead of time?
A: Yes, this cake is even better the next day! The flavors meld together and the texture becomes even more moist. Store it in an airtight container at room temperature or in the refrigerator.
Q: My cake stuck to the pan. What did I do wrong?
A: Make sure you grease the pan very well and use baking paper to line the base and sides. Letting the cake rest for 5-10 minutes after baking also helps it release more easily. If all else fails, you can try running a thin knife around the edges of the pan before inverting.
Final Thoughts
This Upside-Down Banana Cake is more than just a recipe; it’s a journey back to simpler times, to the warmth of a loving kitchen, and to the pure joy of sharing something delicious. I hope this recipe inspires you to create your own memories and to share the magic of baking with those you love. Don’t hesitate to experiment with variations and make it your own. And please, let me know how it turns out! Perhaps pair it with a cup of strong coffee or a glass of chilled milk for the ultimate comfort. Happy baking!