
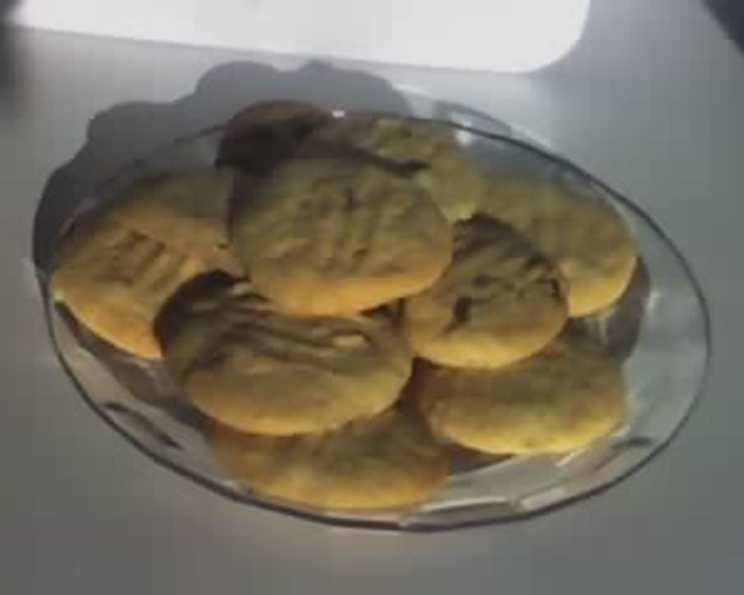
Vanilla Biscuits: A Taste of Home
The aroma of vanilla always transports me back to my childhood kitchen, where my grandmother, Nana Elsie, would be humming a jaunty tune while she baked. Her vanilla biscuits were legendary – crisp around the edges, soft in the middle, and infused with that unmistakable comforting vanilla scent. I remember sneaking into the kitchen, my little fingers hoping to snatch a warm biscuit fresh from the oven. She’d always catch me, but a wink and a smile meant a biscuit was mine, warm and perfect, a small slice of pure happiness.
Recipe Overview
- Prep Time: 10 minutes
- Cook Time: 15-20 minutes
- Total Time: 25-30 minutes
- Servings: 12-16
- Dietary Type: Vegetarian
Ingredients
- 125 g butter, softened
- 1 cup sugar
- 225 g flour
- 50 g sultanas (optional)
- 1 egg
- 1 teaspoon baking powder
- 1 teaspoon vanilla essence
Equipment Needed
- Mixing bowl
- Measuring cups and spoons
- Baking trays
- Fork
- Oven
Instructions
-
Preheat your oven to 190 degrees Celsius (375 degrees Fahrenheit). This is crucial for achieving that perfect golden-brown color and slightly crispy edge.
-
In a mixing bowl, cream together the softened butter, sugar, and vanilla essence. This step is all about incorporating air into the butter and sugar, creating a light and fluffy base for your biscuits. Use an electric mixer or a wooden spoon – either works perfectly.
-
Add the egg to the creamed mixture and beat until well combined. The egg acts as a binder, holding all the ingredients together and adding richness to the biscuits.
-
In a separate bowl, whisk together the flour and baking powder. The baking powder is essential for leavening, giving the biscuits their rise and airy texture.
-
Gradually add the dry ingredients to the wet ingredients, mixing until just combined. Be careful not to overmix, as this can develop the gluten in the flour, resulting in tough biscuits.
-
If using, gently fold in the sultanas. Ensure they are evenly distributed throughout the dough.
-
Roll the dough into small balls, about 1 inch in diameter. The size of the balls will determine the size of your finished biscuits.
-
Place the dough balls onto cold, greased baking trays, leaving some space between them to allow for spreading. Using cold baking trays will help to prevent the biscuits from spreading too thin.
-
Press down each dough ball with a fork, creating a criss-cross pattern. This not only looks pretty but also helps to flatten the biscuits and ensure even baking.
-
Bake for 15-20 minutes, or until the biscuits are golden brown around the edges. Keep a close eye on them during the last few minutes of baking to prevent burning. If you have an Aga oven, as my granny did, they may only need 12-15 minutes.
-
Remove the baking trays from the oven and let the biscuits cool on the trays for a few minutes before transferring them to a wire rack to cool completely. This will prevent them from sticking to the trays and allow them to crisp up nicely.
Expert Tips & Tricks
-
Softened Butter is Key: Make sure your butter is truly softened, not melted. It should be soft enough to easily cream with the sugar.
-
Don’t Overmix: Overmixing develops the gluten in the flour, leading to tough biscuits. Mix just until the ingredients are combined.
-
Chill the Dough: If you have time, chilling the dough for 30 minutes before rolling it into balls can help to prevent the biscuits from spreading too much during baking.
-
Even Baking: Ensure your oven is properly preheated and that the baking trays are evenly spaced on the racks for even baking.
-
Aga Ovens: If you’re lucky enough to own an Aga, adjust the baking time accordingly, as they tend to bake faster.
Serving & Storage Suggestions
Vanilla biscuits are delicious served warm with a cup of tea or coffee. They also make a great addition to a dessert platter or can be enjoyed as a simple afternoon snack. Store cooled biscuits in an airtight container at room temperature for up to 5 days. For longer storage, you can freeze them for up to 2 months. To reheat, simply thaw them at room temperature and warm them in a low oven for a few minutes.
Nutritional Information
| Nutrient | Amount per Serving | % Daily Value |
|---|---|---|
| Calories | 226.7 kcal | N/A |
| Calories from Fat | 81 g | 36% |
| Total Fat | 9 g | 13% |
| Saturated Fat | 5.5 g | 27% |
| Cholesterol | 37.8 mg | 12% |
| Sodium | 111.2 mg | 4% |
| Total Carbohydrate | 34.5 g | 11% |
| Dietary Fiber | 0.7 g | 2% |
| Sugars | 19.2 g | 76% |
| Protein | 2.7 g | 5% |
Note: Nutritional information is an estimate and may vary based on specific ingredients and portion sizes.
Variations & Substitutions
-
Chocolate Chip Biscuits: Add 1/2 cup of chocolate chips to the dough for a classic twist.
-
Lemon Biscuits: Add the zest of one lemon to the dough for a bright, citrusy flavor.
-
Spice Biscuits: Add 1/2 teaspoon of ground cinnamon or nutmeg to the dough for a warm, spiced flavor.
-
Gluten-Free Biscuits: Substitute the all-purpose flour with a gluten-free flour blend. You may need to add a binding agent like xanthan gum to help hold the biscuits together.
-
Nutty Biscuits: Add 1/4 cup of chopped nuts (such as almonds, walnuts, or pecans) to the dough for added crunch and flavor.
FAQs (Frequently Asked Questions)
Q: Can I use salted butter instead of unsalted butter?
A: Yes, you can use salted butter, but you may want to reduce the amount of salt in the recipe slightly.
Q: My biscuits spread too thin during baking. What went wrong?
A: This could be due to several factors, such as using butter that was too soft, not chilling the dough, or baking on a warm baking tray.
Q: Can I make the dough ahead of time?
A: Yes, you can make the dough ahead of time and store it in the refrigerator for up to 24 hours. Just be sure to wrap it tightly to prevent it from drying out.
Q: How do I know when the biscuits are done?
A: The biscuits are done when they are golden brown around the edges and the bottoms are lightly browned.
Q: Can I freeze the baked biscuits?
A: Yes, you can freeze the baked biscuits for up to 2 months. Let them cool completely before freezing, and store them in an airtight container or freezer bag.
Final Thoughts
These vanilla biscuits are more than just a recipe; they’re a connection to the past, a taste of home, and a reminder of the simple joys in life. I urge you to try baking them and share them with your loved ones. Whether you follow the recipe exactly or add your own creative twist, I hope these biscuits bring you as much joy as they’ve brought me over the years. Don’t hesitate to experiment with flavors and share your results – baking is all about creativity and sharing the love! Why not serve them with a dollop of homemade jam or a scoop of vanilla ice cream for an extra special treat?