
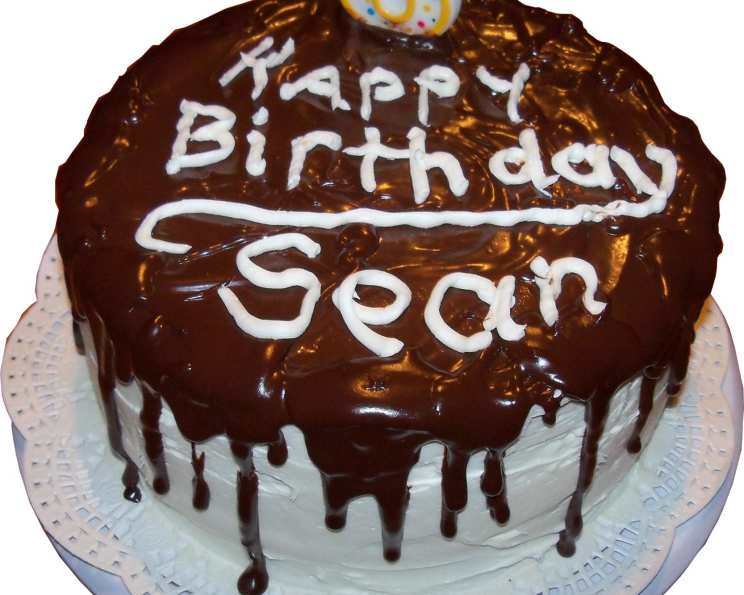
Vanilla Butter-Creme Chocolate Ganache Birthday Cake
I remember when my daughter, Lily, turned ten. She requested a chocolate cake, of course, but it had to be “extra special.” After a week of brainstorming (and a few taste tests!), I landed on this Vanilla Butter-Creme Chocolate Ganache Cake. The rich chocolate cake layers, the unbelievably smooth and creamy vanilla buttercream, and that decadent chocolate ganache cascading down the sides… it was a showstopper. Lily’s eyes lit up like the candles on top, and that memory, along with the recipe, has been a cherished part of our family celebrations ever since.
Recipe Overview
- Prep Time: 1 hour
- Cook Time: 24 minutes
- Total Time: 1 hour 17 minutes
- Servings: 12-16
- Yield: 1 cake
- Dietary Type: Not Gluten-Free
Ingredients
For the Cake:
- ½ cup butter, softened
- ½ cup vegetable shortening
- 2 cups sugar
- 4 eggs, separated
- 3 cups flour
- 2 teaspoons baking powder
- ½ cup whole milk
- ⅓ cup buttermilk, plus 1 tablespoon buttermilk
- ¼ cup heavy whipping cream
- 2 tablespoons vanilla
For the Icing:
- 1 ½ cups butter, softened
- 12 ounces cream cheese
- 1 cup unsalted butter
- 6 cups icing sugar
- 1 teaspoon imitation butter flavoring
- 2 teaspoons vanilla
- 2 teaspoons whipping cream (optional)
For the Ganache:
- ¾ cup heavy whipping cream
- 5 (1 ounce) semi-sweet chocolate baking squares
Equipment Needed
- 3 (9-inch) cake pans
- Electric mixer
- Large mixing bowls
- Medium mixing bowl
- Small mixing bowl
- Wire racks
- Microwave-safe bowl
Instructions
-
Preheat your oven to 350°F (175°C). Prepare three 9-inch cake pans by greasing them thoroughly and then lightly flouring them. This ensures the cakes release easily after baking.
-
In a large mixing bowl, cream together the softened butter and vegetable shortening at medium speed using an electric mixer until the mixture is light and creamy. This step is crucial for a tender cake.
-
Gradually add the sugar to the butter mixture, beating until the mixture becomes light and fluffy. Scrape down the sides of the bowl occasionally to ensure even mixing.
-
Add the egg yolks one at a time, beating well after each addition. Make sure each yolk is fully incorporated into the batter before adding the next.
-
In a separate medium bowl, whisk together the flour and baking powder. This distributes the baking powder evenly throughout the flour, resulting in a uniform rise.
-
In a small bowl, combine the whole milk, buttermilk, heavy whipping cream, and vanilla. This wet mixture adds moisture and flavor to the cake.
-
Gradually add the flour mixture to the butter mixture, alternating with the milk mixture, beginning and ending with the flour mixture. Beat until just combined. Overmixing can lead to a tough cake, so be careful not to overdo it.
-
In another medium bowl, beat the egg whites at medium speed with a clean electric mixer until stiff peaks form. This adds air to the batter, creating a light and airy texture.
-
Gently fold the beaten egg whites into the batter. Be careful not to deflate the egg whites; gently fold them in until just combined.
-
Divide the batter evenly among the prepared cake pans.
-
Bake for 22-24 minutes, or until a wooden pick inserted into the center of the cake comes out clean. Start checking for doneness around 22 minutes, as baking times can vary depending on your oven.
-
Let the cakes cool in the pans for 10 minutes before inverting them onto wire racks to cool completely. Cooling the cakes in the pans helps them retain their shape and prevents them from sticking.
-
While the cakes are cooling, prepare the Vanilla Butter Crème. In a large bowl, beat the softened butter, unsalted butter, and cream cheese at medium speed with an electric mixer until light and creamy. This will form the base of your delicious frosting.
-
Gradually beat in the icing sugar until smooth. Add the sugar a little at a time to prevent it from flying everywhere.
-
Beat in the vanilla extract and imitation butter flavoring. The butter flavoring enhances the buttery taste of the frosting.
-
To make the Ganache, combine the heavy whipping cream and semi-sweet chocolate baking squares in a microwave-safe bowl.
-
Microwave on high in 30-second intervals, stirring between each interval, until the chocolate is melted and smooth (about 2 minutes). Be careful not to overheat the chocolate, as it can seize up.
-
Make sure the ganache is just a little warm, not hot.
-
Once the cakes are completely cool, assemble the cake. Place one layer on a serving plate and spread with a generous layer of Vanilla Butter Crème. Repeat with the remaining layers, frosting the top and sides of the cake.
-
Place the assembled cake in the freezer for 30 minutes to firm up the frosting. This will make it easier to pour the ganache.
-
Carefully and gently spoon the warm ganache over the top of the cake, allowing it to drip down the sides.
-
Let the ganache cool for about 10 minutes before serving. This allows the ganache to set slightly, creating a beautiful glossy finish.
Expert Tips & Tricks
- For an extra moist cake, brush the cooled cake layers with simple syrup before frosting.
- If your frosting is too thick, add a teaspoon of milk or cream at a time until you reach the desired consistency.
- To prevent the cake layers from sliding, place small strips of parchment paper under the edges of the bottom layer before frosting.
- Use a turntable to make frosting the cake easier and more even.
- For a richer chocolate flavor, use dark chocolate baking squares in the ganache.
- If your ganache is too thick, add a tablespoon of warm cream at a time until you reach the desired consistency.
Serving & Storage Suggestions
Serve this Vanilla Butter-Creme Chocolate Ganache Birthday Cake chilled or at room temperature. For an elegant presentation, garnish the cake with fresh berries or chocolate shavings.
Store leftover cake in an airtight container in the refrigerator for up to 3 days. You can also freeze the cake for longer storage. Wrap individual slices tightly in plastic wrap and then place them in a freezer bag. Frozen cake will last for up to 2 months. Thaw frozen cake in the refrigerator before serving.
Nutritional Information
| Nutrient | Amount per Serving | % Daily Value |
|---|---|---|
| Calories | 1470 kcal | 74% |
| Total Fat | 93 g | 143% |
| Saturated Fat | 54 g | 270% |
| Cholesterol | 303 mg | 101% |
| Sodium | 493 mg | 21% |
| Total Carbohydrate | 153 g | 51% |
| Dietary Fiber | 2 g | 7% |
| Sugars | 120 g | 480% |
| Protein | 11 g | 23% |
Note: Nutritional information is an estimate and can vary based on specific ingredients and serving sizes.
Variations & Substitutions
- Gluten-Free: Substitute the all-purpose flour with a gluten-free flour blend. You may also need to add a binder like xanthan gum.
- Chocolate Buttercream: Substitute the Vanilla Butter Crème with a chocolate buttercream for an extra dose of chocolate.
- Different Flavors: Add a teaspoon of lemon zest to the cake batter for a citrusy twist.
- Vegan: Substitute the butter, milk, cream, and eggs with plant-based alternatives. Use a vegan cream cheese for the frosting.
FAQs (Frequently Asked Questions)
Q: Can I make the cake layers ahead of time?
A: Absolutely! You can bake the cake layers up to two days in advance. Wrap them tightly in plastic wrap and store them at room temperature or in the refrigerator.
Q: Can I freeze the entire cake after it’s assembled?
A: Yes, you can. Place the assembled cake in the freezer for about an hour to firm up the frosting and ganache. Then, wrap it tightly in plastic wrap and foil. Freeze for up to 2 months. Thaw in the refrigerator overnight before serving.
Q: What can I do if my ganache is too thick?
A: If your ganache is too thick, add a tablespoon of warm heavy cream at a time, stirring until it reaches the desired consistency.
Q: Can I use a different type of chocolate for the ganache?
A: Yes, you can use milk chocolate or dark chocolate instead of semi-sweet chocolate. Adjust the amount of heavy cream depending on the sweetness of the chocolate.
Q: Why is my buttercream grainy?
A: A grainy buttercream is often caused by the icing sugar not being fully incorporated. Try beating the buttercream for a longer period or adding a tablespoon of milk or cream to help dissolve the sugar.
Final Thoughts
This Vanilla Butter-Creme Chocolate Ganache Birthday Cake is more than just a recipe; it’s a celebration of flavors and a testament to the joy of creating something special. I encourage you to try this recipe and make it your own, adding your personal touch and flair. Whether it’s for a birthday, anniversary, or just a delightful weekend treat, this cake is guaranteed to bring smiles to everyone who tastes it. Share your creations and feedback – I’d love to hear about your baking adventures! And remember, every cake is a masterpiece, especially when made with love.