
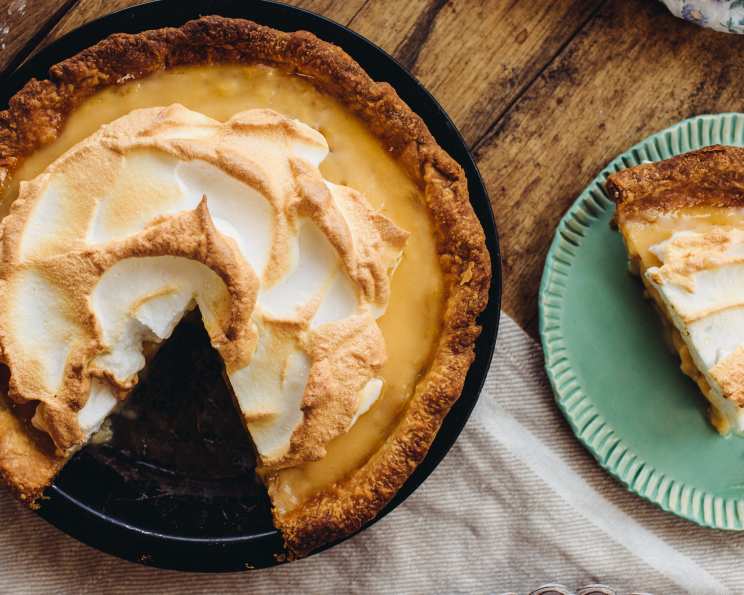
The Timeless Elegance of Vanilla Cream Pie
I remember vividly the first time I tasted vanilla cream pie. It was at my grandmother’s house, a haven of warmth and comforting aromas. The pie, perfectly golden with a billowing cloud of meringue, sat proudly on the kitchen counter. One bite of that cool, silky custard filling, paired with the delicate sweetness of the meringue and flaky crust, transported me to a world of pure bliss. It was more than just dessert; it was a symbol of her love and a tradition I’ve cherished ever since.
Recipe Overview
- Prep Time: 20 minutes
- Cook Time: 15-20 minutes
- Total Time: 35-40 minutes
- Servings: 7
- Yield: 1 pie
- Dietary Type: Not Gluten-Free
Ingredients
- 3/4 cup sugar
- 1/3 cup all-purpose flour
- 1/4 teaspoon salt
- 2 cups milk
- 3 slightly beaten egg yolks
- 2 tablespoons butter or oleo
- 1 teaspoon vanilla extract
- 1 (9-inch) baked pastry shell
- 3 egg whites (for meringue)
- 1/4 teaspoon cream of tartar
- 1/2 tablespoon vanilla extract (for meringue)
- 6 tablespoons sugar (for meringue)
Equipment Needed
- Saucepan
- Whisk
- Mixing bowls
- Measuring cups and spoons
- Electric mixer (for meringue)
- 9-inch pie dish
- Oven
Instructions
-
In a medium saucepan, thoroughly combine sugar, flour, and salt. These dry ingredients form the base for our creamy filling, so ensure they’re well mixed to avoid any lumps later on.
-
Gradually stir in milk, ensuring it’s fully incorporated with the dry ingredients. This gradual addition helps to create a smooth, even consistency, preventing the flour from clumping.
-
Cook and stir the mixture over medium heat, constantly whisking to prevent scorching or sticking. Continue cooking until the mixture begins to boil and noticeably thickens. This is where the magic happens – the starch in the flour is gelatinizing, creating that signature creamy texture.
-
Once boiling and thickened, continue to cook for an additional 2 minutes, stirring constantly. This ensures the flour is fully cooked and eliminates any raw flour taste.
-
Remove the saucepan from the heat. Temper the egg yolks by slowly whisking a small amount of the hot mixture into the slightly beaten egg yolks in a separate bowl. This crucial step prevents the yolks from scrambling when added to the hot mixture.
-
Pour the tempered egg yolk mixture back into the saucepan with the remaining hot mixture. Cook for an additional 2 minutes, stirring constantly. This further cooks the egg yolks and contributes to the overall richness and velvety texture of the filling.
-
Remove the saucepan from the heat once again. Stir in the butter (or oleo) and vanilla extract. The butter adds richness and a subtle sheen to the filling, while the vanilla extract infuses it with its classic, aromatic flavor.
-
Allow the filling to cool to room temperature. This is important to prevent the crust from becoming soggy when you pour in the hot filling. You can speed up the cooling process by placing the saucepan in an ice bath, stirring occasionally.
-
Pour the cooled filling into the baked pastry shell, spreading it evenly.
-
Prepare the meringue: In a clean, dry bowl, beat the 3 egg whites with cream of tartar and vanilla extract using an electric mixer until soft peaks begin to form. The cream of tartar helps to stabilize the egg whites, creating a meringue that holds its shape.
-
Gradually add the 6 tablespoons of sugar to the egg whites, continuing to beat until stiff, glossy peaks form. The sugar sweetens the meringue and further stabilizes the egg whites. Be careful not to overbeat, as this can cause the meringue to become dry and crumbly.
-
Spread the meringue evenly over the top of the pie, ensuring it touches the crust all the way around. This seals the meringue to the crust, preventing it from shrinking during baking. Create swirls and peaks with the back of a spoon for a beautiful presentation.
-
Bake the pie in a preheated moderate oven (350°F or 175°C) for 12 to 15 minutes, or until the meringue is lightly golden brown. Watch carefully to prevent the meringue from burning.
-
Remove the pie from the oven and let it cool completely before serving. This allows the filling to set and the meringue to cool and crisp up.
Expert Tips & Tricks
- For a perfectly golden meringue, ensure your oven rack is positioned in the center of the oven.
- If your meringue starts to brown too quickly, loosely tent the pie with foil to prevent burning.
- To prevent a soggy crust, blind bake your pastry shell before adding the filling.
- Make sure the bowl and beaters you use for the meringue are completely clean and free of any grease. Even a tiny amount of grease can prevent the egg whites from whipping up properly. A wipe of lemon juice or vinegar can help.
- A stand mixer makes quick work of the meringue, but a hand mixer works fine too.
- Don’t skip the step of tempering the egg yolks. This is key to a smooth, lump-free filling.
- If you don’t have cream of tartar, a pinch of salt can also help stabilize the egg whites, though the meringue may not be quite as firm.
Serving & Storage Suggestions
Serve the vanilla cream pie chilled for the best flavor and texture. A slice of this pie pairs perfectly with a cup of freshly brewed coffee or tea.
To store leftovers, cover the pie loosely with plastic wrap and refrigerate. It’s best enjoyed within 2-3 days, as the meringue will start to weep and the crust may become soggy over time. Vanilla cream pie is not suitable for freezing, as the texture of the filling and meringue will change significantly.
Nutritional Information
| Nutrient | Amount per Serving | % Daily Value |
|---|---|---|
| Calories | 388.7 kcal | N/A |
| Calories from Fat | 149 g | 38% |
| Total Fat | 16.6 g | 25% |
| Saturated Fat | 6.5 g | 32% |
| Cholesterol | 89.6 mg | 29% |
| Sodium | 312.8 mg | 13% |
| Total Carbohydrate | 52.8 g | 17% |
| Dietary Fiber | 0.6 g | 2% |
| Sugars | 32.6 g | N/A |
| Protein | 7.2 g | 14% |
Note: Nutritional information is an estimate and may vary depending on specific ingredients and preparation methods.
Variations & Substitutions
- Banana Cream Pie: Layer sliced bananas on the baked crust before pouring in the vanilla cream filling.
- Coconut Cream Pie: Add 1/2 cup of shredded coconut to the vanilla cream filling. You can also toast some coconut flakes to sprinkle on top of the meringue.
- Butterscotch Pie: Substitute 1 cup of brown sugar for the granulated sugar and use 3 tablespoons of butter.
- Chocolate Pie: Increase the sugar to 1 cup and add approximately 4 tablespoons of cocoa powder to the dry ingredients.
- Pineapple Pie: Drain an 8 oz can of crushed pineapple and stir it into the cooled cream filling.
- Dairy-Free Vanilla Cream Pie: Substitute the milk with your favorite non-dairy milk, such as almond milk, soy milk, or coconut milk. Use a vegan butter substitute for the butter.
- Gluten-Free Vanilla Cream Pie: Use a gluten-free pastry crust or make a graham cracker crust using gluten-free graham crackers. Ensure the flour used in the filling is also a gluten-free blend.
FAQs (Frequently Asked Questions)
Q: Can I use store-bought pastry crust?
A: Absolutely! Using a store-bought crust is a great time-saver. Just make sure to blind bake it before adding the filling.
Q: How do I prevent my meringue from weeping?
A: Make sure the meringue seals completely to the crust, and avoid overbaking. A stabilized meringue, made with cream of tartar and properly beaten, will also be less likely to weep.
Q: Can I make the filling ahead of time?
A: Yes, you can make the filling a day in advance. Store it in the refrigerator, covered with plastic wrap to prevent a skin from forming on the surface.
Q: My filling is lumpy, what did I do wrong?
A: Lumpy filling is usually caused by the flour not being fully incorporated or the egg yolks scrambling. Make sure to whisk the dry ingredients thoroughly and temper the yolks properly.
Q: Can I use a different extract besides vanilla?
A: Yes! Almond extract, lemon extract, or even a hint of rum extract can add a unique twist to the classic vanilla flavor.
Final Thoughts
Vanilla cream pie is more than just a dessert; it’s a slice of nostalgia, a comforting hug on a plate. With its creamy filling, delicate meringue, and flaky crust, it’s a classic for a reason. Don’t be intimidated by the steps – this recipe is surprisingly straightforward, and the results are well worth the effort. Gather your ingredients, preheat your oven, and get ready to create a dessert that will delight your family and friends. I encourage you to try this recipe and share your creations! Perhaps pair it with a scoop of vanilla ice cream or a glass of chilled Moscato for an extra touch of indulgence. Happy baking!