
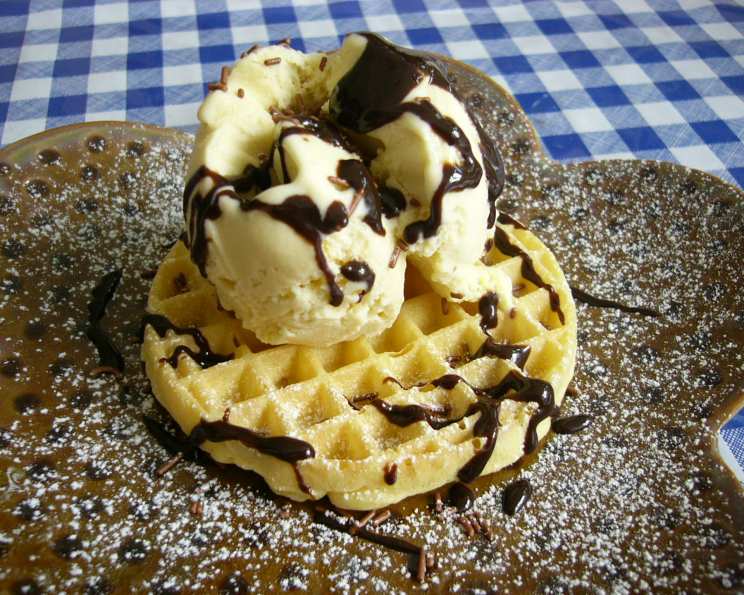
Vanilla Malted Ice Cream: A Nostalgic Treat
There’s something about the flavor of malt that instantly transports me back to my childhood. I remember summer days spent at my local pharmacy, perched on a spinning stool, watching the soda jerk expertly craft a creamy malted milkshake. The cool sweetness, the subtle tang of malt, and that unmistakable vanilla aroma – it was pure bliss. Recreating that experience in ice cream form has been a long-time passion, and this recipe is the culmination of years of tinkering. It captures all the comforting flavors of a classic malted in a frozen, spoonable delight.
Recipe Overview
- Prep Time: 20 minutes
- Cook Time: 15 minutes
- Total Time: At least 4 hours (including chilling)
- Servings: About 6-8
- Yield: About 1 quart
- Dietary Type: Not suitable for lactose-intolerant individuals
Ingredients
- 1 ½ cups milk
- 4 egg yolks
- ¾ cup sugar
- ⅓ cup malt drink powder (such as Ovaltine or Carnation Malted Milk)
- 2 teaspoons vanilla extract
- 1 ½ cups whipping cream
Equipment Needed
- Saucepan
- Whisk
- Mixing bowls
- Fine-mesh sieve or strainer
- Ice cream maker
Instructions
-
In a saucepan, combine the milk and malt drink powder. Heat over medium heat, stirring constantly until the malt powder is completely dissolved and the mixture begins to simmer. Once simmering, immediately remove the saucepan from the heat.
-
While the milk and malt mixture is heating, prepare the egg yolk mixture. In a mixing bowl, whisk together the egg yolks and sugar until the mixture becomes pale yellow, satiny, and resembles a thick batter. This usually takes about 2-3 minutes of vigorous whisking.
-
Slowly pour the hot milk and malt mixture into the egg yolk and sugar mixture, whisking constantly to temper the eggs and prevent them from scrambling. This step is crucial for a smooth, custard-like base.
-
Return the entire mixture to the saucepan and place it over the lowest heat setting.
-
Continuously whisk the mixture, ensuring that it does not boil. The goal is to gently thicken the custard until it coats the back of a spoon. To test for doneness, dip a spoon into the custard and run your finger across the back of the spoon. If the line remains distinct and the custard doesn’t run back together, it’s ready. This process usually takes about 5-8 minutes.
-
Strain the custard immediately through a fine-mesh sieve or strainer into a large bowl. This will remove any accidentally cooked egg bits and ensure a perfectly smooth ice cream base.
-
Let the strained custard cool for about 10 minutes at room temperature. This allows the mixture to release excess steam and prevents condensation from forming when you add the cream.
-
Whisk in the whipping cream and vanilla extract until well combined.
-
Cover the bowl with plastic wrap, pressing the wrap directly onto the surface of the custard to prevent a skin from forming. Chill the mixture in the refrigerator for at least 4 hours, or preferably overnight. A longer chilling period allows the flavors to meld together and the base to become completely cold, resulting in a smoother ice cream.
-
Once thoroughly chilled, process the mixture in your ice cream maker according to the manufacturer’s instructions. The churning process typically takes 20-30 minutes, depending on the machine.
Expert Tips & Tricks
- Don’t Overcook the Custard: Overcooked custard will result in a grainy ice cream. The mixture should be thick enough to coat the back of a spoon but not so thick that it resembles pudding.
- Chill Thoroughly: A well-chilled ice cream base is essential for achieving a smooth and creamy texture. Don’t skip the chilling step!
- Use High-Quality Ingredients: The quality of your ingredients will directly impact the flavor of your ice cream. Opt for fresh, high-quality milk, cream, and vanilla extract for the best results.
- For a richer flavor: Use brown sugar instead of white sugar for a hint of caramel undertones.
Serving & Storage Suggestions
Serve the Vanilla Malted Ice Cream immediately after churning for a soft-serve consistency, or transfer it to an airtight container and freeze for a firmer texture. It’s delicious on its own, or as a complement to brownies, cookies, or pies. Consider topping it with whipped cream, chocolate sauce, or a sprinkle of malt powder for an extra touch of nostalgia.
Store leftover ice cream in an airtight container in the freezer for up to two weeks. For optimal texture, let the ice cream soften slightly at room temperature for a few minutes before serving.
Nutritional Information
| Nutrient | Amount per Serving (approximate) | % Daily Value (approximate) |
|---|---|---|
| Calories | 300 kcal | 15% |
| Total Fat | 20g | 31% |
| Saturated Fat | 13g | 65% |
| Cholesterol | 150mg | 50% |
| Sodium | 60mg | 3% |
| Total Carbohydrate | 25g | 8% |
| Dietary Fiber | 1g | 4% |
| Sugars | 20g | |
| Protein | 4g | 8% |
Variations & Substitutions
- Chocolate Malted Ice Cream: Add 2-3 tablespoons of unsweetened cocoa powder to the milk and malt mixture.
- Coffee Malted Ice Cream: Steep 1/4 cup of coarsely ground coffee beans in the warm milk for 30 minutes before proceeding with the recipe. Strain well.
- Dairy-Free Variation: Use a high-quality coconut cream instead of whipping cream. The milk can be substituted with almond or oat milk, but the flavor will be slightly different. Note that the texture may also vary.
FAQs (Frequently Asked Questions)
Q: Can I make this recipe without an ice cream maker?
A: While an ice cream maker produces the best results, you can try the “no-churn” method. Freeze the custard base in a shallow container, whisking it vigorously every 30 minutes for the first 2-3 hours to break up ice crystals.
Q: What kind of malt drink powder should I use?
A: Ovaltine and Carnation Malted Milk are both excellent choices. Use whatever brand you prefer, as long as it’s a malt drink powder and not just flavored cocoa.
Q: My ice cream turned out icy. What went wrong?
A: Icy ice cream can be caused by not chilling the base thoroughly enough, not using enough fat (cream), or over-churning. Make sure to chill the base overnight and avoid over-churning in the ice cream maker.
Q: Can I add mix-ins to this ice cream?
A: Absolutely! Chunks of chocolate, chopped nuts, or crumbled cookies would be delicious additions. Add them during the last few minutes of churning.
Q: How do I store leftover ice cream to prevent freezer burn?
A: The best way to prevent freezer burn is to store the ice cream in an airtight container, pressing a piece of plastic wrap directly onto the surface before sealing.
Final Thoughts
This Vanilla Malted Ice Cream is more than just a frozen dessert; it’s a taste of nostalgia, a spoonful of comfort, and a celebration of simple pleasures. Don’t be intimidated by the custard-making process – with a little patience and attention to detail, you’ll be rewarded with a creamy, flavorful ice cream that will transport you back to simpler times. So, gather your ingredients, dust off your ice cream maker, and prepare to indulge in a truly delightful treat. I encourage you to experiment with variations and make it your own. And please, share your creations and feedback! Enjoy!