
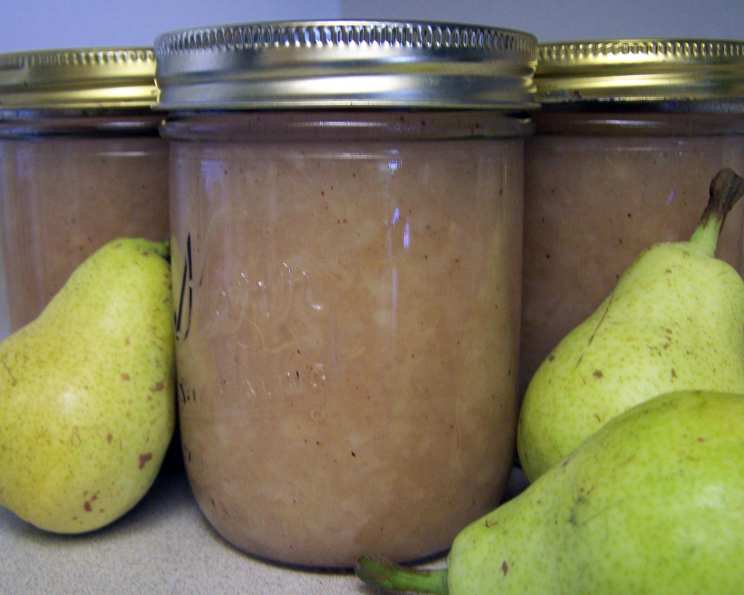
Vanilla Pear Sauce: A Taste of Autumn’s Embrace
There’s something inherently comforting about a warm bowl of fruit sauce. As a child, I remember my grandmother’s kitchen, perpetually filled with the sweet aroma of simmering fruit and spices. It wasn’t just about the taste; it was the feeling of being enveloped in warmth and love. Invariably, a pot of pear sauce was bubbling on the stove, its fragrance a promise of cozy evenings and happy memories. The soft, yielding texture and delicate sweetness of the pears, complemented by the gentle warmth of vanilla, made it an experience I always looked forward to.
Recipe Overview
- Prep Time: 20 minutes
- Cook Time: 15 minutes
- Total Time: 35 minutes
- Yields: 4 quarts
- Serves: 32
- Dietary Type: Vegan
Ingredients
- 25 large ripe pears
- 2 quarts water
- 1 1/2 cups sugar (adjust to taste)
- 1 tablespoon lemon juice
- 1 tablespoon vanilla extract
- 1 teaspoon ground cloves
- 1 teaspoon ground nutmeg
Equipment Needed
- Large 6-quart pot
- Sterilized canning jars (for canning option)
- Lids and bands for canning jars (for canning option)
- Boiling water canner (for canning option)
- Potato masher
- Jar lifter (for canning option)
Instructions
- Begin by preparing your pears. Wash, cut each of the 25 large ripe pears in half, then core and peel them. Now, cut the pears into large chunks.
- Transfer the pear chunks to a large 6-quart pot. Ideally, the pear chunks should fill the pot to at least the 5-quart level.
- Add 2 quarts water and 1 1/2 cups sugar to the pot. If you prefer a sweeter sauce, you can add an additional ½ cup or more of sugar to taste.
- Bring the mixture to a boiling point over medium-high heat. Once boiling, reduce the heat to low and allow the mixture to low boil.
- Stir in 1 tablespoon vanilla extract, 1 tablespoon lemon juice, 1 teaspoon nutmeg, and 1 teaspoon ground cloves.
- Now, perform a taste test. Adjust the amount of sugar and spices as needed to achieve your desired flavor profile. This is your opportunity to make the sauce truly your own.
- Cover the pot and cook for 10-15 minutes, or until the pears are very soft. They should be easily mashed to your desired consistency using a potato masher.
- Do not drain off the liquid after cooking unless the sauce is excessively watery. Aim for a juicy consistency, as some of the liquid will evaporate during the canning process if you choose to can it.
- At this point, if you’re not canning the sauce, you can stop here. Allow the sauce to cool slightly before serving or storing. Otherwise, proceed to the canning steps.
- Quickly fill sterilized, hot (180°F) canning jars to within 1/8 inch of the rim.
- Wipe the jar rims and threads clean with a damp cloth to ensure a proper seal.
- Cover the jars with hot lids (180°F) and apply bands, tightening them finger-tight only.
- Process the filled jars in a boiling water canner for 12 minutes. Ensure that the water covers the jars by 1 to 2 inches.
- Once processing is complete, carefully remove the jars from the canner using a jar lifter and place them on a towel-lined surface to cool. Allow the jars to cool completely, undisturbed, for 12-24 hours. As they cool, you should hear a “popping” sound as the lids seal.
- After cooling, check the seals of the jars by pressing down on the center of each lid. If the lid doesn’t flex, it’s properly sealed. If the lid flexes, the jar isn’t sealed and should be refrigerated and consumed within a week or reprocessed with a new lid.
Important Note: To prevent the pears from darkening during preparation, drop the cut pear pieces into a large pot of water containing 2 tablespoons of salt and 2 tablespoons of vinegar per gallon of water used.
Expert Tips & Tricks
- Spice it Up: Don’t be afraid to experiment with different spices. A pinch of ginger or cardamom can add a unique and delicious twist to the vanilla pear sauce.
- Pear Variety: The type of pears you use will influence the final flavor and texture of your sauce. Bosc pears hold their shape well, while Bartlett pears soften considerably. A combination of pear varieties can create a more complex and interesting sauce.
- Preventing Browning: As mentioned in the recipe, using a saltwater and vinegar solution is a great way to prevent the pears from browning while you’re prepping them. Alternatively, you can toss the cut pears with a little lemon juice.
- Thickening the Sauce: If your sauce is too thin after cooking, you can simmer it uncovered for a bit longer to allow some of the excess liquid to evaporate. You can also add a cornstarch slurry (1 tablespoon cornstarch mixed with 2 tablespoons cold water) to thicken it, but do so gradually to avoid making it too thick.
- Flavor Infusion: For a deeper vanilla flavor, consider using a vanilla bean instead of vanilla extract. Slit the bean lengthwise, scrape out the seeds, and add both the seeds and the pod to the pot while the pears are cooking. Remove the pod before mashing.
Serving & Storage Suggestions
This Vanilla Pear Sauce is incredibly versatile. Serve it warm over vanilla ice cream, yogurt, or pancakes for a delightful breakfast or dessert. It also pairs well with roasted pork or chicken as a savory accompaniment.
- Freshly Made (Uncanned): If you’re not canning the sauce, store it in an airtight container in the refrigerator for up to 5 days.
- Canned: Properly canned jars of Vanilla Pear Sauce can be stored in a cool, dark place for up to 1 year. Once opened, refrigerate and consume within a week.
- Reheating: Reheat the sauce gently in a saucepan over low heat or in the microwave.
Nutritional Information
(Estimates will vary based on specific ingredients and serving size)
| Nutrient | Amount per Serving | % Daily Value |
|---|---|---|
| Calories | 133 kcal | 7% |
| Total Fat | 0.2 g | 0% |
| Saturated Fat | 0 g | 0% |
| Cholesterol | 0 mg | 0% |
| Sodium | 3 mg | 0% |
| Total Carbohydrate | 34.8 g | 11% |
| Dietary Fiber | 5.1 g | 20% |
| Sugars | 25.4 g | 51% |
| Protein | 0.6 g | 1% |
Variations & Substitutions
- Sugar Alternatives: Experiment with different types of sugar, such as brown sugar or maple syrup, for a richer flavor.
- Spice Variations: Try adding a cinnamon stick while cooking for a warm, comforting flavor.
- Pear Varieties: Combine different pear varieties for a more complex flavor profile.
- Citrus Zest: Add a teaspoon of lemon or orange zest for a brighter, more aromatic sauce.
- Alcoholic Infusion: A splash of brandy or rum can add a sophisticated touch to the sauce. Add it towards the end of the cooking process to prevent the alcohol from evaporating completely.
FAQs (Frequently Asked Questions)
Q: Do I have to peel the pears?
A: Peeling the pears results in a smoother sauce, but if you prefer a more rustic texture, you can leave the peels on. Just be sure to wash the pears thoroughly.
Q: Can I use frozen pears?
A: While fresh pears are ideal, you can use frozen pears in a pinch. Just be aware that they may release more liquid during cooking, so you might need to simmer the sauce for a longer time to achieve the desired consistency.
Q: How can I make this sauce less sweet?
A: Reduce the amount of sugar in the recipe or use a sugar substitute. You can also add a little extra lemon juice to balance the sweetness.
Q: Can I freeze the pear sauce?
A: Yes, you can freeze the pear sauce. Allow it to cool completely before transferring it to freezer-safe containers or bags. It can be stored in the freezer for up to 3 months.
Q: How do I know if my canning jars are properly sealed?
A: After the jars have cooled completely, press down on the center of each lid. If the lid doesn’t flex, it’s properly sealed. If the lid flexes, the jar isn’t sealed and should be refrigerated and consumed within a week or reprocessed with a new lid.
Final Thoughts
Vanilla Pear Sauce is more than just a recipe; it’s a celebration of simple flavors and comforting traditions. I encourage you to try this recipe and experience the joy of creating something delicious from scratch. Feel free to adapt it to your own taste preferences and share your variations with friends and family. Whether you serve it warm on a chilly evening or can it for a taste of autumn throughout the year, this sauce is sure to become a cherished favorite.