
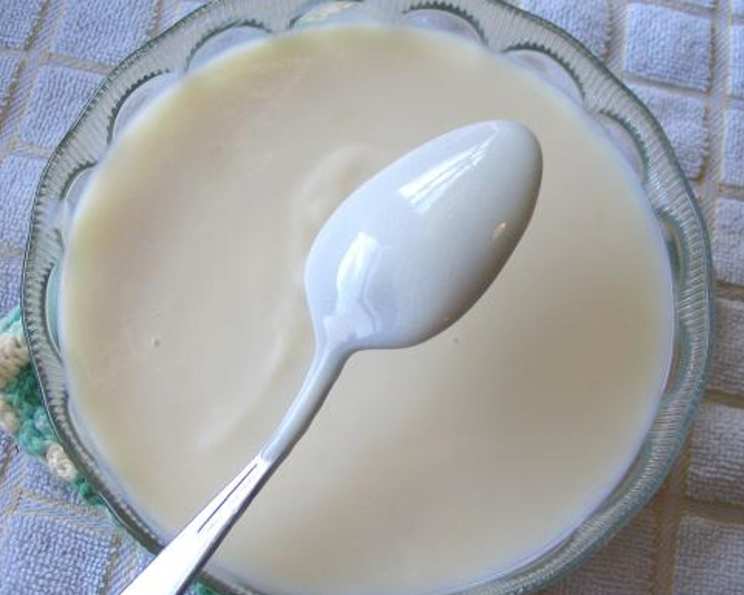
The Ultimate Homemade Vanilla Pudding Mix
Vanilla pudding. Just the words conjure up images of simpler times, childhood comfort, and that unmistakable creamy sweetness. I remember my grandmother always had a bowl of it ready in the fridge, topped with a sprinkle of cinnamon and a dollop of whipped cream. It was a simple pleasure, a guaranteed smile after a long day. As I ventured into the world of professional cooking, I found myself yearning for that same nostalgic flavor, but wanting to control the ingredients and have the flexibility to adapt it for various desserts. That’s when I started experimenting with creating my own vanilla pudding mix – a versatile base for countless culinary creations.
Recipe Overview
- Prep Time: 20 minutes
- Cook Time: 10-15 minutes (when made into pudding)
- Total Time: 30-35 minutes (when made into pudding)
- Yields: 9 batches (of mix)
- Serves: 36 (when made into pudding)
- Dietary Type: Vegetarian (can be made vegan with substitutions)
Ingredients
- 4 cups instant nonfat dry milk powder
- 4 cups sugar
- 1 1/3 cups cornstarch
- 1/2 teaspoon salt
- 2 cups milk (for making pudding from the mix)
- 1 tablespoon butter (for making pudding from the mix)
- 1/2 teaspoon vanilla extract (for making pudding from the mix)
- Optional: 2 egg yolks, slightly beaten (for making pudding richer – see notes below)
Equipment Needed
- Large mixing bowl
- Food processor
- Double boiler or saucepan and heat-safe bowl
- Whisk
- Jars with tight-fitting lids for storing the mix
Instructions
- In a large mixing bowl, combine the instant nonfat dry milk powder, sugar, cornstarch, and salt. It’s important to mix these dry ingredients thoroughly to ensure even distribution and prevent clumping later.
- Pour the mixture into a food processor. Process until you achieve a very fine, uniform powder. This step is crucial for a smooth and creamy final pudding. Don’t skip it! It might take a few minutes of processing to break down any larger granules.
- At this point, your vanilla pudding mix is ready for storage! Transfer it to jars with tight-fitting lids. Label the jars with the date and instructions for use. This makes it perfect for gifting or for keeping on hand for your own future dessert cravings.
- When you’re ready to make pudding, prepare a double boiler by bringing water to a simmer in the bottom pot. Alternatively, you can use a saucepan and a heat-safe bowl that fits snugly over it, ensuring the bottom of the bowl doesn’t touch the water.
- Measure 1 cup of the powdered pudding mix and place it in the top of the double boiler.
- Slowly add the 2 cups of milk to the pudding mix, whisking constantly to prevent lumps from forming. I find that using a whisk results in a lighter and fluffier pudding, but a regular spoon will work just fine too.
- Continue stirring constantly for approximately 10-15 minutes, or until the pudding reaches your desired thickness. The cooking time may vary depending on the heat of your double boiler. Keep a close eye on it and adjust the heat as needed. You’ll notice the mixture gradually thickening as the cornstarch cooks.
- Remove the pudding from the double boiler.
- Stir in the 1 tablespoon of butter and 1/2 teaspoon of vanilla extract. Continue whisking or stirring until the butter is completely melted and the vanilla is thoroughly blended into the pudding.
- Pour the hot pudding into individual serving dishes or a larger bowl.
- Refrigerate for at least 2 hours, or until completely chilled and set. This allows the pudding to firm up and develop its full flavor.
Adding Egg Yolks (Optional): For a richer, more custardy flavor, you can incorporate two slightly beaten egg yolks. After step 6, temper the egg yolks by gradually whisking in some of the hot milk mixture. Then, slowly pour the tempered egg yolks back into the pudding in the double boiler, whisking constantly. Continue cooking and stirring until the pudding thickens. The addition of egg yolks also helps the pudding set more firmly.
Expert Tips & Tricks
- For a smoother pudding, ensure the dry mix is very finely ground in the food processor. Sifting the mix after processing can also help remove any remaining lumps.
- Control the sweetness by adjusting the amount of sugar in the dry mix. You can also use alternative sweeteners like stevia or erythritol, but be sure to adjust the amount accordingly, as their sweetness levels differ from sugar.
- Prevent a skin from forming on the surface of the pudding while it’s chilling by pressing a piece of plastic wrap directly onto the surface.
- Don’t overcook the pudding, as this can cause it to become too thick or even curdle.
- Experiment with flavors by adding a pinch of nutmeg or cinnamon to the dry mix, or by using different extracts like almond or lemon instead of vanilla.
Serving & Storage Suggestions
Serve the chilled vanilla pudding plain, or dress it up with your favorite toppings! Fresh berries, whipped cream, chocolate shavings, or a sprinkle of cinnamon are all delicious options.
Store leftover pudding in an airtight container in the refrigerator for up to 3-4 days. Unfortunately, pudding does not freeze well as the texture can become grainy upon thawing.
Nutritional Information
Note: Nutritional information is based on estimations and may vary depending on specific ingredients and serving sizes.
| Nutrient | Amount per Serving | % Daily Value |
|---|---|---|
| Calories | 142.8 kcal | N/A |
| Calories from Fat | 7 g | 5% |
| Total Fat | 0.9 g | 1% |
| Saturated Fat | 0.6 g | 2% |
| Cholesterol | 4.1 mg | 1% |
| Sodium | 83.9 mg | 3% |
| Total Carbohydrate | 31.1 g | 10% |
| Dietary Fiber | 0 g | 0% |
| Sugars | 26.1 g | 104% |
| Protein | 3.1 g | 6% |
Variations & Substitutions
- Vegan Pudding: Substitute the dry milk powder with a vegan alternative such as soy milk powder, coconut milk powder, or oat milk powder. For the milk, use your favorite plant-based milk like almond, soy, or oat milk. Replace the butter with a vegan butter alternative or coconut oil.
- Chocolate Pudding: Add 1/4 cup of unsweetened cocoa powder to the dry mix.
- Butterscotch Pudding: Use brown sugar instead of granulated sugar in the dry mix, and add a teaspoon of butterscotch extract to the cooked pudding.
- Banana Pudding: Fold sliced bananas into the cooled pudding before serving.
- Seasonal Variations: Add pumpkin puree and pumpkin spice to the dry mix for a fall-inspired pudding, or citrus zest and juice for a summery version.
FAQs (Frequently Asked Questions)
Q: How long does the dry pudding mix last?
A: When stored in an airtight container in a cool, dry place, the dry pudding mix can last for up to 6 months.
Q: Can I use a different type of milk to make the pudding?
A: Yes, you can use any type of milk you prefer, including whole milk, skim milk, or plant-based milk alternatives. Keep in mind that the type of milk you use will affect the flavor and richness of the pudding.
Q: My pudding is lumpy. What did I do wrong?
A: Lumpy pudding is usually caused by not whisking the milk into the dry mix thoroughly enough. Make sure to whisk constantly as you add the milk to prevent clumps from forming. Using a food processor to create a very fine dry mix also helps.
Q: Can I make this pudding without a double boiler?
A: Yes, you can make it in a saucepan over low heat, but be sure to stir constantly to prevent scorching.
Q: Can I add other flavors to the pudding besides vanilla?
A: Absolutely! Experiment with different extracts, spices, and even purees to create your own unique pudding flavors.
Final Thoughts
Homemade vanilla pudding mix is a game-changer in the kitchen. It’s not only a versatile base for countless desserts but also a wonderful way to control the ingredients and avoid artificial additives. From a simple afternoon treat to an elegant dessert centerpiece, this mix has you covered. I encourage you to try this recipe, experiment with different variations, and rediscover the joy of homemade pudding. Don’t hesitate to share your creations and feedback – I’d love to hear how you make this classic dessert your own! Maybe pair it with some homemade shortbread cookies for the ultimate comfort food experience. Happy cooking!