
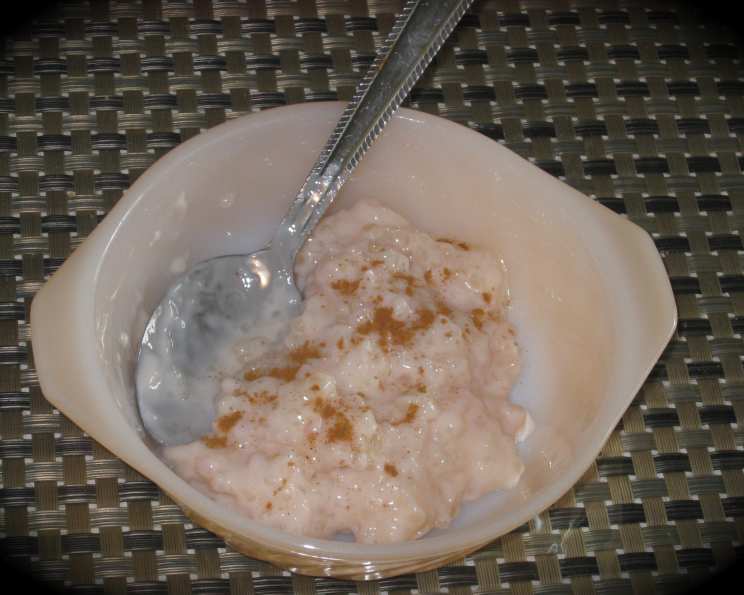
Creamy Dream: Mastering Vanilla Tapioca Pudding
The first time I tasted tapioca pudding, I was a child, tucked away in my grandmother’s cozy kitchen. The aroma of warm milk and vanilla filled the air as she ladled a generous portion into my bowl. The translucent pearls, suspended in a silky custard, looked almost magical. Each spoonful was a comforting, sweet escape, a memory I cherish to this day. Recreating that experience is always my goal, and this recipe is my tribute to her simple, perfect pudding.
Recipe Overview
- Prep Time: 3 hours (soaking tapioca)
- Cook Time: 45 minutes
- Total Time: 3 hours 45 minutes
- Servings: 6-8
- Dietary Type: Gluten-Free
Ingredients
- ¾ cup pearl tapioca
- 2 cups cold water
- 4 cups milk (low-fat, whole, or fat-free)
- ⅔ cup sugar
- ¼ teaspoon salt
- 1 teaspoon vanilla extract
Equipment Needed
- Heavy-bottomed saucepan
- Whisk
- Wide, flat utensil (spatula or wooden spoon)
- Measuring cups and spoons
- Serving bowls or individual pudding cups
Instructions
-
Begin by soaking the pearl tapioca in the cold water for at least 3 hours, or preferably overnight. This step is crucial for softening the tapioca and achieving the desired creamy texture.
-
In a heavy-bottomed saucepan, gently heat the milk over medium heat until it is steaming, but not boiling. Scalding the milk can affect the flavor, so keep a close watch.
-
Drain the excess water from the soaked tapioca. Add the drained tapioca to the steaming milk, stirring constantly with a whisk or spatula. Be sure to scrape the bottom of the pan to prevent sticking or scorching. Continue stirring until the mixture is steaming again – again, avoid boiling.
-
Immediately reduce the heat to very low – even lower than the setting you’d use for cooking rice. You want just enough heat to see a few vapors rising.
-
Stir the mixture frequently for the first few minutes to ensure even distribution of heat. Then, add the sugar and salt, stirring until they are fully dissolved. If the mixture seems too thick, you can add a little extra milk to reach a consistency similar to that of cooking oatmeal. Don’t worry if it seems thin at this stage; it will thicken as it cooks.
-
Continue to cook the pudding for approximately 45 minutes, stirring the bottom of the mixture every 5 minutes or so. Add more milk as needed to maintain that oatmeal-like consistency. The key is to cook the tapioca pearls until they become completely translucent, with no white specks remaining in the center. This is how you know they are fully cooked and will contribute to a smooth, creamy pudding.
-
Important Note: You can use a double boiler to cook the pudding to minimize the risk of scorching, but a heavy-bottomed saucepan will work just fine if you pay close attention and stir frequently. If you notice any sticking or burning, immediately transfer the pudding to a clean pan, discarding any caramelized or browned bits.
-
Once the tapioca pearls are translucent and the pudding has thickened to your liking, remove the saucepan from the heat. Stir in the vanilla extract, ensuring it is evenly distributed throughout the pudding.
-
Transfer the warm vanilla tapioca pudding to a serving bowl or individual pudding cups.
-
Cover the pudding with plastic wrap, pressing it directly onto the surface to prevent a skin from forming. Chill in the refrigerator for at least 2 hours to allow it to fully set and thicken further.
-
Serve chilled, with a dollop of whipped cream, a sprinkle of cinnamon, or fresh fruit.
Expert Tips & Tricks
- Low and Slow: The key to perfect tapioca pudding is cooking it at a very low heat for a longer period. This allows the tapioca pearls to cook evenly and prevents scorching.
- Constant Stirring: Don’t skip the stirring! Regular stirring ensures that the tapioca pearls cook evenly and prevents them from sticking to the bottom of the pan.
- Adjusting Consistency: If your pudding is too thick, add more milk, a little at a time, until you reach your desired consistency. If it’s too thin, continue cooking it over low heat, stirring constantly, until it thickens.
- Don’t Overcook: Overcooked tapioca can become gummy. Watch closely and remove from heat as soon as the pearls are translucent.
- Coconut Milk Twist: For a delicious variation, substitute 1 cup of the milk with unsweetened coconut milk. This adds a subtle coconut flavor and extra creaminess.
Serving & Storage Suggestions
Serve the vanilla tapioca pudding chilled, straight from the refrigerator. It’s delicious on its own, but you can also dress it up with a variety of toppings. Fresh berries, sliced bananas, or a sprinkle of toasted coconut flakes all make excellent additions. A dollop of whipped cream and a dusting of cinnamon is a classic pairing.
Leftover pudding should be stored in an airtight container in the refrigerator. It will keep well for up to 3-4 days. Note that it may thicken further as it sits, so you may need to add a splash of milk when reheating. Tapioca pudding is best enjoyed cold, but if you prefer, you can gently reheat it in a saucepan over low heat, stirring constantly. Avoid boiling, as this can alter the texture. I would not recommend freezing tapioca pudding, as the texture can become grainy upon thawing.
Nutritional Information
| Nutrient | Amount per Serving | % Daily Value |
|---|---|---|
| Calories | 260 kcal | 13% |
| Total Fat | 6g | 8% |
| Saturated Fat | 4g | 20% |
| Cholesterol | 23mg | 8% |
| Sodium | 179mg | 8% |
| Total Carbohydrate | 47g | 17% |
| Dietary Fiber | 0g | 0% |
| Sugars | 23g | N/A |
| Protein | 5g | 10% |
Note: Nutritional information is an estimate and may vary based on specific ingredients and portion sizes.
Variations & Substitutions
- Dairy-Free: Use unsweetened almond milk, oat milk, or soy milk in place of dairy milk for a dairy-free version. Be aware that the flavor and texture may be slightly different.
- Sweetener Options: Experiment with different sweeteners, such as honey, maple syrup, or agave nectar, in place of granulated sugar. Adjust the amount to taste.
- Flavor Infusions: Infuse the milk with other flavors by adding a cinnamon stick, a vanilla bean pod, or lemon zest while heating. Remove before adding the tapioca.
- Chocolate Tapioca: Stir in 2 tablespoons of unsweetened cocoa powder along with the sugar for a chocolatey twist.
- Fruit Puree: Puree fresh or frozen fruit and swirl it into the pudding before serving for added flavor and nutrients. Mango, raspberry, or strawberry puree work well.
FAQs (Frequently Asked Questions)
Q: Can I use instant tapioca in this recipe?
A: No, this recipe is specifically designed for pearl tapioca. Instant tapioca requires different proportions and cooking times.
Q: How do I know when the tapioca is fully cooked?
A: The tapioca pearls should be completely translucent with no white specks in the center. They should also be soft and slightly chewy.
Q: My pudding is too thick. How can I thin it out?
A: Simply add a little more milk, one tablespoon at a time, until you reach your desired consistency.
Q: Can I make this pudding ahead of time?
A: Yes, this pudding can be made ahead of time and stored in the refrigerator for up to 3-4 days. It will thicken as it sits, so you may need to add a splash of milk before serving.
Q: Why is my tapioca pudding lumpy?
A: Lumpy tapioca pudding is usually caused by not stirring frequently enough or by cooking the pudding at too high a heat. Make sure to stir constantly and cook over low heat.
Final Thoughts
Vanilla Tapioca Pudding is more than just a dessert; it’s a taste of nostalgia, a comforting embrace in a bowl. Don’t be intimidated by the soaking and stirring – the result is well worth the effort. This creamy, subtly sweet treat is perfect for any occasion, from a simple weeknight dessert to a special gathering. So, gather your ingredients, put on some good music, and get ready to create a little bit of magic in your own kitchen. I encourage you to experiment with variations, share your creations, and most importantly, enjoy the process. Happy cooking!