
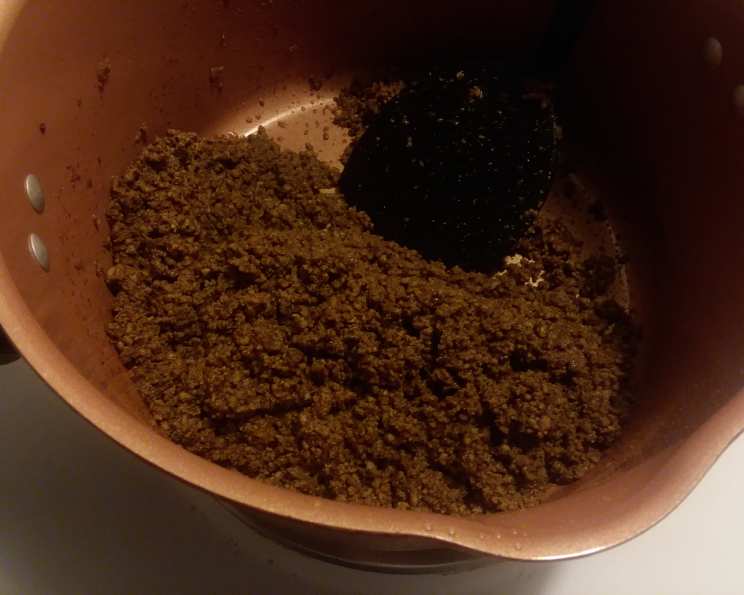
Varsity Chili for Hot Dogs: An Atlanta Classic
The scent of warm, meaty chili always whisks me back to my childhood in Atlanta. No trip downtown was complete without a pilgrimage to The Varsity, that iconic drive-in where the aroma of chili dogs hung heavy in the air, mingling with the shouts of “What’ll ya have?” The sheer volume of people, the organized chaos, and that undeniably perfect chili-smothered hot dog were all part of the experience. This recipe attempts to capture that distinctly Atlantan flavor, bringing those memories right back to your kitchen.
Recipe Overview
- Prep Time: 15 minutes
- Cook Time: 8 hours 20 minutes
- Total Time: 8 hours 35 minutes
- Servings: 18-20
- Yield: About 8 quarts
- Dietary Type: Not specified (can be adapted to be gluten-free and dairy-free)
Ingredients
- 4 lbs lean ground beef
- ½ onion, chopped fine
- 1-2 teaspoons salt (to taste)
- 2 tablespoons ground cumin
- 6 tablespoons chili powder
- 2 cups water
- 1 (1 1/4 ounce) package chili seasoning mix
Equipment Needed
- Large skillet or Dutch oven
- Crockpot (slow cooker)
Instructions
- Begin by browning the lean ground beef in a large skillet or Dutch oven over medium-high heat. Break up the beef with a spoon as it cooks, ensuring it’s evenly browned.
- Once the beef is fully browned, carefully drain off any excess fat. This step is crucial to prevent a greasy chili.
- Transfer the browned ground beef to the crockpot.
- Add the finely chopped onion to the crockpot.
- Sprinkle the salt over the beef and onion. Start with 1 teaspoon and adjust to your liking after the chili has cooked.
- Add the ground cumin to the crockpot. The cumin adds a warm, earthy note to the chili.
- Add the chili powder to the crockpot. This is a key ingredient for that classic chili flavor.
- Pour the water into the crockpot.
- Empty the package of chili seasoning mix into the crockpot. Make sure to break up any clumps of the seasoning mix.
- Using a large spoon, thoroughly combine all the ingredients in the crockpot. Ensure everything is well-mixed so that the flavors meld together during cooking.
- Cover the crockpot and cook on high heat for 2 hours.
- After 2 hours on high, carefully stir the chili well. This helps to redistribute the flavors and prevent sticking.
- Reduce the heat to low and continue cooking for 6-8 more hours. The longer cooking time on low heat allows the flavors to deepen and intensify. The chili should be gently simmering, not boiling.
- After the long, slow cook, give the chili one final stir. It should be thick, rich, and deeply flavorful.
- Taste and adjust the seasoning, adding more salt, chili powder, or cumin as needed to suit your preference.
Expert Tips & Tricks
- For an even smoother chili, consider using an immersion blender to partially blend the chili after it has cooked on low for a few hours. Be careful not to over-blend, as you still want some texture.
- If you prefer a spicier chili, add a pinch of cayenne pepper or a dash of hot sauce to the crockpot along with the other seasonings.
- To add depth, try browning the ground beef with a tablespoon of tomato paste. The tomato paste will caramelize and add a rich, savory note to the chili.
- If you find the chili is too thick, add a little more water, one tablespoon at a time, until you reach the desired consistency.
- Conversely, if the chili is too thin, remove the lid from the crockpot during the last hour of cooking to allow some of the excess liquid to evaporate.
Serving & Storage Suggestions
This Varsity-style chili is, of course, best served on hot dogs! Steam or grill your favorite hot dogs and nestle them in soft buns. Generously ladle the chili over the hot dogs, and add your favorite toppings such as chopped onions, shredded cheese, or a dollop of mustard.
Leftover chili can be stored in an airtight container in the refrigerator for up to 3-4 days. For longer storage, transfer the chili to freezer-safe containers and freeze for up to 2-3 months.
To reheat, thaw the chili in the refrigerator overnight. Reheat gently in a saucepan over medium heat, stirring occasionally, until heated through. You can also reheat the chili in the microwave, but be sure to stir it every minute to ensure even heating.
Nutritional Information
(Note: Nutritional information is an estimate and can vary based on specific ingredients and portion sizes.)
| Nutrient | Amount per Serving | % Daily Value |
|---|---|---|
| Calories | 250 kcal | 13% |
| Total Fat | 15g | 23% |
| Saturated Fat | 7g | 35% |
| Cholesterol | 75mg | 25% |
| Sodium | 300mg | 13% |
| Total Carbohydrate | 5g | 2% |
| Dietary Fiber | 2g | 8% |
| Sugars | 2g | N/A |
| Protein | 20g | 40% |
Variations & Substitutions
- Gluten-Free: Ensure that your chili seasoning mix is gluten-free. Many commercially available mixes contain gluten.
- Vegetarian: Substitute the ground beef with a plant-based ground beef alternative. You may need to adjust the cooking time slightly.
- Spicier: Add a chopped jalapeño pepper or a pinch of cayenne pepper to the crockpot for extra heat.
- Smokier: Add a teaspoon of smoked paprika to the chili along with the other spices.
- Sweet: A tablespoon of brown sugar or molasses can add a subtle sweetness that balances the savory flavors.
- Beans: While traditionally this chili is served without beans, you can add a can of kidney beans or pinto beans for a heartier chili. Drain and rinse the beans before adding them to the crockpot in the last hour of cooking.
FAQs (Frequently Asked Questions)
Q: Can I make this chili on the stovetop instead of in a crockpot?
A: Yes, you can. After browning the ground beef, combine all ingredients in a large pot and simmer on low heat for at least 2 hours, stirring occasionally, until the chili has thickened and the flavors have melded.
Q: Can I use a different cut of beef?
A: While lean ground beef is recommended, you can use other cuts like ground chuck, but be sure to drain off any excess fat after browning.
Q: How can I thicken the chili if it’s too watery?
A: Remove the lid from the crockpot during the last hour of cooking to allow some of the liquid to evaporate. Alternatively, you can mix a tablespoon of cornstarch with a tablespoon of cold water and stir it into the chili during the last 30 minutes of cooking.
Q: Can I prepare this chili in advance?
A: Absolutely! In fact, chili often tastes even better the next day. Prepare the chili as directed, let it cool completely, and store it in an airtight container in the refrigerator. Reheat gently before serving.
Q: Is this chili suitable for freezing?
A: Yes, this chili freezes well. Allow it to cool completely, then transfer it to freezer-safe containers or bags. Thaw in the refrigerator overnight before reheating.
Final Thoughts
Now that you’re armed with this recipe, it’s time to recreate a taste of Atlanta in your own kitchen! Don’t be afraid to experiment with the seasonings and adjust them to your liking. The best chili is the one that you enjoy the most. So gather your ingredients, fire up the crockpot, and get ready to enjoy a delicious, nostalgic bowl of Varsity-style chili. And don’t forget to share your creations and feedback with friends and family. After all, food is always best when shared!