
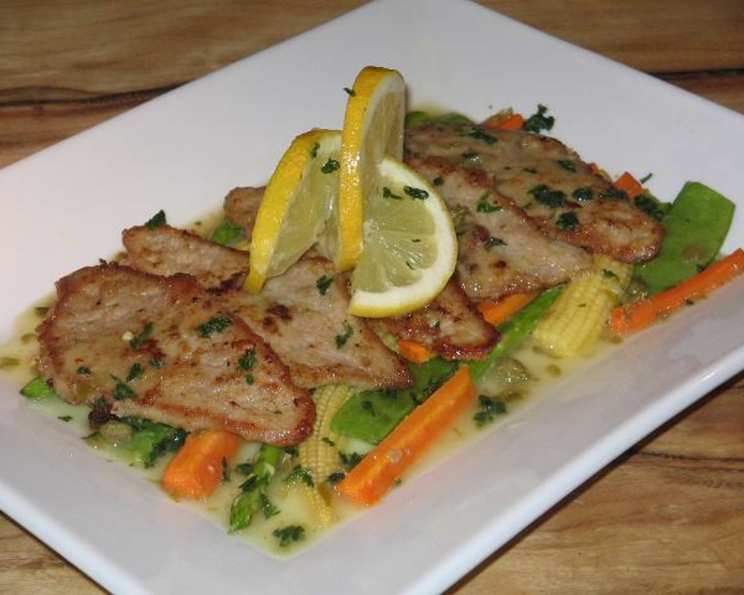
Veal Piccata//Veal Francaise: A Culinary Two-Step
The first time I tasted veal piccata was in a tiny, unassuming Italian trattoria in Rome. The aroma of lemon, butter, and capers hung heavy in the air, promising something extraordinary. When the plate arrived, glistening under the warm light, I was instantly captivated. Each bite was a revelation: the tender veal, the bright, tangy sauce, the satisfying pop of the capers. It was simplicity perfected, a dish that spoke volumes about the power of fresh ingredients and skillful execution. Over the years, I’ve experimented with countless variations, but I always come back to the classic flavors of that Roman afternoon. Now, I’m excited to share my take on this dish and it’s sister Veal Francaise with you!
Recipe Overview
- Prep Time: 10 minutes
- Cook Time: 10 minutes
- Total Time: 20 minutes
- Servings: 4
- Dietary Type: Varies (see variations)
Ingredients
- 2 tablespoons olive oil
- 2 tablespoons butter
- 8 veal scallopini
- Flour, mixed with salt & pepper (for dredging)
- 2 eggs, and 2 tablespoons water, whisked (for Francaise)
- 1 cup chicken broth
- 1 lemon, juiced
- 1 lemon, sliced for garnish
- Fresh parsley (to garnish)
- 2 tablespoons butter (for finishing the sauce)
Equipment Needed
- Large Skillet
- Oven-proof plate
- Whisk
Instructions
-
Prepare the Veal: Lightly pound the veal scallopini to an even thickness of about 1/4 inch. This ensures even cooking and tenderizes the meat.
-
Preheat: Preheat your oven to 200°F (93°C). This low temperature will keep the cooked veal warm while you prepare the sauce.
-
Dredge the Veal (Piccata): In a shallow dish, mix the flour with salt and pepper to taste. Dredge each veal scallopini in the flour mixture, ensuring it’s evenly coated. Shake off any excess flour.
-
Prepare the Egg Wash (Francaise): In a separate shallow dish, whisk together the eggs and 2 tablespoons of water.
-
Sear the Veal: In a large skillet over medium-high heat, heat the olive oil and 2 tablespoons of butter. Once the butter is melted and the pan is hot, add 4 of the veal scallopini to the skillet, being careful not to overcrowd the pan. If making the Piccata, make sure the veal is only dredged in flour. If making the Francaise, dip the floured scallops into the eggwash before placing in the pan.
-
Cook the Veal: Cook the veal for about 2 minutes on each side, until golden brown and cooked through. The internal temperature should reach 145°F (63°C). Be careful not to overcook the veal, as it can become tough.
-
Keep Warm: Remove the cooked veal from the skillet and place it on an ovenproof plate. Place the plate in the preheated oven to keep the veal warm while you cook the remaining scallopini and prepare the sauce.
-
Repeat: Repeat steps 5-7 with the remaining 4 veal scallopini.
-
Deglaze the Pan: Once all the veal has been cooked and set aside, add the chicken broth to the skillet. Bring to a simmer and use a wooden spoon to scrape up any browned bits from the bottom of the pan. These browned bits, known as fond, are packed with flavor and will add depth to the sauce.
-
Reduce the Broth: Allow the chicken broth to reduce by half, which will concentrate the flavors. This should take about 5 minutes.
-
Add Lemon Juice: Squeeze the juice of 1 lemon into the reduced broth. Continue to simmer the sauce, reducing it until it thickens slightly, about 3-5 minutes.
-
Finish the Sauce: Reduce the heat to low and add the remaining 2 tablespoons of butter to the sauce, a little at a time, whisking continuously. This technique, known as mounting the butter, will create a rich, emulsified sauce with a glossy sheen.
-
Combine Veal and Sauce: Add the cooked veal scallopini back into the pan with the sauce. Toss gently to coat the veal evenly with the lemon-butter sauce.
-
Serve: Serve the veal piccata//francaise immediately, garnished with fresh parsley and lemon slices.
Expert Tips & Tricks
- Pounding the Veal: Place the veal scallopini between two sheets of plastic wrap or parchment paper before pounding to prevent tearing. Use a meat mallet or rolling pin to gently pound the veal to an even thickness.
- Don’t Overcrowd the Pan: Cooking the veal in batches ensures that the pan remains hot and the veal sears properly. Overcrowding the pan will lower the temperature and cause the veal to steam instead of sear, resulting in a less flavorful and less appealing dish.
- Adjusting the Sauce: Taste the sauce and adjust the seasoning as needed. If you prefer a more tangy sauce, add a little more lemon juice. For a richer sauce, add a touch more butter.
- Add Capers (Optional): For a classic piccata variation, add 2 tablespoons of drained capers to the sauce along with the lemon juice. The salty, briny capers will add a delightful burst of flavor.
Serving & Storage Suggestions
Veal piccata is best served immediately while the sauce is still hot and the veal is tender. It pairs well with a variety of sides, such as:
- Pasta: Serve over a bed of linguine, spaghetti, or angel hair pasta tossed with olive oil and parsley.
- Rice Pilaf: A light and fluffy rice pilaf is a classic accompaniment.
- Roasted Vegetables: Asparagus, broccoli, or green beans are excellent choices.
- Mashed Potatoes: Creamy mashed potatoes provide a comforting base for the tangy sauce.
Storage: Leftover veal piccata can be stored in an airtight container in the refrigerator for up to 3 days.
Reheating: To reheat, gently warm the veal and sauce in a skillet over low heat, or in the microwave. Be careful not to overheat the veal, as it can become tough. Adding a splash of chicken broth or lemon juice while reheating can help to rehydrate the sauce.
Nutritional Information
| Nutrient | Amount per Serving | % Daily Value |
|---|---|---|
| Calories | 320 kcal | 16% |
| Total Fat | 22g | 34% |
| Saturated Fat | 12g | 60% |
| Cholesterol | 150mg | 50% |
| Sodium | 400mg | 17% |
| Total Carbohydrate | 8g | 3% |
| Dietary Fiber | 1g | 4% |
| Sugars | 2g | 4% |
| Protein | 20g | 40% |
Note: Nutritional information is an estimate and may vary based on specific ingredients and portion sizes.
Variations & Substitutions
- Chicken Piccata/Francaise: Substitute chicken breasts for the veal scallopini. Pound the chicken breasts to an even thickness before dredging and cooking.
- Gluten-Free: Use a gluten-free flour blend for dredging.
- Dairy-Free: Substitute olive oil or a dairy-free butter alternative for the butter in the sauce.
- Vegetarian: Use thick slices of halloumi cheese or large portobello mushroom caps in place of veal.
- Spicy Piccata: Add a pinch of red pepper flakes to the sauce for a touch of heat.
- Wine Infusion: Introduce a splash of dry white wine when deglazing the pan for extra flavor.
FAQs (Frequently Asked Questions)
Q: Can I make this dish ahead of time?
A: While veal piccata is best served immediately, you can prepare the sauce ahead of time and store it in the refrigerator. Reheat the sauce and add the cooked veal just before serving.
Q: What is veal scallopini?
A: Veal scallopini are thin slices of veal cut from the leg or loin. They are typically pounded thin to tenderize them and ensure even cooking.
Q: How do I prevent the veal from becoming tough?
A: The key to tender veal piccata is to not overcook the veal. Cook it just until it’s golden brown and cooked through, about 2 minutes per side.
Q: Can I use a different type of broth?
A: Yes, you can substitute vegetable broth for chicken broth.
Q: What can I substitute for the lemon juice?
A: While lemon juice is essential to the flavor of veal piccata, you can substitute a small amount of white wine vinegar in a pinch. However, lemon juice is highly recommended for the most authentic flavor.
Final Thoughts
I hope this recipe inspires you to create your own memorable version of veal piccata or francaise. This dish is a testament to the beauty of simplicity, where fresh ingredients and careful technique combine to create something truly special. Don’t be afraid to experiment with variations and personalize the recipe to suit your own taste. Share your creations with friends and family, and let the flavors of Italy transport you to sun-drenched trattorias and warm summer evenings. Buon appetito!