
Vegan, Gluten-Free Buckwheat Pancakes
The first time I tasted buckwheat pancakes, I was hiking in the Adirondacks. A tiny cabin nestled beside a crystal-clear lake advertised “Buckwheat Jacks” on a hand-painted sign. The aroma alone, earthy and sweet, pulled me in. Served hot off the griddle with a generous pour of maple syrup tapped from the surrounding woods, they were a revelation – a taste of pure, unadulterated comfort that fueled the rest of my hike and left a lasting memory of warmth and simple pleasures. This recipe aims to recapture that feeling, while also catering to vegan and gluten-free dietary needs, proving that deliciousness knows no bounds.
Recipe Overview
- Prep Time: 15 minutes
- Cook Time: 5 minutes
- Total Time: 20 minutes
- Servings: 4
- Yield: 8 pancakes
- Dietary Type: Vegan, Gluten-Free
Ingredients
- ½ cup buckwheat flour
- ¼ cup quinoa flour
- ¼ cup cornflour
- 2 tablespoons tapioca flour (or cornstarch or arrowroot)
- 1 tablespoon ground flax seeds (or flax meal)
- 1 tablespoon baking powder
- ¼ teaspoon cinnamon
- ¼ teaspoon salt
- ½ cup soymilk (or other nondairy milk)
- ½ cup water
- 2 tablespoons pure maple syrup
- 2 tablespoons canola oil
- ½ teaspoon vanilla extract
Equipment Needed
- Large Mixing Bowl
- Fork or Whisk
- Large Skillet or Griddle
- Cooking Spray
- Ice Cream Scooper (optional)
Instructions
-
In a large mixing bowl, whisk together all the dry ingredients: buckwheat flour, quinoa flour, cornflour, tapioca flour (or cornstarch or arrowroot), ground flax seeds, baking powder, cinnamon, and salt. Ensure all ingredients are well-combined.
-
Create a well in the center of the dry ingredients. This creates a space to add the wet ingredients without making a mess.
-
Pour in the remaining ingredients: soymilk (or other nondairy milk), water, pure maple syrup, canola oil, and vanilla extract into the well.
-
Use a fork or whisk to mix the wet and dry ingredients well for about a minute. The batter should be relatively smooth, but it’s okay if there are a few small lumps. Be careful not to overmix.
-
Let the batter rest for about 10 minutes. This allows the flours to fully absorb the liquid and the baking powder to activate, resulting in lighter and fluffier pancakes.
-
While the batter is resting, preheat a large skillet or griddle over medium-high heat. The pan is ready when a drop of water sizzles and evaporates quickly.
-
Once the pan is hot, spray it lightly with cooking spray. This prevents the pancakes from sticking.
-
Use an ice cream scooper or a ¼ cup measuring cup to pour the batter onto the hot skillet, forming individual pancakes. Leave some space between each pancake to allow for spreading.
-
As the pancakes cook, you’ll notice small air bubbles forming on the surface. Unlike regular pancakes, these might not bubble as profusely due to the gluten-free nature of the flours. Don’t be concerned; it’s perfectly normal.
-
Cook the pancakes for about 2 ½ to 3 minutes on the first side, until golden brown and cooked about halfway through.
-
Carefully flip the pancakes with a spatula.
-
Cook for another 2 minutes on the second side, until golden brown and cooked through. The pancakes should be firm to the touch.
-
Remove the cooked pancakes from the skillet and place them on a plate.
-
Repeat steps 7-13 until all the batter is used up.
Expert Tips & Tricks
- For extra fluffy pancakes, you can try separating the wet and dry ingredients and whipping the soymilk (or other non-dairy milk) slightly before combining.
- If you find the batter is too thick, add a tablespoon or two of water until it reaches your desired consistency.
- Don’t overcrowd the pan. Cook the pancakes in batches to ensure they cook evenly.
- Keep the cooked pancakes warm in a preheated oven (around 200°F or 95°C) while you finish cooking the remaining batter.
- Use a non-stick skillet! Buckwheat and gluten-free pancakes can be stickier than traditional ones.
- For a richer flavor, use brown butter instead of canola oil! (Note: this will remove the Vegan aspect!)
Serving & Storage Suggestions
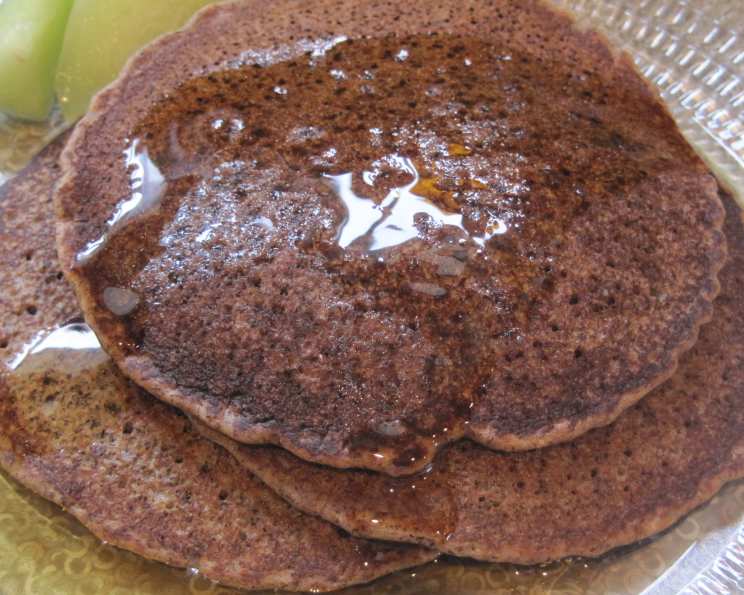
Serve these delicious vegan and gluten-free buckwheat pancakes immediately while they are still warm. They are fantastic with a generous drizzle of pure maple syrup, fresh berries, sliced bananas, or a dollop of your favorite vegan whipped cream. You can also add a sprinkle of chopped nuts or seeds for extra texture and flavor.
Leftover pancakes can be stored in an airtight container in the refrigerator for up to 3 days. To reheat, simply warm them in a toaster, microwave, or skillet until heated through. You can also freeze them for longer storage. Place the cooled pancakes in a single layer on a baking sheet and freeze for about 30 minutes. Once frozen, transfer them to a freezer bag or container. They can be stored in the freezer for up to 2 months. To reheat frozen pancakes, thaw them overnight in the refrigerator or heat them directly from frozen in a toaster or oven.
Nutritional Information
| Nutrient | Amount per Serving | % Daily Value |
|---|---|---|
| Calories | 193.9 kcal | N/A |
| Calories from Fat | 81 g | 42% |
| Total Fat | 9 g | 13% |
| Saturated Fat | 0.8 g | 3% |
| Cholesterol | 0 mg | 0% |
| Sodium | 437.8 mg | 18% |
| Total Carbohydrate | 26.4 g | 8% |
| Dietary Fiber | 2.8 g | 11% |
| Sugars | 7.8 g | 31% |
| Protein | 3.7 g | 7% |
Variations & Substitutions
- Flour Power: Feel free to experiment with different gluten-free flours. If you don’t have quinoa flour, you can substitute it with more cornflour or even chickpea flour for a slightly nutty flavor. Just avoid cornmeal, as it’s much coarser than cornflour.
- Spice it Up: Add a pinch of nutmeg, cardamom, or ginger to the batter for a warm and inviting flavor.
- Fruity Fun: Fold in blueberries, raspberries, or chopped strawberries into the batter before cooking for a burst of fruity goodness.
- Nutty Delight: Add a tablespoon of chopped walnuts or pecans to the batter for added texture and flavor.
- Sweet Treats: Instead of maple syrup, use agave nectar, date syrup, or coconut sugar for a different sweetener.
FAQs (Frequently Asked Questions)
Q: Can I make these pancakes ahead of time?
A: Yes, you can make the batter ahead of time and store it in the refrigerator for up to 24 hours. Just give it a good stir before cooking. Cooked pancakes can also be made ahead and reheated.
Q: What if I don’t have ground flax seeds?
A: You can use chia seeds instead or simply omit them. The flax seeds help bind the ingredients together, but the pancakes will still work without them.
Q: Can I use regular milk instead of soymilk?
A: If you’re not vegan, you can substitute the soymilk with regular dairy milk. However, using plant-based milk keeps this recipe dairy-free.
Q: Why are my pancakes sticking to the pan?
A: Make sure your skillet is properly preheated and well-greased with cooking spray. Also, avoid flipping the pancakes too early, as they need time to set on the first side.
Q: How can I make these pancakes even fluffier?
A: Try separating the egg whites (if using eggs) and whipping them until stiff peaks form before gently folding them into the batter.
Final Thoughts
These Vegan, Gluten-Free Buckwheat Pancakes are a delicious and wholesome way to start your day. Whether you’re following a special diet or simply looking for a healthier alternative to traditional pancakes, this recipe is sure to please. The combination of earthy buckwheat flour, fluffy quinoa flour, and sweet maple syrup creates a symphony of flavors that will leave you wanting more. So, gather your ingredients, fire up your skillet, and get ready to enjoy a stack of these delightful pancakes. Don’t be afraid to experiment with variations and make them your own. And please, share your feedback and creations! What will you top yours with?