
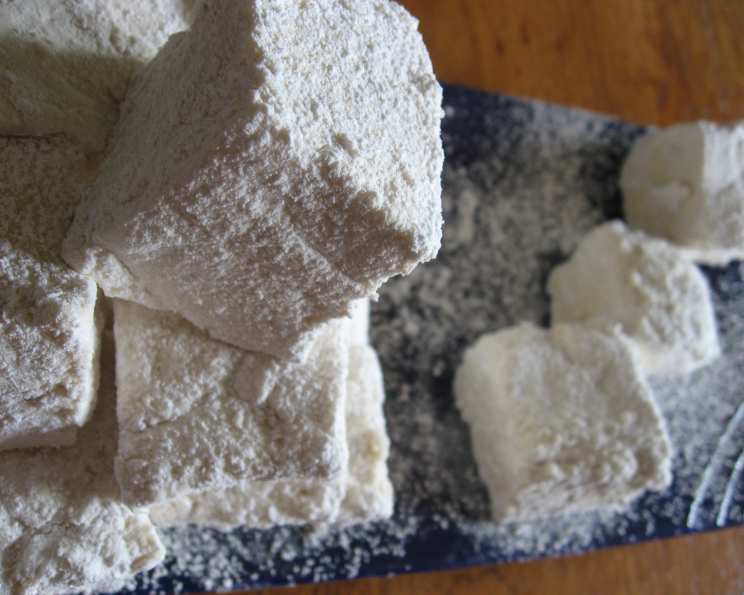
Vegan Marshmallows That Work!
The first time I attempted vegan marshmallows, it was a sticky, heartbreaking disaster. I envisioned fluffy clouds of sweetness, perfect for roasting over a campfire. Instead, I ended up with a sugary cement that clung to every surface in my kitchen. Determined to conquer this culinary challenge, I embarked on a quest to find a recipe that actually delivered on its promise – a truly vegan marshmallow, without the gelatin. After many failed attempts and countless hours of research, I finally found it, a recipe that transforms simple ingredients into pillowy perfection.
Recipe Overview:
- Prep Time: 20 minutes
- Cook Time: 20 minutes
- Total Time: 40 minutes
- Yields: 30-35 marshmallows
- Serves: 10-15
- Dietary Type: Vegan, Gluten-Free
Ingredients:
-
For the Pan:
- 2 tablespoons powdered sugar
- 2 tablespoons cornstarch
-
For the Fluff:
- 5 tablespoons soy protein isolate
- ½ teaspoon baking soda
- 1 teaspoon cream of tartar
- ¼ teaspoon guar gum
- ¾ cup cold water
- ⅛ teaspoon salt
-
For the Sugar Syrup:
- 1 ½ cups raw sugar
- 1 cup light corn syrup
- ½ cup water
- 1 tablespoon Genutine vegetarian gelatin (available at www.le-sanctuaire.com)
- 2 teaspoons vanilla extract
Equipment Needed:
- 8×8 or 8×12 baking pan
- Stand mixer (highly recommended)
- Saucepan
- Candy thermometer
- Whisk
- Rubber scraper
- Wax paper
Instructions:
-
Prepare the Pan: Choose a small 8×8 baking pan for exceptionally thick marshmallows or an 8×12 pan for more manageable, bite-sized treats. In a small bowl, thoroughly mix together the powdered sugar and cornstarch. Generously spray your chosen pan with cooking oil and then dust it evenly with the sugar/cornstarch mixture, ensuring all surfaces are coated. Set the prepared pan aside.
-
Create the Fluff: In the bowl of a stand mixer (or a large mixing bowl if using a hand mixer), combine the following dry ingredients: soy protein isolate, baking soda, cream of tartar, guar gum, and salt. Add the ¾ cup of cold water to the dry ingredients. Using the whisk attachment, begin whipping the mixture on medium-high speed. Continue to whip for approximately 10 minutes, or until the mixture forms stiff peaks and noticeably increases in volume. This step is crucial for achieving that signature marshmallowy texture.
-
Cook the Sugar Syrup: In a medium saucepan, combine the Genutine vegetarian gelatin and the raw sugar. Add the ½ cup of water to the mixture and whisk quickly to ensure the Genutine is well-distributed. You should have a thick, somewhat pasty mixture. Now, add the light corn syrup to the saucepan. Place the saucepan over medium heat and stir the mixture occasionally. Insert a candy thermometer into the syrup mixture, making sure it doesn’t touch the bottom of the pan. Continue to cook the syrup, stirring occasionally, until the thermometer reaches 230 degrees Fahrenheit.
At this stage, the syrup will become thick and gloppy. You’ll notice the mixture beginning to gel as one large mass, and you should be able to briefly see the bottom of the pan as you stir – a visual indicator that the syrup is reaching the desired consistency. Once the syrup reaches 230 degrees F, remove the saucepan from the heat and stir in the vanilla extract.
-
Combine Fluff and Syrup: This is where things can get a little messy, so be prepared! Turn your stand mixer on to high speed, ensuring the whisk attachment is running. Carefully and quickly add the hot sugar syrup to the whipped fluff. Do not add the syrup slowly! Because the sugar gel is incredibly sticky, it can climb up your whisk attachment and begin to gum up its connection to the mixer. It’s best to just pour it in all at once while the mixer is running at high speed. Let the mixture whip on high speed for approximately 10 minutes. During this time, the mixture will transform into a glossy, voluminous marshmallow cream.
-
Set the Marshmallows: Using a rubber scraper, carefully pour the marshmallow mixture into your prepared pan. The mixture should be white, fluffy, and still warm to the touch. Gently cover the surface with a sheet of wax paper. Use your hands or a flat spatula to gently press down on the wax paper, ensuring the marshmallow mixture is evenly distributed into the corners and sides of the pan. Remove the wax paper and place the pan in the refrigerator to cool and set for at least one hour, or preferably longer, for the best results.
-
Cut and Coat: Once the marshmallows are thoroughly cooled and firm, turn them out onto a cutting board. Use a sharp knife to cut the marshmallows into squares of your desired size. To prevent sticking, lightly coat the knife with the cornstarch/powdered sugar mixture. In a bowl, place the remaining cornstarch/powdered sugar mixture. Coat all sides of each marshmallow square with the mixture, ensuring they are thoroughly covered. This will prevent the marshmallows from sticking together and give them a smooth, matte finish.
Expert Tips & Tricks:
- Don’t skimp on the whipping time. The extended whipping time is critical for incorporating air and creating the light, airy texture of marshmallows.
- Keep everything clean. Make sure all your equipment is grease-free and dry. Any residue can interfere with the formation of the marshmallow structure.
- For flavored marshmallows, add extracts or flavorings to the fluff during the last minute of whipping. Think peppermint, lemon, or even a touch of almond.
- Troubleshooting Sticky Marshmallows: If your marshmallows are still too sticky after chilling, dust them with additional cornstarch/powdered sugar mixture. You can also let them air dry for a few hours to further reduce stickiness.
Serving & Storage Suggestions:
These vegan marshmallows are incredibly versatile! Enjoy them straight from the pan, roasted over a campfire, or melted into a mug of hot cocoa. They also make a delightful addition to rice crispy treats, s’mores, and other desserts.
Store the marshmallows in an airtight container at room temperature for up to a week. For longer storage, you can freeze them in a single layer on a baking sheet before transferring them to a freezer-safe bag. Frozen marshmallows can be stored for up to 2-3 months. Thaw them at room temperature before serving.
Nutritional Information:
| Nutrient | Amount per Serving | % Daily Value |
|---|---|---|
| Calories | 228.1 kcal | N/A |
| Total Fat | 0.1 g | 0% |
| Saturated Fat | 0 g | 0% |
| Cholesterol | 0 mg | 0% |
| Sodium | 114.1 mg | 4% |
| Total Carbohydrate | 59.5 g | 19% |
| Dietary Fiber | 0 g | 0% |
| Sugars | 40.8 g | 163% |
| Protein | 0 g | 0% |
Note: Nutritional information is an estimate and may vary based on specific ingredients used.
Variations & Substitutions:
- Flavor Variations: Experiment with different extracts! Peppermint extract for a festive treat, or almond extract for a subtle nutty flavor. A few drops of food coloring can also add a fun visual element.
- Sugar Substitutions: While raw sugar is recommended, you can substitute with granulated sugar.
- Corn Syrup Alternatives: While corn syrup provides the signature texture, you can try using brown rice syrup or tapioca syrup as a substitute, though the texture may be slightly different.
- Spice it up: Add a pinch of cinnamon or nutmeg to the sugar syrup for a warm, comforting flavor.
FAQs (Frequently Asked Questions):
Q: What is soy protein isolate and why is it used?
A: Soy protein isolate is a highly purified form of soy protein, providing structure and stability to the marshmallows, similar to gelatin in traditional recipes. It helps create that signature chewy texture.
Q: Can I use a hand mixer instead of a stand mixer?
A: Yes, you can use a hand mixer, but be prepared for a workout! It will take longer to whip the fluff to stiff peaks, and you’ll need to hold the mixer steady while pouring in the hot syrup.
Q: What if my marshmallows are too sticky?
A: Ensure you’ve used the correct amount of cornstarch and powdered sugar mixture. You can also try chilling the marshmallows for a longer period or letting them air dry for a few hours after cutting and coating.
Q: Can I add chocolate to these marshmallows?
A: Absolutely! Melt dairy-free chocolate and drizzle it over the marshmallows after they’ve set. Or, dip the marshmallows entirely in chocolate for an even more decadent treat.
Q: Where can I find Genutine vegetarian gelatin?
A: Genutine vegetarian gelatin is available at www.le-sanctuaire.com.
Final Thoughts:
Conquering the art of vegan marshmallow making is incredibly rewarding. The light, fluffy texture and sweet vanilla flavor are sure to delight both vegans and non-vegans alike. So gather your ingredients, put on your apron, and prepare to create some marshmallow magic! Don’t be afraid to experiment with different flavors and variations to make these treats your own. And most importantly, share your creations with friends and family – they’re guaranteed to be a hit!