
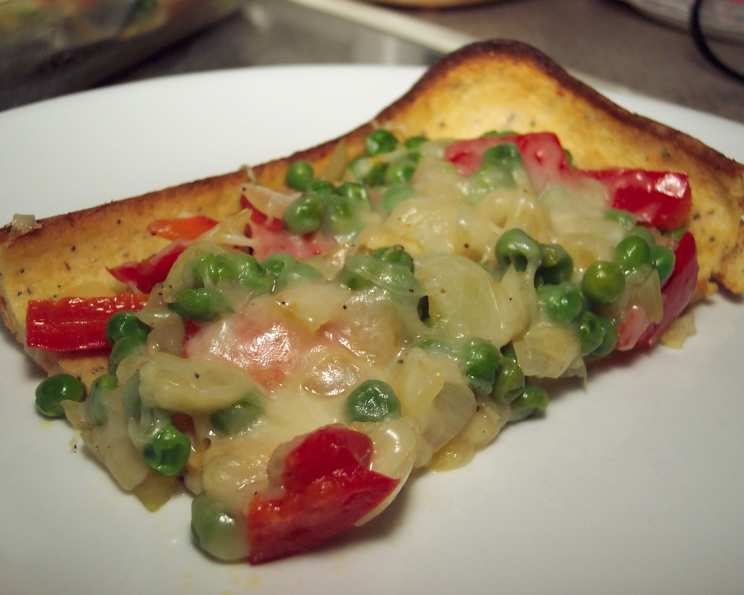
Vegetable Dutch Baby: A Savory Delight
I remember the first time I ever had a Dutch Baby. It was at a tiny, sun-drenched café in Amsterdam. The aroma of freshly baked goods hung heavy in the air, mingling with the scent of strong coffee. The server placed before me a puffy, golden wonder, dusted with powdered sugar and brimming with sweet berries. It was love at first bite, a delightful combination of crisp edges and a custardy center. Since then, I’ve experimented endlessly with different variations, and this savory Vegetable Dutch Baby has become a staple in my kitchen – a celebration of fresh, vibrant flavors and satisfying textures.
Recipe Overview
- Prep Time: 20 minutes
- Cook Time: 22 minutes
- Total Time: 42 minutes
- Servings: 4
- Yield: 1 pie
- Dietary Type: Vegetarian
Ingredients
- 8 ounces coleslaw mix
- 1/2 cup onion, chopped
- 1 cup fresh mushrooms, sliced
- 1/2 cup yellow squash, quartered and thinly sliced
- 1/2 cup zucchini, quartered and thinly sliced
- 3/4 cup canned black beans, drained and rinsed
- 1/2 teaspoon dried basil
- 1/4 teaspoon dried thyme
- 1/2 teaspoon garlic powder
- Salt and pepper to taste
- 1 tablespoon reduced fat margarine
- 1/2 cup all-purpose flour
- 1/2 cup skim milk
- 2 eggs, beaten
- 1/2 cup mozzarella cheese, shredded
- Vegetable oil cooking spray
Equipment Needed
- Large nonstick skillet
- Medium bowl
- 9-inch pie pan
- Oven
Instructions
-
Begin by preheating your oven to 425 degrees F (220 degrees C). This high temperature is crucial for achieving that signature Dutch Baby puff.
-
Prepare your skillet. Coat a large nonstick skillet with vegetable oil cooking spray and place it over medium-high heat. Let the skillet heat up until hot – you should see the spray shimmering slightly.
-
Sauté the vegetables. Add the coleslaw mix, chopped onion, sliced mushrooms, quartered and thinly sliced yellow squash, and quartered and thinly sliced zucchini to the hot skillet. Sauté these vegetables for 5 to 7 minutes, or until they are tender. Remember to stir frequently to ensure even cooking and prevent burning.
-
Incorporate the black beans and seasonings. Stir in the drained and rinsed black beans, dried basil, dried thyme, and garlic powder. Season with salt and pepper to taste. Once everything is well combined, reduce the heat to low and keep the vegetable mixture warm while you prepare the batter.
-
Melt the margarine. Place the reduced fat margarine in a 9-inch pie pan. Place the pie pan in the preheated oven until the margarine is completely melted. This usually takes just a minute or two, so keep a close eye on it!
-
Prepare the batter. In a medium bowl, combine the all-purpose flour, skim milk, and beaten eggs. Stir well until you have a smooth batter.
-
Assemble and bake. Carefully remove the pie pan with the melted margarine from the oven. Pour the batter into the prepared pie pan. It’s important not to stir the batter into the melted margarine at this point. Simply pour it in gently.
-
Bake the Dutch Baby. Bake in the preheated oven for 15 to 20 minutes, or until the Dutch Baby is puffed up and lightly browned around the edges. The center should still have a slight wobble.
-
Add the vegetable filling and cheese. Remove the Dutch Baby from the oven. Spoon the warm vegetable mixture evenly into the baked shell. Sprinkle the shredded mozzarella cheese over the top.
-
Finish baking. Return the pie pan to the oven and bake for an additional 1 to 2 minutes, or until the cheese is melted and bubbly.
-
Let the Dutch Baby cool slightly before slicing and serving. The Dutch Baby will deflate slightly as it cools, which is perfectly normal.
Expert Tips & Tricks
-
For extra crispy edges: Ensure your pie pan and skillet are thoroughly heated before adding the margarine and vegetables, respectively. The rapid temperature change helps create that desired texture.
-
Vegetable Variations: Feel free to substitute vegetables based on your preference or what you have on hand. Bell peppers, spinach, or even roasted sweet potatoes would be excellent additions.
-
Make-Ahead Tip: The vegetable mixture can be prepared a day in advance and stored in the refrigerator. This will save you time on the day you plan to bake the Dutch Baby.
-
Troubleshooting Puffiness: If your Dutch Baby doesn’t puff up as much as you’d like, ensure your oven is at the correct temperature and avoid opening the oven door during baking, as this can release heat and prevent proper puffing.
Serving & Storage Suggestions
Serve the Vegetable Dutch Baby immediately after baking for the best flavor and texture. A dollop of plain Greek yogurt or a sprinkle of fresh herbs would be a lovely addition.
Leftovers can be stored in an airtight container in the refrigerator for up to 3 days. To reheat, warm gently in a low oven or microwave. Note that the texture will be softer than when freshly baked. The Dutch Baby is best enjoyed fresh, as freezing can significantly alter its texture.
Nutritional Information
| Nutrient | Amount per Serving | % Daily Value* |
|---|---|---|
| Calories | 228 kcal | N/A |
| Calories from Fat | 61 kcal | N/A |
| Total Fat | 6.8 g | 10% |
| Saturated Fat | 2.9 g | 14% |
| Cholesterol | 104.7 mg | 34% |
| Sodium | 356.7 mg | 14% |
| Total Carbohydrate | 28.7 g | 9% |
| Dietary Fiber | 5.9 g | 23% |
| Sugars | 4.1 g | N/A |
| Protein | 13.7 g | 27% |
*Percentage Daily Values are based on a 2,000 calorie diet.
Variations & Substitutions
-
Gluten-Free: Substitute the all-purpose flour with a gluten-free blend. Ensure the blend contains xanthan gum or a similar binder for optimal texture.
-
Dairy-Free: Replace the skim milk with almond milk, soy milk, or oat milk. Use a dairy-free mozzarella cheese alternative.
-
Spicy Kick: Add a pinch of red pepper flakes to the vegetable mixture for a hint of heat.
-
Seasonal Adaptation: Incorporate seasonal vegetables like butternut squash in the fall or asparagus in the spring.
FAQs (Frequently Asked Questions)
Q: Can I use frozen vegetables?
A: While fresh vegetables are preferred for their texture and flavor, you can use frozen vegetables in a pinch. Be sure to thaw and drain them thoroughly before sautéing to remove excess moisture.
Q: Can I add meat to this recipe?
A: Absolutely! Cooked sausage, bacon, or shredded chicken would be delicious additions to the vegetable mixture.
Q: Why did my Dutch Baby not puff up?
A: Several factors can prevent a Dutch Baby from puffing up, including a low oven temperature, opening the oven door during baking, or using cold ingredients.
Q: Can I make this in a cast iron skillet?
A: Yes, a cast iron skillet works beautifully for this recipe. Just ensure it is well-seasoned to prevent sticking.
Q: Is it necessary to melt the margarine in the pie pan before adding the batter?
A: Yes, melting the margarine creates a hot, greased surface that helps the Dutch Baby puff up properly.
Final Thoughts
I hope this Vegetable Dutch Baby brings as much joy to your table as it has to mine. It’s a versatile and satisfying dish that’s perfect for breakfast, brunch, lunch, or dinner. Don’t be afraid to experiment with different vegetables and seasonings to create your own unique variation. I encourage you to give this recipe a try and share your feedback with me. Perhaps pair it with a crisp green salad and a light vinaigrette for a complete and balanced meal. Happy cooking!