
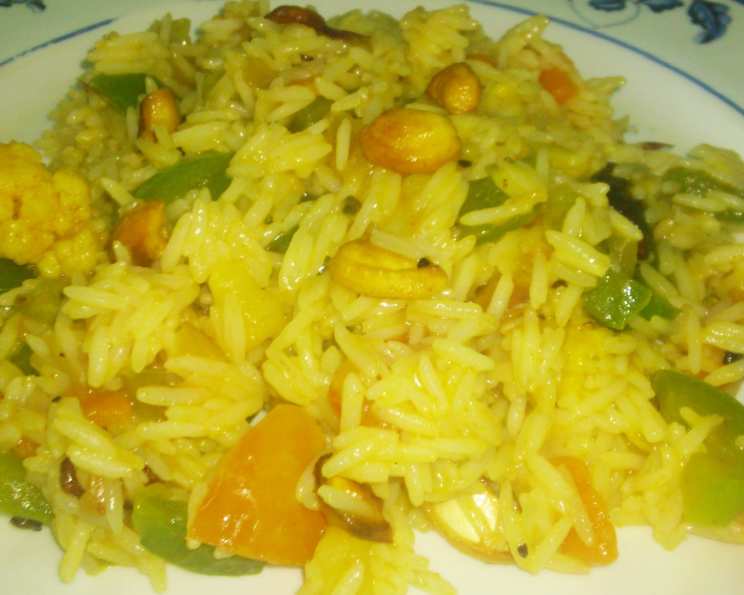
Aromatic Vegetarian Biryani: A Symphony of Flavors
Biryani. Just the word conjures up vivid images: fragrant steam rising from a pot, the vibrant colors of vegetables nestled within fluffy rice, and the intoxicating aroma of spices that fills the entire kitchen. I remember the first time I tasted biryani, at a small family gathering during my travels through India. I was immediately captivated by the complex yet comforting flavors, a perfect balance of savory, spicy, and subtly sweet notes. The gentle warmth that spread through me with each mouthful made me fall in love with Indian food, and Vegetarian Biryani has remained a treasured dish in my repertoire ever since.
Recipe Overview
- Prep Time: 20 minutes
- Cook Time: 35 minutes
- Total Time: 55 minutes
- Servings: 4
- Dietary Type: Vegetarian
Ingredients
For Rice:
- 1 1/2 cups basmati rice, rinsed
- 3 cups water
- 1 pinch salt
For Vegetables:
- 1 tablespoon ghee (or 1 tablespoon butter)
- 1 tablespoon cooking oil
- 1 onion, chopped
- 2 garlic cloves, minced
- 1 tablespoon grated fresh ginger
- 1/2 teaspoon ground cumin
- 1 teaspoon turmeric
- 1/2 teaspoon curry powder
- 1/8 teaspoon cayenne pepper
- 1 baking potato, peeled and cut into 1 1/2-inch pieces (about 1/2 pound)
- 2 carrots, cut into 1 1/2-inch pieces
- 2 cups water
- 1 1/2 teaspoons salt
- 1 (10 ounce) package frozen peas, defrosted
- 1/4 cup plain yogurt
- 1 jalapeno chile, seeds and ribs removed, minced
- 1 tomato, seeded and cut into 1/2-inch pieces
- 1/2 cup cilantro leaf
Equipment Needed
- Large pot with lid
- Large frying pan
Instructions
-
In a large pot, combine the water and salt and bring to a boil over high heat.
-
Once boiling, stir in the basmati rice. Reduce the heat to medium-low and boil gently until the rice has absorbed all (or most of) the water, approximately 10 to 15 minutes. Keep an eye on the pot to ensure the rice doesn’t burn. If needed, drain any excess water.
-
Cover the pot tightly with a lid and return it to the stovetop (turned off) to keep the rice warm and allow it to steam. This step is crucial for achieving fluffy and separate grains.
-
While the rice is cooking, prepare the vegetable component. In a large frying pan, melt the ghee (or butter) together with the cooking oil over moderately low heat. Using both prevents the butter from burning and adds a rich flavor.
-
Add the chopped onion to the pan and cook, stirring occasionally, until it becomes translucent, about 5 minutes. Be patient and don’t rush this step; properly sautéed onions are the foundation of great flavor.
-
Add the minced garlic and grated ginger to the pan and cook, stirring constantly, until fragrant, about 1 minute. Be careful not to burn the garlic, as it can become bitter.
-
Stir in the ground cumin, turmeric, curry powder, and cayenne pepper. Cook, stirring continuously, for 1 minute longer. This process, known as blooming the spices, releases their essential oils and intensifies their aroma and flavor. The kitchen should now be filled with a tantalizing fragrance!
-
Add the peeled and chopped potato, chopped carrots, water, and salt to the pan.
-
Increase the heat to moderately high and bring the mixture to a simmer. Cover the pan and simmer until the vegetables are tender and no liquid remains in the pan, about 10 minutes. Stir occasionally to prevent sticking. The potatoes should be easily pierced with a fork.
-
To serve, stir the defrosted peas into the other cooked vegetables and remove the pan from the heat.
-
Gently stir in the plain yogurt and cooked rice. Be careful not to overmix, as this can make the rice mushy. You want to distribute the vegetables and yogurt evenly throughout the rice while maintaining the integrity of the grains.
-
Garnish with the minced jalapeno chile, diced tomato, and fresh cilantro leaves. Serve immediately.
Expert Tips & Tricks
- Rice is key: Using high-quality basmati rice is essential for achieving the perfect texture. Rinse the rice thoroughly before cooking to remove excess starch, which will prevent it from becoming sticky.
- Spice it up (or down): Adjust the amount of cayenne pepper and jalapeno to your desired level of spiciness. If you prefer a milder dish, omit the cayenne altogether or use a milder chile.
- Vegetable variations: Feel free to experiment with other vegetables, such as cauliflower, green beans, or bell peppers. Just be sure to adjust the cooking time accordingly.
- Browning the onions: Take your time and properly brown the onions. This step is critical for developing the rich, complex flavor of the biryani.
- Yogurt substitute: If you’re dairy-free, you can substitute the plain yogurt with a plant-based yogurt alternative, such as coconut yogurt or soy yogurt.
Serving & Storage Suggestions
Serve the Vegetarian Biryani hot, garnished with fresh cilantro, jalapeno, and tomato. It pairs well with a side of raita (yogurt dip) or a simple green salad.
Leftover biryani can be stored in an airtight container in the refrigerator for up to 3 days. Reheat gently in a microwave or in a pan over low heat, adding a splash of water if needed to prevent it from drying out. Freezing is not recommended, as the rice can become mushy upon thawing.
Nutritional Information
| Nutrient | Amount per Serving | % Daily Value |
|---|---|---|
| Calories | 446 kcal | N/A |
| Calories from Fat | 88 g | 20% |
| Total Fat | 9.8 g | 15% |
| Saturated Fat | 3.3 g | 16% |
| Cholesterol | 10.2 mg | 3% |
| Sodium | 1035.5 mg | 43% |
| Total Carbohydrate | 79.2 g | 26% |
| Dietary Fiber | 8.4 g | 33% |
| Sugars | 8.8 g | N/A |
| Protein | 11.6 g | 23% |
Note: Nutritional information is an estimate and may vary based on specific ingredients and preparation methods.
Variations & Substitutions
- Vegan Biryani: Substitute the ghee with coconut oil or another plant-based oil and use a plant-based yogurt alternative.
- Gluten-Free Biryani: Ensure that the curry powder you use is gluten-free, as some brands may contain wheat flour.
- Spicier Biryani: Add a pinch of chili flakes or a finely chopped serrano pepper for extra heat.
- Sweeter Biryani: Add a handful of raisins or dried cranberries for a touch of sweetness.
- Nutty Biryani: Add a handful of toasted almonds or cashews for added texture and flavor.
FAQs (Frequently Asked Questions)
Q: Can I use brown rice instead of basmati rice?
A: Yes, you can use brown rice, but the cooking time will need to be adjusted. Brown rice typically requires more water and a longer cooking time than basmati rice.
Q: Can I make this recipe ahead of time?
A: Yes, you can prepare the vegetable mixture ahead of time and store it in the refrigerator for up to 2 days. When ready to serve, simply reheat the vegetable mixture and stir in the cooked rice, yogurt, and garnishes.
Q: How do I prevent the rice from sticking to the bottom of the pot?
A: Use a heavy-bottomed pot and make sure to keep the heat on low while the rice is cooking. Stir the rice gently once or twice during cooking to prevent sticking.
Q: What if I don’t have ghee?
A: You can substitute the ghee with butter or another cooking oil, such as coconut oil or vegetable oil. However, ghee does add a unique flavor to the biryani.
Q: Can I add protein to this biryani?
A: Absolutely! You can add paneer (Indian cheese), tofu, or chickpeas for added protein. Add these ingredients along with the other vegetables.
Final Thoughts
Vegetarian Biryani is a dish that truly celebrates the vibrant flavors of India. With its aromatic spices, tender vegetables, and fluffy rice, it’s a feast for the senses. I encourage you to try this recipe and experiment with your favorite vegetables and spices to create your own unique version. Don’t be afraid to adjust the level of spice to your preference and enjoy the process of creating this comforting and flavorful dish. Share your creations and feedback – I’d love to hear about your biryani adventures!