
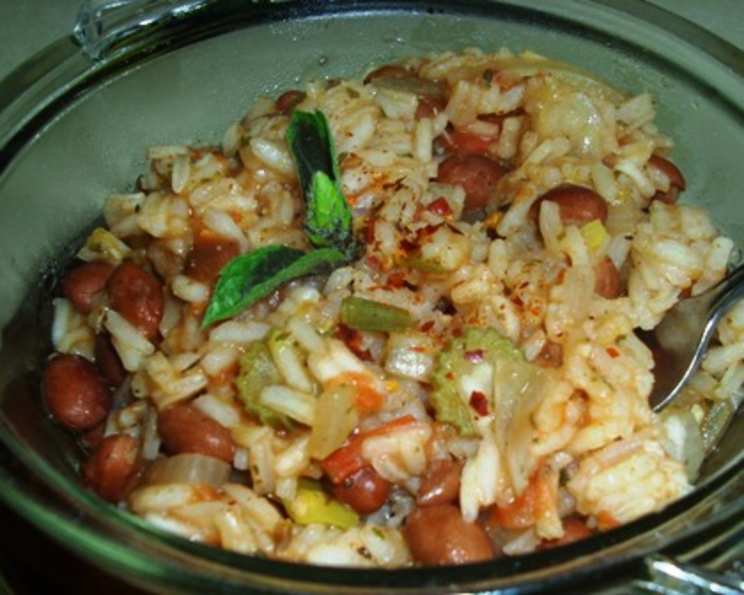
Soulful Vegetarian Black-Eyed Peas & Rice: A Culinary Homage
There’s a certain magic to dishes that transcend mere sustenance. They become woven into the fabric of our memories, evoking feelings of warmth, family, and home. For me, black-eyed peas and rice is one of those dishes. Growing up, it wasn’t a holiday unless the aroma of simmering peas filled my auntie’s kitchen, a smell that meant laughter, stories, and a table overflowing with love was soon to follow. It was the taste of comfort, the taste of connection, and this vegetarian version honors those cherished traditions.
Recipe Overview
- Prep Time: 15 minutes
- Cook Time: 40-45 minutes
- Total Time: 55-60 minutes
- Servings: 6
- Dietary Type: Vegan, Gluten-Free
Ingredients
- 1 cup black-eyed peas, rinsed and drained
- 4 cups water
- 3 small vegetable bouillon cubes
- 2 garlic cloves, crushed
- 1 tablespoon vegetable oil
- 1 tablespoon cilantro, minced
- 1 tablespoon parsley, minced
- 1 teaspoon salt (optional)
- ½ teaspoon pepper
- 1 large onion, chopped
- 2 medium scallions, chopped
- 1 teaspoon dried thyme leaves
- 1 large tomato, chopped
- 1 cup long-grain rice, uncooked
Equipment Needed
- Large saucepan or Dutch oven
- Measuring cups and spoons
- Cutting board
- Knife
Instructions
-
In a large saucepan or Dutch oven, combine the rinsed and drained black-eyed peas and water. Add the vegetable bouillon cubes and crushed garlic.
-
Bring the mixture to a boil over high heat. Once boiling, reduce the heat to low.
-
Stir in the vegetable oil, minced cilantro, minced parsley, salt (if using), and pepper. Stir well to combine the ingredients.
-
Cover the saucepan or Dutch oven and let the black-eyed peas simmer for 15 minutes.
-
After 15 minutes, stir in the chopped onion, chopped scallions, dried thyme leaves, and chopped tomato.
-
Cover the saucepan or Dutch oven again and continue to simmer for another 15 to 20 minutes, or until the black-eyed peas are almost soft. Check periodically to ensure the peas don’t stick to the bottom; stir gently if needed.
-
Stir in the uncooked long-grain rice. Make sure the rice is evenly distributed throughout the black-eyed peas mixture.
-
Cover the saucepan or Dutch oven and cook until the rice and black-eyed peas are tender and the rice has absorbed most of the liquid. This usually takes about 15 to 20 minutes, but check the rice for doneness – it should be fluffy and separate. If the liquid is absorbed before the rice is cooked, add a small amount of water (about ¼ cup) and continue cooking, covered, until the rice is tender.
-
Once the rice and peas are cooked, remove the saucepan or Dutch oven from the heat. Leave the dish covered and let it stand for 10 minutes before serving. This allows the flavors to meld together and the rice to finish steaming.
Expert Tips & Tricks
- Soaking the Peas: For a faster cooking time and improved digestibility, soak the black-eyed peas in water for at least 4 hours, or preferably overnight, before cooking. Drain and rinse them well before adding them to the saucepan.
- Spice it Up: Add a pinch of red pepper flakes or a dash of your favorite hot sauce for a little extra heat. A jalapeño pepper, finely diced and added with the other vegetables, also works wonders.
- Bouillon Variation: Feel free to experiment with different flavors of vegetable bouillon cubes. Mushroom bouillon, for example, adds a lovely umami depth.
- Herb Infusion: For a more intense herbal flavor, create a bouquet garni by tying together the cilantro, parsley, and thyme with kitchen twine. Remove the bouquet garni before serving.
- Tomato Paste Boost: For a richer, more concentrated tomato flavor, stir in a tablespoon of tomato paste along with the chopped tomato. This will also help to thicken the sauce.
- Consistent Simmering: Maintaining a consistent, low simmer is key to preventing the black-eyed peas from scorching and ensuring even cooking.
- Preventing Stickiness: To prevent the rice from sticking to the bottom of the pot, use a heavy-bottomed saucepan or Dutch oven. Stir the mixture occasionally during the cooking process.
- Adjusting Consistency: If the final dish is too dry, add a little more water or vegetable broth. If it’s too watery, cook uncovered for a few minutes to allow the excess liquid to evaporate.
- Make Ahead: This dish can be made a day or two in advance. The flavors actually improve as they sit! Store it in an airtight container in the refrigerator and reheat gently on the stovetop or in the microwave.
Serving & Storage Suggestions
Serve the Vegetarian Black-Eyed Peas & Rice hot, garnished with a sprinkle of fresh cilantro or parsley. It makes a wonderful main course or a hearty side dish. This dish pairs well with cornbread, collard greens, or a simple side salad.
To store leftovers, allow the black-eyed peas and rice to cool completely. Transfer it to an airtight container and refrigerate for up to 3-4 days. Reheat in a saucepan over medium-low heat, adding a splash of water or vegetable broth if needed. You can also reheat individual portions in the microwave.
Freezing is also an option. Divide the cooled black-eyed peas and rice into freezer-safe containers or zip-top bags. For best results, consume within 2-3 months. Thaw overnight in the refrigerator before reheating.
Nutritional Information
| Nutrient | Amount per Serving | % Daily Value |
|---|---|---|
| Calories | 187.4 kcal | N/A |
| Calories from Fat | N/A | 26% |
| Total Fat | 2.9 g | 4% |
| Saturated Fat | 0.5 g | 2% |
| Cholesterol | 0.2 mg | 0% |
| Sodium | 431.8 mg | 17% |
| Total Carbohydrate | 35.2 g | 11% |
| Dietary Fiber | 2.5 g | 10% |
| Sugars | 1.8 g | 7% |
| Protein | 4.9 g | 9% |
Note: Nutritional information is an estimate and may vary based on specific ingredients and preparation methods.
Variations & Substitutions
- Spicy Black-Eyed Peas & Rice: Add a diced jalapeño pepper or a pinch of cayenne pepper for a spicy kick.
- Coconut Black-Eyed Peas & Rice: Replace 1 cup of the water with coconut milk for a richer, creamier flavor.
- Brown Rice Version: Substitute brown rice for long-grain white rice. Note that brown rice will require a longer cooking time and more liquid.
- Smoked Paprika: Add ½ teaspoon of smoked paprika for a smoky flavor reminiscent of traditional versions made with ham hock.
- Different Herbs: Experiment with other herbs like oregano, marjoram, or a bay leaf for different flavor profiles.
- Adding Greens: For a nutritional boost, stir in some chopped spinach, kale, or collard greens during the last 5 minutes of cooking.
- Quinoa Instead of Rice: For a gluten-free alternative, replace the rice with quinoa. Adjust the cooking time and liquid accordingly.
FAQs (Frequently Asked Questions)
Q: Can I use canned black-eyed peas instead of dried?
A: Yes, you can. Use about 2 cups of canned black-eyed peas, rinsed and drained. Reduce the initial cooking time to about 10 minutes before adding the other vegetables.
Q: Do I need to soak the black-eyed peas before cooking?
A: Soaking is not strictly necessary, but it reduces cooking time and can make the peas more digestible. If you have time, soak them for at least 4 hours or overnight.
Q: Can I make this dish in a slow cooker?
A: Yes, you can. Combine all ingredients in the slow cooker, except the rice. Cook on low for 6-8 hours, or on high for 3-4 hours, until the peas are tender. Add the rice during the last hour of cooking.
Q: How do I prevent the rice from becoming mushy?
A: Use the correct amount of water and avoid overcooking the rice. Once the rice is cooked, remove the pot from the heat and let it stand, covered, for 10 minutes to allow the steam to finish cooking the rice.
Q: Can I add other vegetables to this dish?
A: Absolutely! Diced bell peppers, carrots, or celery would be great additions. Add them along with the onion and scallions.
Final Thoughts
This Vegetarian Black-Eyed Peas & Rice is more than just a meal; it’s a taste of heritage, a hug in a bowl, and a celebration of simple, wholesome ingredients. I hope this recipe inspires you to create your own memories in the kitchen and share this comforting dish with those you love. Feel free to experiment with variations and make it your own. And most importantly, don’t forget to savor every flavorful bite!