
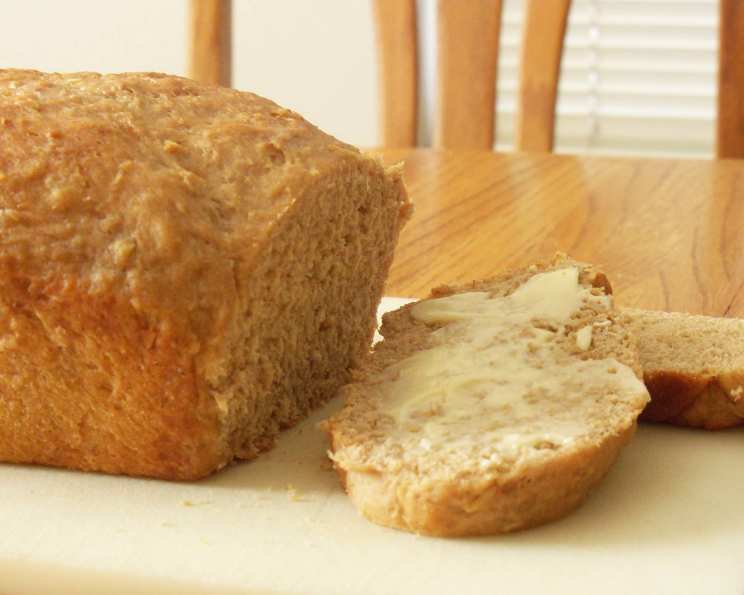
Vermont Whole Wheat Oatmeal Honey Bread
The scent of baking bread always takes me back to my grandmother’s kitchen. She wasn’t fancy, but her bread was legendary. I remember standing on a stool, watching her mix the dough, the warmth of the oven radiating through the room. This Vermont Whole Wheat Oatmeal Honey Bread reminds me of those simple, comforting moments. The nutty whole wheat, the chewy oats, and the subtle sweetness of honey – it’s a bread that feeds both body and soul, just like my grandmother’s.
Recipe Overview
- Prep Time: 2 hours 8 minutes
- Cook Time: 33 minutes
- Total Time: 2 hours 41 minutes
- Yields: 2 loaves
- Dietary Type: Vegetarian
Ingredients
- 2 cups boiling water
- 1 cup rolled oats
- 1/2 cup maple sugar
- 1 tablespoon honey
- 1/4 cup butter
- 1 tablespoon kosher salt
- 1 teaspoon cinnamon (Saigon cinnamon preferred)
- 1 tablespoon instant yeast
- 1 1/2 cups 100% white whole wheat flour
- 4 cups unbleached all-purpose flour
Equipment Needed
- Large mixing bowl
- Measuring cups and spoons
- Dough scraper (optional)
- Two 8 1/2 x 4 1/2-inch bread pans
- Lightly greased plastic wrap
- Instant-read thermometer
Instructions
- In a large mixing bowl, combine the boiling water, rolled oats, maple sugar, honey, butter, kosher salt, and cinnamon. Stir well to combine. This initial hot water bath helps to soften the oats and meld the flavors beautifully.
- Let the mixture cool to lukewarm. This is a crucial step! If the mixture is too hot, it will kill the yeast. You want it to be warm enough to activate the yeast, but not scalding.
- Add the instant yeast and the flours (both the whole wheat and all-purpose), stirring to form a rough dough. Don’t worry if it looks shaggy at this point; it will come together during kneading.
- Knead the dough (about 10 minutes by hand, or 5 to 7 minutes by machine) until it is smooth and satiny. The dough should be elastic and slightly tacky, not sticky. If kneading by hand, use a well-floured surface to prevent sticking. A stand mixer with a dough hook makes this process much easier.
- Transfer the dough to a lightly greased bowl, turning to coat all sides. This prevents a skin from forming as it rises.
- Cover the bowl with lightly greased plastic wrap. The grease prevents the plastic wrap from sticking to the dough as it rises.
- Allow the dough to rise for 1 hour, or until doubled in size. Find a warm, draft-free place for the dough to rise; a slightly warm oven (turned off!) works well.
- Divide the dough in half. Gently deflate the dough and divide it evenly.
- Shape each half into a loaf. Gently flatten each piece of dough and shape it into a rectangle. Then, tightly roll it up and tuck the ends underneath to form a loaf.
- Place the loaves in two greased 8 1/2 x 4 1/2-inch bread pans. Ensure the pans are well-greased to prevent sticking.
- Cover the pans with lightly greased plastic wrap. Again, this keeps the dough moist and prevents a skin from forming.
- Allow the loaves to rise until they’ve crowned about 1 inch over the rim of the pan, about 1 hour. This is called proofing, and it’s the final rise before baking. The dough should be light and airy.
- Bake the loaves in a preheated 360°F oven for 33 minutes. Keep a close eye on the bread as it bakes.
- Remove them from the oven when they’re golden brown, and the interior registers 190°F on an instant-read thermometer. This is the most reliable way to ensure the bread is fully cooked. Insert the thermometer into the center of the loaf.
- Let the bread cool in the pans for about 10 minutes before turning out onto a wire rack to cool completely. Cooling the bread completely before slicing is essential. If you slice it while it’s still warm, it will be gummy.
Expert Tips & Tricks
- Use a dough scraper: A dough scraper is invaluable for working with sticky dough. It helps you gather the dough and clean your work surface.
- The poke test: Gently poke the risen dough with your finger. If the indentation slowly springs back, it’s ready to bake. If it springs back immediately, it needs more time. If the indentation doesn’t spring back at all, it’s over-proofed.
- Oven temperature variations: If your oven runs hot, reduce the temperature by 10-20°F. If it runs cold, increase the temperature by 10-20°F.
- For a softer crust: Brush the tops of the loaves with melted butter immediately after removing them from the oven.
- Preventing a gummy texture: Ensure the bread is fully cooled before slicing. Use a serrated bread knife for clean slices.
Serving & Storage Suggestions
This Vermont Whole Wheat Oatmeal Honey Bread is delicious served warm with butter, jam, or honey. It also makes excellent toast and sandwiches.
To store, wrap the cooled bread tightly in plastic wrap or place it in an airtight container. It will keep at room temperature for 2-3 days. For longer storage, slice the bread and freeze it in a freezer-safe bag for up to 3 months. To reheat, thaw the bread at room temperature or toast it directly from frozen.
Nutritional Information
| Nutrient | Amount per Serving | % Daily Value |
|---|---|---|
| Calories | 1754.1 kcal | N/A |
| Calories from Fat | N/A | 15% |
| Total Fat | 30.1 g | 46% |
| Saturated Fat | 15.8 g | 78% |
| Cholesterol | 61 mg | 20% |
| Sodium | 3675.2 mg | 153% |
| Total Carbohydrate | 327.8 g | 109% |
| Dietary Fiber | 23.6 g | 94% |
| Sugars | 40.9 g | N/A |
| Protein | 47.3 g | 94% |
Note: Nutritional information is an estimate and may vary based on specific ingredients and portion sizes.
Variations & Substitutions
- Different Flours: Experiment with other whole grain flours, such as spelt or rye, in place of some of the whole wheat flour.
- Sweeteners: Instead of maple sugar, you can use brown sugar or granulated sugar. You can also adjust the amount of honey to your liking.
- Nuts and Seeds: Add 1/2 cup of chopped nuts (walnuts, pecans) or seeds (sunflower, pumpkin) to the dough for added texture and flavor.
- Dried Fruit: Incorporate 1/2 cup of dried fruit (raisins, cranberries) for a sweeter, chewier bread.
- Spices: Add a pinch of nutmeg, cardamom, or ginger to the dough for a warming spice blend.
FAQs (Frequently Asked Questions)
Q: Can I use active dry yeast instead of instant yeast?
A: Yes, but you’ll need to proof the active dry yeast in warm water with a pinch of sugar for about 5-10 minutes before adding it to the dough.
Q: My dough isn’t rising. What could be the problem?
A: The most common culprit is the yeast being too old or the water being too hot (killing the yeast). Make sure your yeast is fresh and the water is lukewarm. Also, ensure the rising environment is warm and draft-free.
Q: The crust of my bread is browning too quickly. What can I do?
A: Tent the loaves with aluminum foil during the last 10-15 minutes of baking to prevent excessive browning.
Q: Can I make this dough ahead of time and bake it later?
A: Yes, you can let the dough rise in the refrigerator overnight for a slower, more flavorful rise. Bring it to room temperature for about 30 minutes before shaping and baking.
Q: My bread is dense and gummy. What went wrong?
A: This could be due to under-baking, over-proofing, or using too much flour. Ensure the internal temperature reaches 190°F, don’t over-proof the dough, and measure the flour accurately.
Final Thoughts
There’s something truly magical about baking bread from scratch. The aroma fills your home, the process is therapeutic, and the result is a loaf of wholesome goodness you can share with loved ones. This Vermont Whole Wheat Oatmeal Honey Bread is a delightful twist on a classic, offering a satisfying combination of flavors and textures. I encourage you to give it a try and experience the joy of homemade bread. Don’t be afraid to experiment with variations and make it your own! Share your baking adventures and any feedback you have – happy baking!