
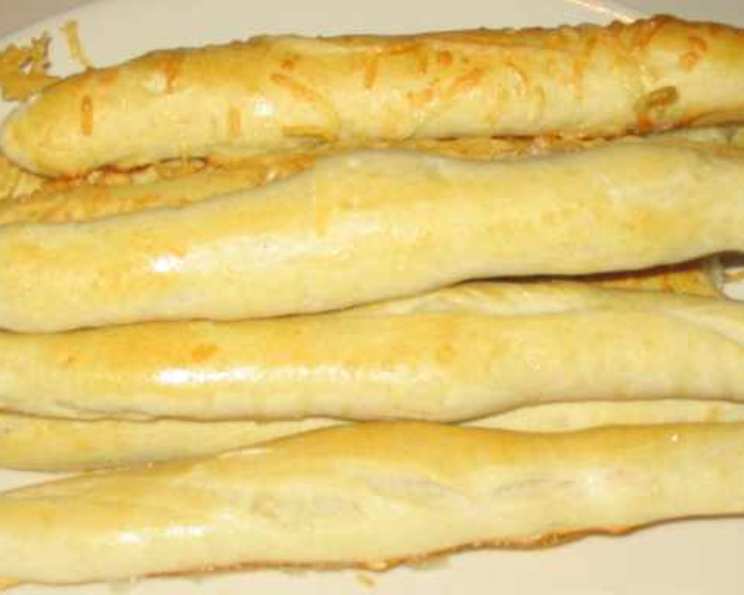
Very Quick Soft Breadsticks: A Culinary Flashback
The aroma of baking bread always transports me back to my childhood. I remember standing on a stool in my grandmother’s kitchen, mesmerized as she transformed simple ingredients into golden-brown loaves. While these weren’t exactly her sourdough, they have that same comforting and inviting essence. These quick soft breadsticks, though a far cry from her intricate creations, offer that same warm, yeasty joy in a fraction of the time. One bite and I am instantly back there, reliving cherished memories, now with a new generation of cooks ready to embark on their own baking adventures. They’re perfect alongside a hearty bowl of pasta, dipped in marinara, or simply enjoyed warm from the oven.
Recipe Overview
- Prep Time: 5 minutes
- Cook Time: 12-15 minutes
- Total Time: 17-20 minutes
- Yields: 16 breadsticks
- Serves: 8
- Dietary Type: Vegetarian
Ingredients
- 1 (8 ounce) can refrigerated buttermilk biscuits
- 1 egg white, slightly beaten
- Coarse salt
Equipment Needed
- Cookie sheet
- Pastry brush (optional)
- Small bowl
Instructions
-
Preheat your oven to 400°F (200°C). It’s important to ensure the oven is fully preheated for even baking.
-
Lightly grease a cookie sheet. This will prevent the breadsticks from sticking and ensure they release easily once baked. You can use cooking spray or brush the sheet with melted butter or oil.
-
Open the can of refrigerated buttermilk biscuits. Gently separate each biscuit.
-
Cut each biscuit in half. This will give you two breadsticks from each biscuit.
-
Roll each half into a pencil shape, approximately 6 inches long. Aim for a uniform thickness to ensure even baking. If the dough is too sticky to work with, lightly flour your work surface.
-
Place the rolled breadsticks onto the prepared cookie sheet, spacing them slightly apart.
-
In a small bowl, slightly beat the egg white. This will act as an adhesive and give the breadsticks a beautiful golden-brown color.
-
Brush the tops of the breadsticks with the beaten egg white. Be sure to cover them evenly. A pastry brush makes this process easier, but you can also use a clean finger or the back of a spoon.
-
Sprinkle generously with coarse salt. The coarse salt adds a delightful crunch and enhances the overall flavor of the breadsticks. Sea salt or kosher salt work well.
-
Bake in the preheated oven for 12 to 15 minutes, or until golden brown. Keep a close eye on them, as baking times may vary depending on your oven. The breadsticks are done when they are puffed up and golden brown.
-
Remove the breadsticks from the oven and let them cool slightly on the cookie sheet before serving.
Expert Tips & Tricks
- For extra flavor, try adding a pinch of garlic powder or Italian seasoning to the egg white before brushing it on the breadsticks.
- If you want a softer breadstick, bake them for the shorter end of the baking time (around 12 minutes). For a crispier breadstick, bake them for the full 15 minutes.
- Don’t overcrowd the cookie sheet. Baking in batches ensures the breadsticks bake evenly.
- If you don’t have coarse salt, you can use regular table salt, but reduce the amount slightly as it is more potent.
- For an extra touch, melt a tablespoon of butter and brush it over the breadsticks immediately after they come out of the oven.
Serving & Storage Suggestions
These quick soft breadsticks are best served warm, straight from the oven. They are a perfect accompaniment to pasta dishes, soups, salads, or even as a snack on their own. Serve them with a side of marinara sauce, pesto, or garlic butter for dipping.
Leftover breadsticks can be stored in an airtight container at room temperature for up to 2 days. To reheat, wrap them in foil and warm them in a preheated oven at 350°F (175°C) for a few minutes, or until heated through. You can also microwave them for a few seconds, but they may become slightly chewy.
For longer storage, you can freeze the breadsticks. Allow them to cool completely, then wrap them individually in plastic wrap and place them in a freezer bag. They can be stored in the freezer for up to 2 months. To reheat, bake them from frozen in a preheated oven at 350°F (175°C) for about 10 minutes, or until heated through.
Nutritional Information
| Nutrient | Amount per Serving | % Daily Value |
|---|---|---|
| Calories | 75 kcal | 4% |
| Total Fat | 3.1g | 4% |
| Saturated Fat | 0.8g | 4% |
| Cholesterol | 0.2mg | 0% |
| Sodium | 232.4mg | 9% |
| Total Carbohydrate | 9.9g | 3% |
| Dietary Fiber | 0.2g | 0% |
| Sugars | 1.7g | 6% |
| Protein | 1.9g | 3% |
Note: Nutritional information is an estimate and can vary based on specific ingredients and preparation methods.
Variations & Substitutions
- Cheesy Breadsticks: Sprinkle shredded Parmesan, mozzarella, or cheddar cheese over the breadsticks before baking.
- Garlic Breadsticks: Mix minced garlic with melted butter and brush over the breadsticks before baking.
- Herb Breadsticks: Sprinkle dried herbs such as oregano, basil, or rosemary over the breadsticks before baking.
- Spicy Breadsticks: Add a pinch of red pepper flakes to the egg white before brushing it on the breadsticks.
- Cinnamon Sugar Breadsticks: Skip the salt and brush the breadsticks with melted butter, then sprinkle with a mixture of cinnamon and sugar after baking.
- Vegan Breadsticks: Use vegan biscuit dough and replace the egg wash with a mixture of olive oil and plant-based milk.
FAQs (Frequently Asked Questions)
Q: Can I use regular biscuit dough instead of buttermilk biscuits?
A: Yes, you can. The flavor might be slightly different, but the recipe will still work.
Q: What if I don’t have coarse salt?
A: You can use regular table salt, but reduce the amount slightly as it is more potent.
Q: Can I make these ahead of time?
A: You can roll the breadsticks and place them on the baking sheet ahead of time, then cover them with plastic wrap and refrigerate until ready to bake.
Q: How do I keep the breadsticks from getting too hard?
A: Avoid overbaking them. Bake for the shorter end of the baking time (around 12 minutes) for softer breadsticks.
Q: Can I freeze the dough before baking?
A: It’s not recommended to freeze the dough before baking as it can affect the texture. Freezing after baking works much better.
Final Thoughts
I hope you enjoy these ridiculously easy and delicious soft breadsticks as much as my family and I do. They’re a perfect way to add a touch of homemade goodness to any meal without spending hours in the kitchen. Don’t be afraid to experiment with different flavors and toppings to create your own unique version. I can’t wait to hear what you think! Share your creations and feedback – happy baking!