
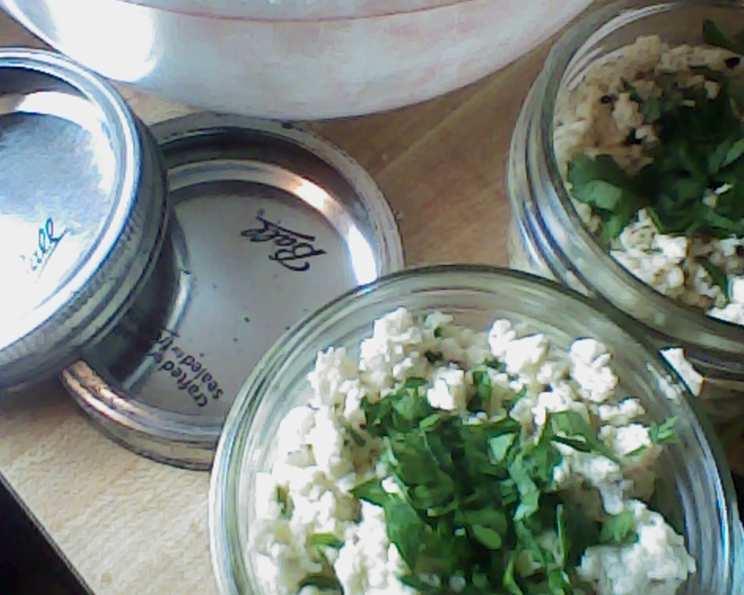
Homemade Vinegar Cheese: A Culinary Alchemy
The first time I made vinegar cheese, it felt like kitchen magic. I remember standing over the stove, my young son perched on a stool beside me, his eyes wide with anticipation. As the milk transformed into curds and whey, a tangible sense of wonder filled the air. It wasn’t just about making cheese; it was about witnessing a simple chemical reaction, a delightful alchemy unfolding right before our eyes. That day, we didn’t just create a simple cheese; we built a shared memory seasoned with curiosity and joy.
Recipe Overview
- Prep Time: 5 minutes
- Cook Time: 20 minutes
- Total Time: 25 minutes
- Yields: 2 cups
- Dietary Type: Vegetarian
Ingredients
- 2 quarts whole milk
- ¼ cup vinegar
Equipment Needed
- Large pot
- Colander
- Cheesecloth
- Large bowl
Instructions
- Begin by heating the whole milk in a large pot over medium heat. It’s crucial to watch the milk carefully to prevent scorching. Stir occasionally to ensure even heating.
- Continue heating the milk until it reaches a temperature of 185°F (85°C), or just before it begins to boil. You’ll notice steam rising from the surface, and small bubbles forming around the edges. Use a thermometer for best results.
- Once the milk reaches the desired temperature, reduce the heat to low. Slowly add the vinegar, while continuously stirring the milk gently. The acid in the vinegar is what causes the magic to happen, so add it slowly and evenly to encourage proper curd formation.
- As the vinegar is incorporated, you’ll observe the milk beginning to separate into curds and whey. The curds will be the solid, white parts, and the whey will be the translucent, yellowish liquid. Continue stirring gently until the separation is complete. This usually takes a few minutes.
- Once the milk is fully separated, carefully pour the mixture into a colander lined with several layers of cheesecloth. Ensure the cheesecloth is large enough to extend over the sides of the colander, as this will be used to gather and contain the curds.
- If you wish to save the whey for other culinary applications (such as bread making or adding to smoothies), place a large bowl underneath the colander to collect the draining liquid. Otherwise, you can simply discard it.
- Gather the corners of the cheesecloth together, forming a small sack containing the curds. Tie the corners securely with kitchen twine or a rubber band. This will allow the remaining whey to drain from the curds.
- Hang the tied cheesecloth sack in a safe place where it can drip freely without contaminating anything. A kitchen faucet, cupboard knob, or even a wooden spoon placed across a tall pot will work well.
- Allow the cheese to drip and drain for several hours, or until it reaches the desired consistency. The longer it drains, the firmer the cheese will become. At a minimum, let it drain for at least 2 hours. Overnight drainage in the refrigerator is also an option.
- After the cheese has drained sufficiently, carefully remove it from the cheesecloth. At this point, the vinegar cheese is ready to be enjoyed. You can eat it plain, or cut it into cubes and marinate it in various dressings.
Expert Tips & Tricks
- Milk Matters: Using high-quality, whole milk will produce the best-tasting and creamiest cheese. Avoid ultra-pasteurized milk, as it may not separate as effectively.
- Gentle Handling: Be gentle when stirring the milk and transferring the curds. Avoid excessive agitation, which can result in a crumbly cheese.
- Vinegar Variety: While white vinegar is a standard choice, experiment with other types of vinegar, such as apple cider vinegar or white wine vinegar, to subtly alter the flavor profile.
- Whey Reuse: Don’t discard the whey! It’s a nutritional powerhouse that can be used in baking, soups, smoothies, or even as a plant fertilizer.
- Drainage Duration: The draining time is crucial to the final texture of the cheese. For a softer, spreadable cheese, drain for a shorter period. For a firmer, more sliceable cheese, drain for longer. You can even press the cheese to achieve a very firm texture.
Serving & Storage Suggestions
Vinegar cheese is incredibly versatile and can be enjoyed in a variety of ways. Serve it plain as a simple snack, or cube it and marinate it in your favorite herbed olive oil. It also pairs well with salads, sandwiches, and crackers.
Store leftover vinegar cheese in an airtight container in the refrigerator. It will keep for up to 5 days. Because this is a fresh, unaged cheese, it’s important to consume it relatively quickly. Freezing is not recommended, as it can alter the texture of the cheese.
Nutritional Information
| Nutrient | Amount per Serving | % Daily Value |
|---|---|---|
| Calories | 100 kcal | 5% |
| Total Fat | 6g | 9% |
| Saturated Fat | 4g | 20% |
| Cholesterol | 20mg | 7% |
| Sodium | 80mg | 3% |
| Total Carbohydrate | 5g | 2% |
| Dietary Fiber | 0g | 0% |
| Sugars | 5g | N/A |
| Protein | 5g | 10% |
Please note that nutritional information is an estimate and may vary based on specific ingredients and preparation methods.
Variations & Substitutions
- Herbed Cheese: Add fresh or dried herbs, such as thyme, rosemary, or oregano, to the milk during the heating process to infuse the cheese with flavor.
- Spiced Cheese: Incorporate spices like garlic powder, onion powder, or chili flakes for a savory kick.
- Sweet Cheese: Add a touch of honey or maple syrup to the milk for a slightly sweet cheese that pairs well with fruit.
- Salted Cheese: Add salt to the cheese while it is draining to enhance the flavor.
- Goat Milk Cheese: Substitute goat milk for cow’s milk for a tangier and more distinctive flavor.
FAQs (Frequently Asked Questions)
Q: What type of vinegar works best for making vinegar cheese?
A: White vinegar is the most common choice, but you can also use apple cider vinegar or white wine vinegar for a slightly different flavor profile.
Q: Can I use skim milk to make vinegar cheese?
A: Whole milk works best, as the fat content contributes to the cheese’s creamy texture. Skim milk will still work, but the resulting cheese will be drier and less flavorful.
Q: How long should I drain the cheese?
A: The draining time depends on the desired consistency. For a softer cheese, drain for 2-3 hours. For a firmer cheese, drain for 4-6 hours, or even overnight in the refrigerator.
Q: Can I press the cheese to make it firmer?
A: Yes, you can press the cheese by placing a weight on top of the cheesecloth-wrapped curds while it drains. This will help to remove more whey and create a firmer cheese.
Q: What can I do with the leftover whey?
A: Whey is a versatile ingredient that can be used in baking, soups, smoothies, or even as a plant fertilizer. It’s rich in protein and nutrients, so don’t throw it away!
Final Thoughts
Creating vinegar cheese is a truly rewarding culinary experience. It’s simple, quick, and yields a surprisingly delicious and versatile cheese. Whether you’re a seasoned chef or a beginner in the kitchen, I encourage you to try this recipe and discover the magic of homemade cheese. Experiment with different flavors and variations to create your own signature vinegar cheese, and share your creations with friends and family. Pair it with a crisp white wine and some crusty bread for a truly delightful snack or appetizer. Happy cheesemaking!