
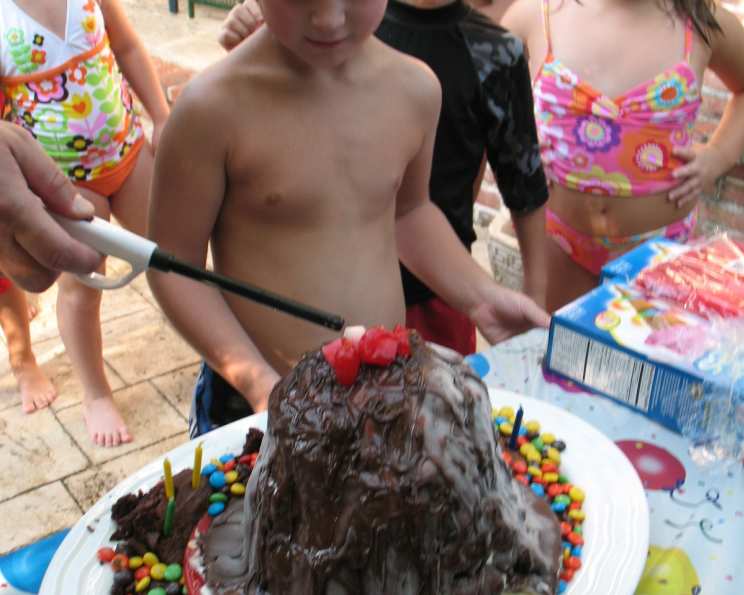
The Spectacular Volcano Ice Cream Sundae: A Culinary Eruption!
I’ll never forget the look on my little brother’s face when my mom unveiled our homemade Volcano Ice Cream Sundae at his tenth birthday party. The flickering sugar cube “lava” and cascading hot fudge were pure magic, and suddenly, store-bought cakes seemed utterly dull. It wasn’t just dessert; it was an edible science experiment, a sugary spectacle that cemented itself in our family’s celebratory lore. This recipe isn’t just about making ice cream; it’s about making memories.
Recipe Overview
- Prep Time: 15 minutes
- Cook Time: 0 minutes
- Total Time: 15 minutes
- Servings: 15
- Yield: 1 Volcano Ice Cream Sundae
- Dietary Type: Varies, depending on ice cream choice (can be vegetarian, gluten-free)
Ingredients
- 5 quarts pail ice cream (vanilla or your choice)
- 12 ounces magic shell chocolate fudge topping
- 11 1/2 ounces hot fudge (not too thick)
- 4 sugar cubes
- 1 teaspoon lemon extract (orange extract works too)
- 4 maraschino cherries
Equipment Needed
- Large Serving Platter
- Knife
- Small Bowl
- Matches or Lighter
Instructions
- Prepare the Ice Cream: The first step is extracting your ice cream from its container. To do this neatly, run a knife around the inside edge of the ice cream pail. If the ice cream is stubbornly frozen, you may need to briefly dip the bottom of the container in hot water for a few seconds. Be careful not to melt the ice cream too much!
- Unmold onto Platter: Carefully invert the ice cream pail onto a large serving platter. The goal is to have the entire block of ice cream come out in one piece. If it resists, repeat the hot water dip briefly.
- Sculpt the Volcano: Now comes the fun part! Using your knife, carefully cut away the sharp edges from the top and sides of the ice cream. Shape it into a sloped mountain or volcano shape. You want a good, steep slope for the “lava” to flow down.
- Apply the Magic Shell: Evenly pour the magic shell chocolate fudge topping over the entire surface of the ice cream volcano. This will create a hard, chocolate shell that acts as the base for the hot fudge lava. Let the shell harden completely according to the package directions. This usually takes just a few minutes.
- Drizzle the Hot Fudge: Once the magic shell is firm, it’s time for the “lava”! Gently warm the hot fudge if needed, making sure it’s pourable but not too thin. Drizzle the hot fudge over the top of the volcano, allowing it to cascade down the sides and pool around the base, creating a realistic lava flow effect.
- Prepare the Flaming Cherry Toppers: In a small bowl, place 3 or 4 sugar cubes. Drizzle the lemon extract (or orange extract) over the sugar cubes, saturating them. This extract is what will help the sugar cubes ignite.
- Assemble the Cherry “Bombs”: Open 3 or 4 maraschino cherries slightly. Carefully insert one of the saturated sugar cubes into each cherry. These will be your miniature, edible “volcanic bombs.”
- Ignite and Serve: Place the sugar cube-filled cherries in the center, on top of the chocolate-covered “volcano.” Using a match or lighter, carefully light the sugar cubes on fire. They will burn with a small, blue flame. Serve immediately and enjoy the spectacle!
Expert Tips & Tricks
- Chill the Platter: Before unmolding the ice cream, chill your serving platter in the freezer for at least 30 minutes. This will help prevent the ice cream from melting too quickly.
- Ice Cream Selection: While vanilla is classic, don’t be afraid to experiment with different ice cream flavors. Chocolate, strawberry, or even a mix of flavors can add extra depth to your volcano.
- Magic Shell Consistency: If your magic shell is too thick, microwave it in 10-second intervals until it becomes pourable. Be careful not to overheat it!
- Hot Fudge Temperature: Ensure your hot fudge isn’t too thick. A slightly thinner consistency will create a better lava flow effect. If necessary, add a tablespoon of milk or water to thin it out.
- Safety First: Always exercise caution when working with fire. Ensure children are supervised and keep a glass of water nearby in case you need to extinguish the flames.
- Individual Volcanoes: As suggested in the original recipe, you can create individual volcanoes using paper cups. Simply fill the cups with ice cream, freeze until solid, and then follow the shaping and topping instructions.
Serving & Storage Suggestions
Serve your Volcano Ice Cream Sundae immediately after assembly and ignition for the full dramatic effect. The melting ice cream and flowing hot fudge are best enjoyed fresh. Due to the nature of the dessert, it’s not ideal for long-term storage.
- Room Temperature: The volcano will last only a few minutes at room temperature before the ice cream starts to melt significantly.
- Refrigeration/Freezing: Attempting to refrigerate or freeze the assembled volcano is not recommended, as the textures will be compromised.
- Ingredient Storage: You can store the ice cream, magic shell, and hot fudge separately in their original containers according to the manufacturer’s instructions.
Nutritional Information
Please note that these are rough estimates, as the actual values will vary based on specific brands and ingredients used.
| Nutrient | Amount per Serving | % Daily Value |
|---|---|---|
| Calories | 450 kcal | 23% |
| Total Fat | 20g | 31% |
| Saturated Fat | 12g | 60% |
| Cholesterol | 60mg | 20% |
| Sodium | 250mg | 10% |
| Total Carbohydrate | 65g | 22% |
| Dietary Fiber | 2g | 8% |
| Sugars | 50g | N/A |
| Protein | 6g | 12% |
Variations & Substitutions
- Dairy-Free Volcano: Use dairy-free ice cream, vegan magic shell, and dairy-free hot fudge to create a completely vegan version.
- Gluten-Free Volcano: Ensure all toppings are gluten-free. Most magic shell and hot fudge brands are naturally gluten-free, but always check the label.
- Flavor Variations: Experiment with different ice cream flavors, such as chocolate, strawberry, mint chocolate chip, or even coffee ice cream.
- Extract Options: Try almond extract or peppermint extract instead of lemon or orange for a different flavor profile.
- Fruit Toppings: Add other fresh fruits like sliced strawberries, bananas, or blueberries around the base of the volcano for added flavor and visual appeal.
- Nutty Volcano: Sprinkle chopped nuts around the base for added texture and flavor.
FAQs (Frequently Asked Questions)
Q: Can I make this ahead of time?
A: It’s best to assemble the Volcano Ice Cream Sundae just before serving, as the ice cream will melt quickly. However, you can prepare all the components (sculpt the ice cream, saturate the sugar cubes) in advance.
Q: What if the sugar cubes don’t light?
A: Make sure the sugar cubes are thoroughly saturated with the lemon or orange extract. Also, use a long match or lighter to avoid burning your fingers. If they still don’t light, try using a different brand of sugar cubes.
Q: Can I use a different type of shell topping?
A: Yes! Any hard-shell chocolate topping will work. You can even make your own by melting chocolate with a bit of coconut oil.
Q: What if I don’t have maraschino cherries?
A: You can use other small, edible decorations, such as gumdrops, sprinkles, or even small pieces of fruit. The cherries are mainly for visual effect.
Q: How do I clean up the melted fudge?
A: The easiest way to clean up the melted fudge is to let it harden slightly and then scrape it off the platter with a spatula. Use warm, soapy water to remove any remaining residue.
Final Thoughts
The Volcano Ice Cream Sundae is more than just a dessert; it’s a celebration, a conversation starter, and a truly memorable experience. Don’t be intimidated by the “volcano” aspect—it’s surprisingly easy to create, and the “oohs” and “aahs” are well worth the effort. Gather your ingredients, unleash your inner sculptor, and get ready for a culinary eruption of fun and flavor! Share your volcanic creations with me; I’d love to see your spin on this classic dessert. Perhaps you’ll pair it with a refreshing tropical fruit salad to balance the richness, or a steaming mug of hot chocolate for an extra cozy treat. The possibilities are endless!