
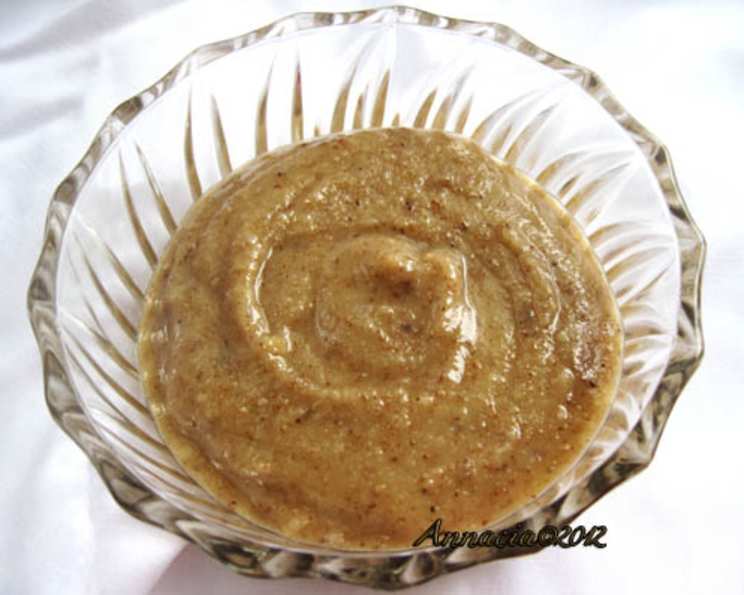
Homemade Walnut Butter: A Nutty Delight
There’s something so deeply satisfying about making your own nut butter. I remember the first time I tried it – I was a broke college student, craving the comforting taste of peanut butter but recoiling at the price tag of the good stuff. Necessity, as they say, is the mother of invention. I stumbled upon a recipe for homemade almond butter, and after a few kitchen mishaps (let’s just say my food processor earned its keep!), I was hooked. The rich, nutty aroma filling my tiny apartment, the smooth, creamy texture…it was a revelation. And now, years later, I still get that same thrill whipping up a batch of walnut butter. It’s a simple act that transforms humble ingredients into something truly special.
Recipe Overview
- Prep Time: 5 minutes
- Cook Time: 10 minutes
- Total Time: 15 minutes
- Yields: 1/2 cup
- Serves: 8
- Dietary Type: Vegan, Gluten-Free, Dairy-Free
Ingredients
- 1 cup walnuts
- 1/2 teaspoon salt
- 3 teaspoons walnut oil (preferably roasted walnut oil)
Equipment Needed
- Baking Sheet
- Food Processor
Instructions
-
Begin by preheating your oven to 350 degrees Fahrenheit (175 degrees Celsius). Even toasting is key to a great walnut butter, so make sure your oven is properly preheated.
-
Spread the walnuts in a single layer on a baking sheet. This ensures even toasting and prevents burning.
-
Toast the walnuts until they are fragrant and lightly colored, about 10 minutes. Be sure to stir them about halfway through the baking time to promote even toasting. Keep a close eye on them; they can go from perfectly toasted to burnt quite quickly.
-
Carefully transfer the toasted walnuts to a food processor. Take a moment to discard any dried skin or dust that may have accumulated during toasting. This will result in a smoother final product.
-
Add the salt to the food processor.
-
Chop the nuts finely using the food processor.
-
With the motor running, slowly drizzle in the walnut oil. Adding the oil gradually helps to emulsify the mixture.
-
Continue to whirl the mixture until the nuts are ground into butter. This may take a few minutes, depending on the power of your food processor. Be patient and persistent.
-
Stop the food processor two or three times during the process to scrape down the sides of the bowl with a spatula. This ensures that all the nuts are evenly processed and incorporated into the butter.
Expert Tips & Tricks
- Toasting is key: Don’t skip the toasting step! It brings out the natural oils and enhances the flavor of the walnuts, resulting in a richer, more complex butter.
- Patience is a virtue: Making nut butter takes time. Don’t be tempted to add more oil to speed up the process. Just keep scraping down the sides and pulsing the food processor until the nuts release their natural oils.
- Roasted vs. Unroasted Walnut Oil: While any walnut oil will work, using roasted walnut oil will impart a deeper, richer flavor to your walnut butter. It’s definitely worth seeking out.
- Temperature Matters: Make sure your walnuts are cool enough to handle after toasting, but still slightly warm when you add them to the food processor. This helps release the oils more readily.
- Don’t Over-Process: Be careful not to over-process the walnut butter, as this can cause it to become too thin or oily. Stop processing as soon as it reaches your desired consistency.
Serving & Storage Suggestions
Homemade walnut butter is incredibly versatile. Spread it on toast, bagels, or crackers for a quick and satisfying snack. Use it as a dip for apple slices or celery sticks. Swirl it into oatmeal or yogurt for added flavor and nutrition. You can even use it in baking, adding it to cookies, brownies, or cakes for a nutty twist.
Store your homemade walnut butter in an airtight container in the refrigerator. Since it doesn’t contain any preservatives, it’s best to refrigerate it to prevent it from going rancid. It will keep for up to 2 weeks in the refrigerator. You can also freeze it for longer storage; it will keep for up to 2 months in the freezer. Allow it to thaw in the refrigerator before using.
Nutritional Information
| Nutrient | Amount per Serving | % Daily Value |
|---|---|---|
| Calories | 110.6 kcal | N/A |
| Calories from Fat | N/A | N/A |
| Total Fat | 11.2 g | 17% |
| Saturated Fat | 1.1 g | 5% |
| Cholesterol | 0 mg | 0% |
| Sodium | 145.6 mg | 6% |
| Total Carbohydrate | 2 g | 0% |
| Dietary Fiber | 1 g | 3% |
| Sugars | 0.4 g | 1% |
| Protein | 2.2 g | 4% |
Variations & Substitutions
- Sweeten it up: For a sweeter walnut butter, add a teaspoon of honey or maple syrup to the food processor along with the oil.
- Spice it up: Experiment with different spices, such as cinnamon, nutmeg, or ginger. A pinch of cayenne pepper can also add a nice kick.
- Chocolate walnut butter: Add a tablespoon of cocoa powder to the food processor for a chocolatey treat.
- Other nuts: Feel free to mix in other nuts, such as almonds, pecans, or cashews, for a unique flavor combination.
- Different oils: If you don’t have walnut oil on hand, you can substitute another neutral-flavored oil, such as grapeseed oil or avocado oil. However, walnut oil adds a distinctive flavor that complements the walnuts perfectly.
FAQs (Frequently Asked Questions)
Q: Why is my walnut butter so dry and crumbly?
A: This usually means that the walnuts haven’t released enough of their natural oils. Continue processing the mixture and scraping down the sides of the bowl. Patience is key!
Q: Can I use a blender instead of a food processor?
A: While technically possible, a food processor is highly recommended. Blenders often struggle to process nuts into a smooth butter, resulting in a grainy texture.
Q: How can I make my walnut butter smoother?
A: Make sure to toast the walnuts properly and remove any loose skins before processing. Also, adding a little extra walnut oil can help to achieve a smoother consistency.
Q: How long does homemade walnut butter last?
A: Homemade walnut butter will last for up to 2 weeks in the refrigerator or up to 2 months in the freezer.
Q: Can I add salt to the walnuts before toasting?
A: Yes, you can toss the walnuts with salt before toasting for a more evenly seasoned nut butter.
Final Thoughts
Making your own walnut butter is a simple yet rewarding experience that allows you to create a delicious and healthy spread tailored to your own taste preferences. Don’t be afraid to experiment with different flavors and variations. This recipe is a fantastic starting point, and I encourage you to make it your own. Whether you’re a seasoned chef or a kitchen novice, I hope you give this recipe a try. And when you do, please let me know how it turns out! I’m always eager to hear your feedback and see your culinary creations. Enjoy!