
Crafting Liquid Gold: A Journey into Homemade Walnut Oil
The memory is etched in my mind: my grandmother, with her hands perpetually stained with flour, drizzling a fragrant, nutty oil over a simple green salad. It wasn’t just any oil; it was walnut oil, meticulously crafted from the black walnuts that grew wild on her property. The aroma alone transported me to autumn days, the scent of fallen leaves mingling with the rich, earthy fragrance of the walnuts. That simple salad, elevated by the homemade oil, remains one of my most cherished culinary memories, a testament to the transformative power of quality ingredients made with love.
Recipe Overview
- Prep Time: 10 minutes
- Cook Time: 25 minutes
- Total Time: 35 minutes
- Yields: 16 tablespoons
- Serves: 16
- Dietary Type: Vegan, Gluten-Free, Dairy-Free
Ingredients
- ¾ cup walnut pieces
- 1 ⅓ cups vegetable oil
Equipment Needed
- Small saucepan
- Shallow baking sheet
- Plastic bag
- Mallet or rolling pin
- Large jar
- Strainer
Instructions
- Begin by preheating your oven to 350 degrees Fahrenheit (175 degrees Celsius).
- In a small saucepan, bring water to a boil. Carefully drop the walnut pieces into the boiling water and allow them to boil for 3 minutes. This blanching process helps to mellow the bitterness and bring out the natural flavor of the walnuts.
- After 3 minutes, immediately drain the walnuts thoroughly.
- Spread the blanched walnuts in a single layer on a shallow baking sheet. This ensures even toasting.
- Bake for 15-25 minutes, or until the walnuts turn golden brown. Be sure to stir them once halfway through to prevent burning. Keep a close watch – walnuts can go from perfectly toasted to burnt in a matter of minutes.
- Remove the baking sheet from the oven and allow the toasted walnuts to cool to lukewarm.
- Once the walnuts are slightly cooled, transfer them to a plastic bag. Using a mallet or rolling pin, crush the warm walnuts. This releases their oils and intensifies their flavor. Don’t pulverize them into a powder; a coarse crush is ideal.
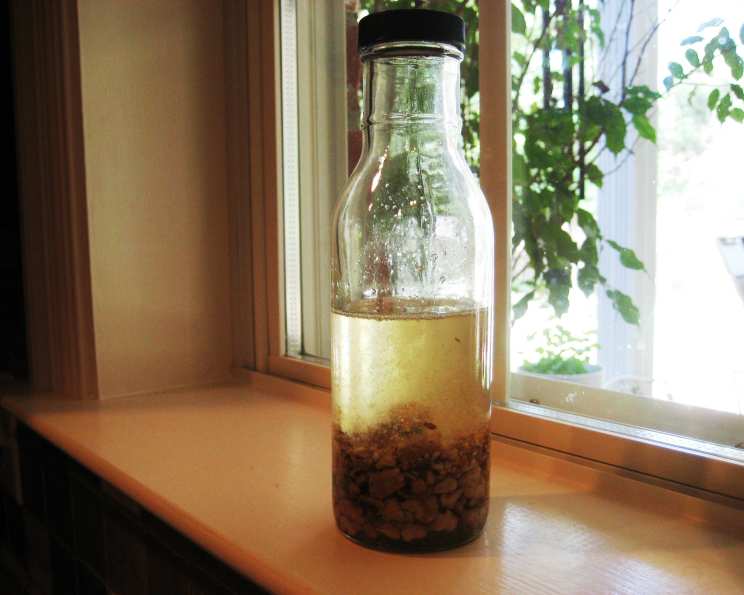
- In a large jar, combine the crushed walnuts with the vegetable oil. Ensure the walnuts are fully submerged in the oil.
- Allow the mixture to infuse. When you’re ready to use the walnut oil, simply strain the walnuts from the oil. Discard the walnuts (or save them for another use; see “Variations & Substitutions”). The strained oil is your homemade walnut oil, ready to elevate your dishes.
Expert Tips & Tricks
- Quality of Walnuts: The flavor of your walnut oil hinges on the quality of the walnuts. Opt for fresh, high-quality walnuts for the best results. Avoid using rancid or stale walnuts, as they will impart an unpleasant flavor to the oil.
- Type of Vegetable Oil: While this recipe calls for vegetable oil, you can experiment with different neutral-flavored oils like grapeseed or sunflower oil. These oils allow the walnut flavor to shine through without overpowering it. Olive oil is not recommended, as its own flavor will compete with the walnut.
- Infusion Time: The longer the walnuts infuse in the oil, the stronger the walnut flavor will be. For a subtle flavor, infuse for a few days. For a more intense flavor, infuse for a week or even longer. Taste the oil periodically to determine when it has reached your desired intensity.
- Toasting is Key: Proper toasting is crucial for developing the rich, nutty flavor of the walnuts. Be careful not to over-toast them, as burnt walnuts will result in a bitter oil. Aim for a golden brown color.
- Gentle Crushing: Avoid pulverizing the toasted walnuts. A coarse crush is sufficient to release the oils and flavors. Over-processing can result in a cloudy oil.
- Strain Thoroughly: Ensure you strain the walnut oil thoroughly to remove any walnut particles. This will extend the shelf life of the oil and prevent it from becoming cloudy. Use a fine-mesh sieve or cheesecloth for the best results.
Serving & Storage Suggestions
Walnut oil is best used as a finishing oil, drizzled over dishes just before serving to preserve its delicate flavor and aroma. It’s not ideal for high-heat cooking, as its flavor degrades quickly under heat.
- Serving Suggestions:
- Drizzle over salads, especially those with bitter greens like arugula or endive.
- Use as a finishing oil for roasted vegetables, particularly root vegetables like beets and carrots.
- Add a touch to pasta dishes, risottos, or grain bowls.
- Drizzle over grilled fish or chicken.
- Use as a dipping oil for bread.
- Add a few drops to soups or sauces for a nutty depth of flavor.
- Storage: Store your homemade walnut oil in an airtight container in a cool, dark place, away from direct sunlight and heat. Properly stored, it should last for several months. You may notice some sediment settling at the bottom of the jar; this is normal and does not affect the quality of the oil. If the oil develops a rancid odor, discard it. Refrigeration is not necessary, but it can help extend the shelf life.
Nutritional Information
(Estimated per tablespoon)
| Nutrient | Amount per Serving | % Daily Value |
|---|---|---|
| Calories | 120 kcal | 6% |
| Total Fat | 14g | 22% |
| Saturated Fat | 1g | 5% |
| Monounsaturated Fat | 3g | N/A |
| Polyunsaturated Fat | 10g | N/A |
| Cholesterol | 0mg | 0% |
| Sodium | 0mg | 0% |
| Total Carbohydrate | 0g | 0% |
| Fiber | 0g | 0% |
| Sugar | 0g | 0% |
| Protein | 0g | 0% |
| Vitamin E | 0.2mg | 1% |
Variations & Substitutions
- Infused Walnut Oil: Get creative by adding other ingredients to the oil during the infusion process. Try adding fresh herbs like rosemary or thyme, a clove of garlic, or a dried chili pepper for a spicy kick.
- Black Walnut Oil: For a more intense and earthy flavor, use black walnuts instead of English walnuts. Black walnuts have a stronger, more distinctive flavor.
- Hazelnut Oil: If you can’t find walnuts, you can use hazelnuts as a substitute. The process is the same, but the resulting oil will have a distinct hazelnut flavor.
- Chili Walnut Oil: For a spicy kick, add a dried chili pepper to the oil during the infusion process. Start with a small amount and taste the oil periodically to adjust the spice level.
- Garlic Walnut Oil: Add a peeled clove of garlic to the oil during the infusion process for a savory twist.
- Walnut Paste: Don’t discard the walnuts after straining the oil! Pulse them in a food processor with a little water or broth to create a delicious walnut paste. This can be used as a spread, added to sauces, or incorporated into baked goods.
- Toasted Walnut Crumble: Instead of crushing the walnuts, you can roughly chop them after toasting and use them as a crunchy topping for salads or other dishes.
- Different Nuts: Experiment with other nuts like pecans or almonds for unique flavor profiles.
FAQs (Frequently Asked Questions)
Q: Why do I need to blanch the walnuts before toasting them?
A: Blanching the walnuts helps to remove any bitterness and bring out their natural flavor. It also helps to soften them slightly, making them easier to crush.
Q: Can I use already toasted walnuts for this recipe?
A: While you can use already toasted walnuts, toasting them yourself ensures they are fresh and have the optimal flavor for the oil.
Q: How long does the walnut oil last?
A: Properly stored in a cool, dark place, homemade walnut oil should last for several months. If it develops a rancid odor, discard it.
Q: Why can’t I use walnut oil for high-heat cooking?
A: Walnut oil has a low smoke point, meaning it will burn and degrade quickly at high temperatures. This will result in a bitter, unpleasant flavor. It’s best used as a finishing oil.
Q: What is the sediment at the bottom of the jar?
A: The sediment is simply walnut particles that have settled out of the oil. It’s normal and does not affect the quality of the oil. You can carefully pour off the clear oil, leaving the sediment behind.
Final Thoughts
Crafting your own walnut oil is a simple yet rewarding culinary experience that unlocks a world of flavor. It transforms everyday dishes into gourmet delights. Don’t be afraid to experiment with different variations and infusions to create your own signature walnut oil. Once you’ve tasted the difference between store-bought and homemade, you’ll never go back. I encourage you to try this recipe and share your feedback. Perhaps you’ll drizzle your golden creation over a roasted beet salad paired with a crisp Sauvignon Blanc, letting the earthy notes dance on your palate. Bon appétit!