
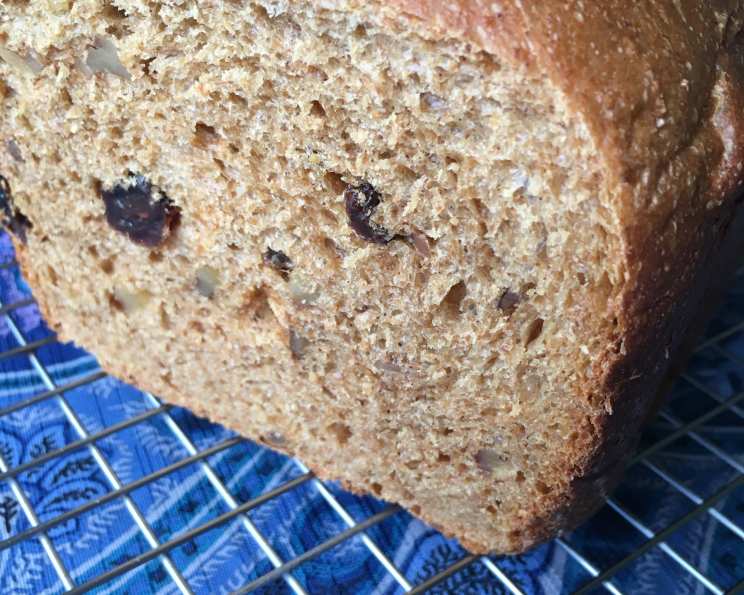
Walnut Raisin Loaf (Bread Machine)
The aroma of freshly baked bread always takes me back to my grandmother’s kitchen. She had this incredible, almost magical way of coaxing the most amazing flavors from simple ingredients. Her walnut raisin bread, baked in her trusty old bread machine, was a particular favorite. It wasn’t just the taste of the slightly sweet dough, the chewy raisins, and the crunchy walnuts; it was the warmth and comfort it brought, a reminder of home and family that I cherish to this day.
Recipe Overview
- Prep Time: 15 minutes
- Cook Time: 3 hours 15 minutes (approximate bread machine cycle time)
- Total Time: 3 hours 30 minutes
- Servings: 8
- Yield: 1 (1 1/2 pound) loaf
- Dietary Type: Vegetarian
Ingredients
- 2/3 cup water
- 1/2 cup plain yogurt (May substitute sour cream)
- 1/4 cup nonfat dry milk powder
- 1 1/4 teaspoons salt
- 2 tablespoons liquid honey
- 2 tablespoons light molasses
- 2 tablespoons vegetable oil
- 1 cup whole wheat flour
- 1 1/4 cups bread flour
- 1/3 cup rye flour
- 1/2 teaspoon ground cinnamon
- 1 3/4 teaspoons bread machine yeast or 1 3/4 teaspoons instant yeast
- 1/3 cup raisins
- 1/3 cup chopped walnuts
Equipment Needed
- Bread Machine
Instructions
- Begin by meticulously measuring all ingredients, except the raisins and walnuts. Follow the order recommended by your bread machine manufacturer. This is crucial for optimal rising and baking. Generally, liquids go in first, followed by dry ingredients, with the yeast nestled on top, away from the wet ingredients.
- Carefully insert the baking pan into the bread machine. Ensure it locks securely into place.
- Select the “Sweet Cycle” on your bread machine. This cycle is specifically designed for breads with higher sugar content, like this walnut raisin loaf.
- Listen for the “add ingredient” signal during the kneading process. This is your cue to gently incorporate the raisins and chopped walnuts into the dough. Distribute them evenly.
- Once the baking cycle has finished, promptly remove the bread pan from the machine, using oven mitts to protect your hands from the heat.
- Immediately turn the walnut raisin loaf out of the pan and place it on a wire rack to cool. This prevents the bottom crust from becoming soggy.
- Allow the bread to cool completely to room temperature before slicing. This is essential for a clean cut and prevents the crumb from becoming gummy. It’s tempting to dive in while it’s still warm, but patience is rewarded!
Expert Tips & Tricks
- Yogurt Variation: While plain yogurt is called for in this recipe, sour cream can be used as a substitute. It will yield a slightly richer, tangier flavor in the final loaf.
- Flour Power: Using a combination of whole wheat, bread, and rye flour provides a wonderful depth of flavor and texture. However, if you don’t have all three on hand, you can adjust the ratios. For example, you can substitute additional bread flour for the rye flour. Just be mindful that the overall hydration may need slight tweaking; the dough should be slightly tacky but not overly sticky.
- Nutty Boost: Toasting the walnuts before adding them to the dough enhances their flavor and adds a pleasant crunch. Simply spread the chopped walnuts on a baking sheet and toast them in a 350°F (175°C) oven for about 5-7 minutes, or until fragrant and lightly browned. Let them cool completely before adding them to the dough.
- Yeast Considerations: Make sure your yeast is fresh! Expired yeast won’t produce the desired rise. You can test its viability by mixing a small amount of yeast with warm water and a pinch of sugar. If it foams up within 5-10 minutes, it’s good to go.
- Sticky Situation: If the dough seems too sticky during the kneading process, add a tablespoon of bread flour at a time until it reaches a manageable consistency. Conversely, if the dough seems too dry, add a teaspoon of water at a time.
- Sweetness Adjustment: Depending on your preference, you can adjust the amount of honey and molasses. For a less sweet loaf, reduce the amounts slightly.
- Add-Ins Timing: Ensure to only add the raisins and walnuts when the machine signals, as adding them too early could lead to them being crushed during the kneading process.
Serving & Storage Suggestions
This walnut raisin loaf is delicious on its own, spread with a pat of butter, or toasted and served with cream cheese. It’s also a fantastic accompaniment to soups and salads.
To store, wrap the cooled loaf tightly in plastic wrap or place it in an airtight container at room temperature. It will stay fresh for 2-3 days. For longer storage, you can freeze the loaf for up to 2 months. Thaw it completely at room temperature before slicing and serving. You can also revive a slightly stale loaf by wrapping it in foil and warming it in a low oven (300°F/150°C) for about 10-15 minutes.
Nutritional Information
| Nutrient | Amount per Serving | % Daily Value |
|---|---|---|
| Calories | 273.5 kcal | N/A |
| Calories from Fat | N/A | N/A |
| Total Fat | 7.8 g | 12% |
| Saturated Fat | 1.2 g | 5% |
| Cholesterol | 2.7 mg | 0% |
| Sodium | 395.1 mg | 16% |
| Total Carbohydrate | 45.6 g | 15% |
| Dietary Fiber | 3.5 g | 14% |
| Sugars | 13.6 g | N/A |
| Protein | 7.7 g | 15% |
Variations & Substitutions
- Spiced Up: Add a pinch of ground cloves or nutmeg along with the cinnamon for a warmer, more complex flavor profile.
- Fruity Fun: Experiment with different dried fruits, such as cranberries, apricots, or dates.
- Seeded Sensation: Add a tablespoon of flax seeds or chia seeds for added nutritional value and a slightly nutty flavor.
- Nut-Free Option: Substitute sunflower seeds or pumpkin seeds for the walnuts.
- Sweetener Swap: Maple syrup can be used in place of honey.
- Dairy-Free: You can use a non-dairy yogurt alternative, such as soy or almond yogurt, to make this loaf dairy-free. Ensure it’s plain and unsweetened for best results.
FAQs (Frequently Asked Questions)
Q: Can I use all bread flour instead of the whole wheat and rye flour?
A: Yes, you can, but the texture and flavor will be different. The loaf will be lighter and less dense. You may need to adjust the liquid slightly as bread flour absorbs water differently.
Q: What if I don’t have a “Sweet Cycle” on my bread machine?
A: Use the basic bread cycle, but monitor the dough closely. If it starts to brown too quickly, tent the top with foil.
Q: Why is my bread sinking in the middle?
A: This could be due to too much liquid, too much yeast, or not enough gluten development. Ensure you’re measuring ingredients accurately and using fresh yeast.
Q: Can I add more raisins and walnuts?
A: While tempting, adding too many add-ins can interfere with the gluten structure and prevent the bread from rising properly. Stick to the recommended amounts for best results.
Q: What can I do if my bread machine is old, and the non-stick coating is wearing off?
A: Lightly grease the bread pan before adding the ingredients, even if it is supposed to be non-stick. This will help prevent the loaf from sticking. You can also line the bottom of the pan with parchment paper.
Final Thoughts
I hope this walnut raisin loaf recipe brings as much joy to your kitchen as it has to mine. It’s a comforting, flavorful bread that’s perfect for any occasion. Don’t be afraid to experiment with the variations and substitutions to create your own signature loaf. And please, share your baking adventures and any feedback you have – I’m always eager to hear how it turns out! Pair a slice with a warm cup of tea or coffee and enjoy the simple pleasures of homemade goodness.